
Learning how to draw a pistol from a holster is an important part of marksmanship and self-defense training. Mastering this skill will not only make you a safer gun handler, but you’ll also have an easier time setting up your shot. However, it takes practice to be proficient at it. This article will cover how to draw a pistol from a holster from an open carry position and a concealed carry position.
Drawing A Handgun Step-by-step
At the end of the day, drawing a pistol from a holster is a relatively simple task. You’re basically just pulling it out while you get into a shooting position. But doing it safely and proficiently requires a fair amount of technique. Therefore, we’re going to give you step-by-step instructions for drawing a handgun. These include:
- Gripping your pistol,
- Removing it from the holster,
- Adding your support hand,
- And, pushing out to aim.
Each step is designed to give you more and more control of the pistol before taking a shot.
Before You Draw
Before you draw, it’s best practice to begin by getting into a shooting position. You do this by separating your feet about shoulder-width apart and placing your strong foot behind you. Next, you should lean forward and put a slight bend in your knees.
A shooting position is essentially a fighting or athletic stance like the way a boxer or baseball player stands. By positioning your body this way, you’re in a better position to absorb and control recoil.
Where To Put Your Hands
You’ll want to position your hands in a way so you can access your firearm without waving your support hand in front of the muzzle. You can avoid doing this by placing your palm on the center of your chest.
If you’re carrying concealed, though, you will do this naturally because you’ll need to use your support hand to lift your shirt so you can access your firearm with your dominant hand. In other words, just keep your support hand in place until step three.
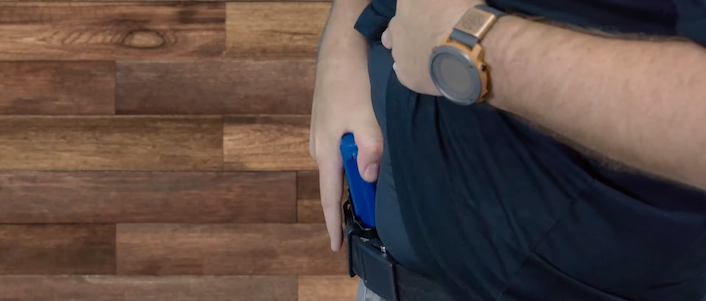
Step One: Gripping
The point of step one is to establish a high, firm grip on the pistol.
For the high part, place the crook of your hand on the beavertail and wrap your bottom three fingers (middle, ring, and pinky) around the grip. And, just like you would when you hold a gun, keep your trigger finger straight.
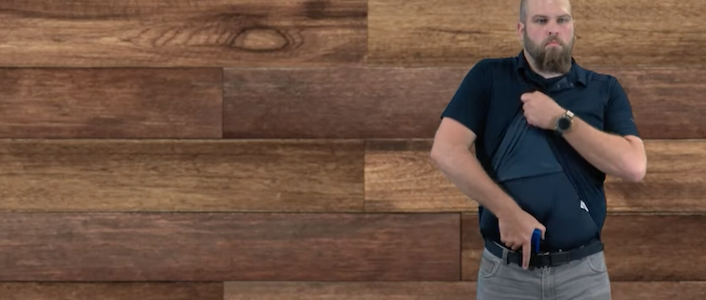
The instructor is lifting his shirt during a pistol draw from a concealed position. This technique not only clears the way for a pistol draw, but also ensures that he won’t flag his support hand with the muzzle.
For the firm part, you’ll have to find what’s right for you. You’ll want to grab it hard, but you don’t need to white-knuckle it.
And there’s one last step if you have a duty retention holster like ours from Safariland. In order to draw the pistol, you have to unlock it by depressing a button. It’s usually located where your thumb or index finger lands.
Step Two: Removing
For step two, we’re simply removing the gun from the holster.
With a duty retention holster, that means pressing the release button and then pulling up so the muzzle clears the holster.
You should also maintain your high, firm grip and your index finger should continue to be straight and off the trigger.
Quick note: while you should be as methodical as possible during practice, you might end up combining steps one and two after you develop better technique.
Step Three: Support
After you draw your handgun, rotate the gun about 45 degrees by dropping your elbow. You should, however, keep it pointed down range at all times.
Next, guide your handgun toward your support hand. Once in place, you should use your support hand to cup your weapon hand. By the end, your thumbs should be parallel and the base of your palms pressed together.
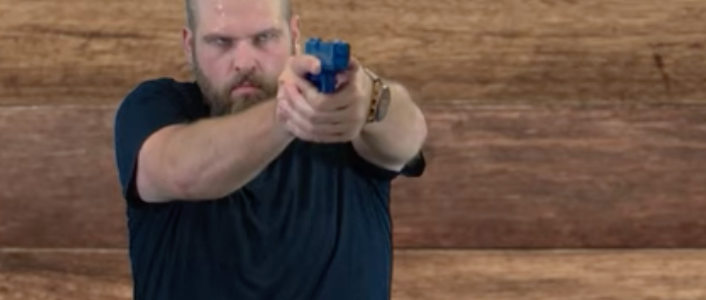
In the fourth and final step, the instructor demonstrates the pushout. Before he fires the handgun, he aligns the sights onto his target.
If you’re able to establish positive control with both your dominant and support hands before you shoot, you reduce the need to re-adjust your grip after you shoot.
Step Four: Pushout
The final step is the pushout, so extend your elbows and position your pistol so you can see the sights.
If you did all four steps correctly, you will have a secure grip and can focus on aiming, so begin getting sight alignment and sight picture. When you’re ready, take your shot.
Re-holster
To re-holster, you simply reverse the steps, but instead of watching your target, you can look at what you’re doing so you safely and correctly guide your pistol back into the holster.
Parting Shots
While everyone aspires to be fast, the immediate goal when drawing your pistol should be smooth, fluid movement. That way, you will get your gun out safely and give yourself a better chance of hitting your target.
For more tips on training and gear, check out our library of How To Guides and GearExpert, or if you have questions, send them directly through our Contact Us page.
Daniel Terrill has written about the gun industry and shooting world for more than a decade. He learned about guns in the Marine Corps and more about gear during his time as a police officer. His work has appeared in a variety of publications.
Latest posts by Daniel Terrill (see all)
- Project ChildSafe: Distributing Gun Safety Locks Since 1999 - October 7, 2021
- Understanding Different Types Of Triggers & How They Work - August 24, 2021
- How To Draw A Pistol From A Holster Step-By-Step (Video) - August 24, 2021
Related Posts
« What Is a Red Dot Sight Good For? Understanding Different Types Of Triggers & How They Work »