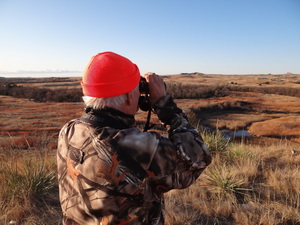
What Binocular Magnification Is Best for Hunting?
Each season, people want to know what binocular magnification is best for hunting. It’s a fair question, but unfortunately, the answer isn’t a universal number. Your hunting location, prey of choice, and personal preferences all play key roles in determining what magnification your hunting binoculars should be.
Before we get into that, it’s important that you understand how binocular magnification works.
Binocular Numbers and Magnification Explained
While shopping for binoculars, you’ll notice that they are labeled with two numbers with an “x” in between them.
- The first number displays the binocular’s magnification.
- The second number is the binocular’s objective lens (front lens) size in millimeters.
- For example, a 10×42 binocular has a magnification power of 10x and a 42mm objective lens.
The magnification level represents how many times closer objects will appear. A magnification of 10x will make the image appear ten times closer, 4x will appear four times closer, and so on.
Choosing the Best Hunting Binocular Magnification
Now that you know how binocular magnification works, you can start narrowing down your options to find the perfect match. High-quality binoculars can be pretty expensive, and it’s worth the investment if you find a pair that meets all of your criteria. It’s easier to pick a pair of binos if you only hunt one type of game because you’re most likely hunting that animal from the same distance.
If you hunt multiple types of game, then you want to invest in a pair with a wider magnification range so that you can adapt to any scenario on a hunting trip.
Best Binocular Magnification for Hunting Deer
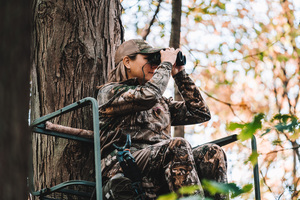
Most deer are taken down from 100 yards or less. Seasoned shooters can usually land accurate shots up to 200 yards out, but the difficulty of the shot increases exponentially as the distance increases from there. That means a 10x binocular will make a mule deer that’s 200 yards away appear as if it were only 20. That’s plenty of magnification power to effectively scout your surroundings on a deer hunting trip.
If you can’t find a pair of 10x hunting binoculars in your price range, 6-8x magnification will also work well as long as you have decent vision. Don’t forget that trees, foliage, and other natural elements can obstruct your view, so clarity is essential with any hunting binocular. If you opt for a pair with a lower magnification power, make sure it has lens coatings that improve brightness and clarity to ensure you can properly see with reduced magnification.
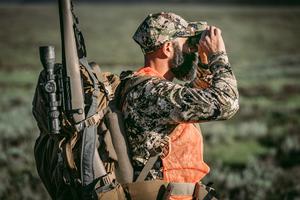
Best Binocular Magnification for Hunting Elk
While whitetails are commonly in wooded areas, most elk roam in open plains with less natural coverage. While elk don’t have superior vision, they will still easily spot you if you get too close without wearing the proper camouflage. That means you might have to hunt from a further distance than with deer, so your ideal binocular magnification level should reflect that.
However, elk are found out in the open and are often easier to spot than deer. We recommend no less than 8x magnification with elk hunting binoculars. Invest in a good pair of 10x binos if you want the best sighting experience out west.
Other Hunting Binocular Magnification Tips
Magnification directly impacts your field of view (FOV) when using binoculars.
- As magnification power decreases, your FOV increases
- As magnification power increases, your FOV decreases
If you decide to buy a pair of powerful hunting binoculars, keep that in mind while scouting for your next shot. Each time you increase the magnification, you’re shrinking your overall view, and you may miss a great opportunity just out of your sight because you’re focusing on a much smaller area.
Our final tip is to use a tripod with binoculars that have 10x or higher magnification. At full magnification, a pair of 10x binoculars will have a tiny field of view, and every movement you make is incredibly noticeable. Plus, binos with high magnification are usually heavier than compact binoculars, which can make your hands shake during long observation sessions. Buy a tripod to maintain steady views during high-power observation.
Taking a Closer Look at Magnification
Finding the best magnification for hunting binoculars is actually one of the easiest parts of choosing the right pair. If you know where and what you’re hunting, you know how close different magnification levels will bring you to your target.
The best hunting binoculars will be anywhere from 6-12x magnification, and you don’t need an incredibly powerful pair if you plan on hunting from shorter distances. Just remember to also buy a tripod if you snag a pair of binoculars with 10x or higher magnification.
Choosing the magnification power is just one aspect of buying hunting binos. Clarity, durability, and comfort all play key roles in determining how good a binocular is. If you need help determining what other features and specs you’ll need, check out our guide on How to Choose the Best Binoculars. When you’re ready to make a decision, stop by OpticsPlanet to shop for binoculars and accessories from Leupold, Vortex, and more of your favorite brands.
Read More


 training knives, like