• child finding gun in the home

    Gun Safety at Home: How to Childproof Your Guns

    Jun 22 • How-To • 4042

    Responsible firearm owners know that practicing gun safety at home is a top priority, especially for families with kids. Many people keep guns in the house to protect their loved ones, but if you don’t practice proper gun safety at home, those weapons designed for defense become a major threat.

    A study on unintentional firearm deaths (2000-2015) revealed that an estimated 430 firearm fatalities occur in the U.S. every year.

    • The rate is highest for older children to young adults (ages 10-29)statistical graphic about accidental firearm deaths
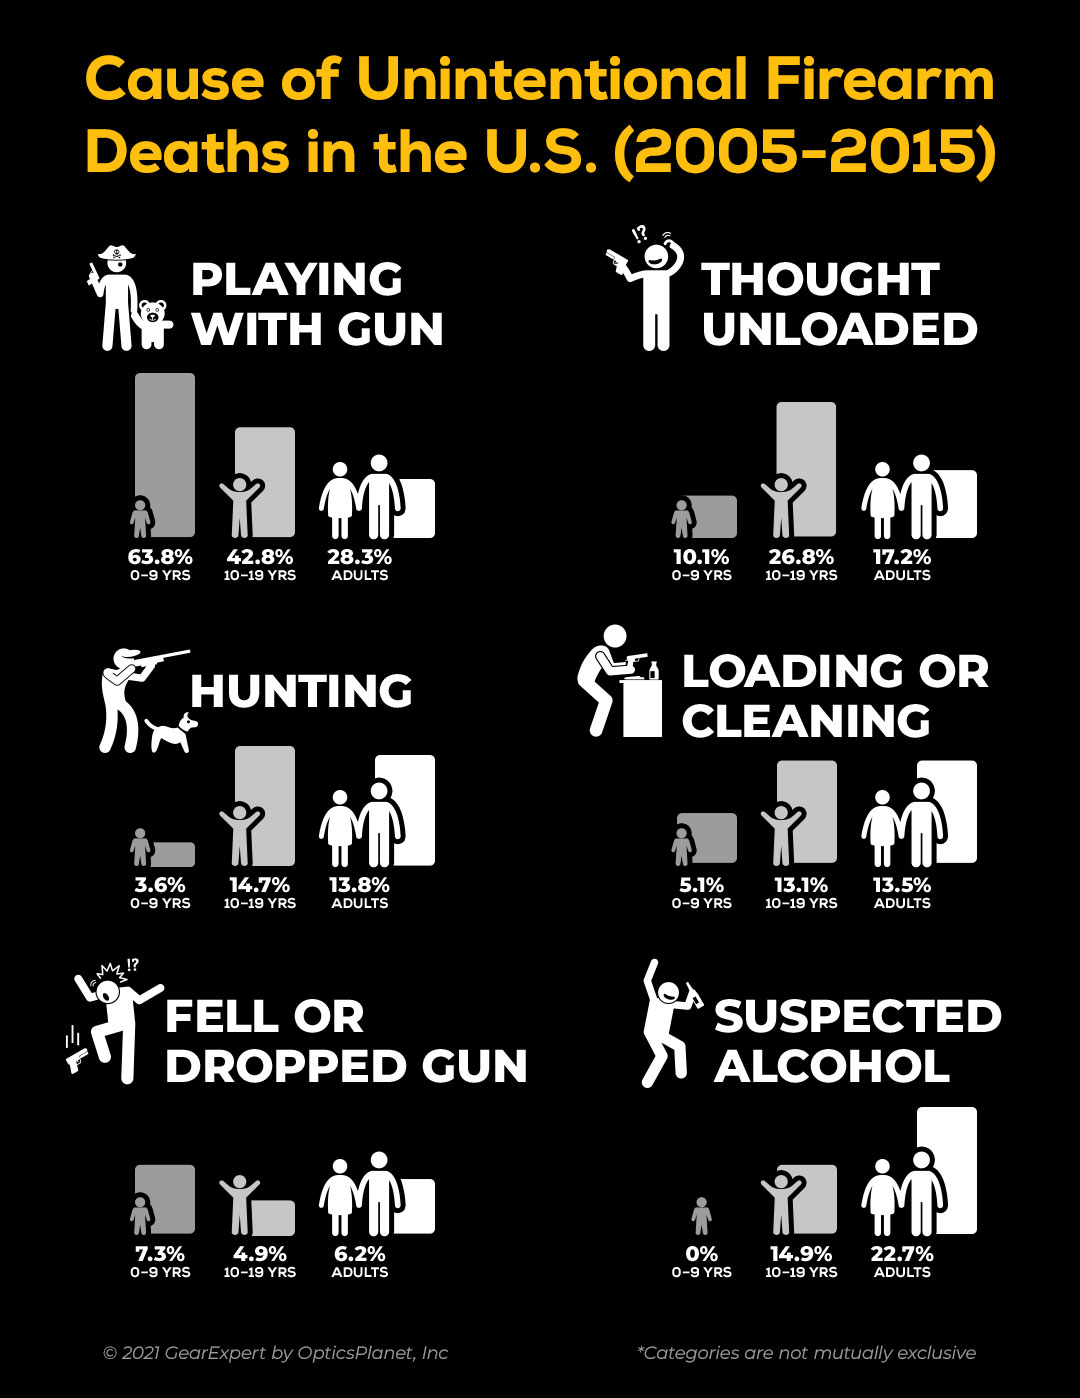
    • 28.3% were “playing with the gun” 
    • 17.2% “thought it was unloaded” 

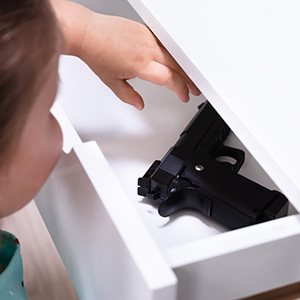
    The study also found that these incidents most commonly occur in their own home or a friend’s, indicating that proper firearm safety and storage could have prevented such tragic loss. 

    At only 3 years old, most children possess the strength to pull the trigger, but “childproofing” your weapons doesn’t just pertain to young kids. You need to safeguard your guns from all youth who are not ready to bear the responsibilities of firearms. 

    This guide on firearm safety at home will teach you how to effectively childproof your weapons and showcases safety products that you should consider using. After reading, you will be able to store a shotgun, pistol, rifle, crossbow, or other weapons safely at home and away from children. 

    Gun Safety for Kids

    While gun locks and childproof safes are a must, the first step to safely keep a firearm in your home is to educate your children about gun safety. The 4 Rules of Firearm Safety provide a great starting point covering the basic rules of how to treat and handle any firearm. However, educating your children about guns isn’t always easy, and there are some other talking points to consider.

    Kids are fueled by curiosity. If you own a weapon, it may be in your best interest to have a discussion about guns rather than hiding the fact that you own one. You obviously don’t need to tell them what you own exactly or where you keep it, but hiding that fact will only increase their curiosity and desire to explore restricted areas of your home.

    Just because you didn’t tell your kids if you have a gun or where it is doesn’t mean that they don’t know. In fact, children under the age of 10 are just as likely as older children to know where household firearms are stored. Kids are smarter than we sometimes give credit for, and teaching them about gun safety at home is one of the best tools at our disposal.

    Teach them about the dangers of firearms and how they are not toys. Children are exposed to guns in movies, video games, TV, etc. You must ensure they learn that real-life firearms are dangerous items and must be respected as such. The goal is to educate your children about firearms, teach them safety procedures, and ensure they know that guns are to be handled by responsible and trained owners. In the end, they should respect guns and what they’re capable of, not fear them entirely. 

    How to Safely Store Guns at Home

    Safely storing your firearms is crucial for practicing gun safety at home. Before you physically childproof your weapons, think about the safest place to store them. Ask yourself these questions before finding a spot:

    • Where do they play? 
    • What areas can they access?
    • Do you want your gun nearby for home defense?

    Don’t assume your children can’t access a certain area because of height or standard locks. Kids view shelves like indoor rock climbing, and step stools can always give them a boost. Truly dig deep while thinking about the safest storage location to ensure all of your bases are covered.

    If you own a gun for home defense, then you’ll want it nearby. The master bedroom is ideal since you’ll be able to closely monitor your firearms at night while still having quick access to them.

    Gun Safety Tips for Parents

    After teaching your kids about gun safety at home and selecting a safe storage location, it’s time to discuss how toparents talking to kids about gun safety at home childproof your guns. Education is essential but not enough to guarantee your guns stay out of your kids’ hands. You need to physically childproof your firearms to ensure a 0% possibility of them accessing it and firing a live round. That includes keeping all firearms unloaded and decocked and checking chambers to make sure your guns are 100% unloaded.

    Another recommendation is to securely store ammunition in a separate area. This can be another safe or lockable storage container. This adds an extra layer of protection by further reducing the possibility of your children accessing a loaded gun. Understandably, you want to have a loaded firearm at the ready for personal protection, but that presents more of a danger than it prevents with children in the house.

    Childproof Gun Safes and Trigger Locks

    With all the steps in place to safely own a firearm at home, it’s time to pick out the best childproof gun storage based on your needs and budget. It’s important to remember that gun safes and lockable storage containers are just a deterrent from accessing your weapons. Just because your guns are locked away doesn’t mean that you still shouldn’t follow the points above.

    Childproof Trigger Locks

    Before we discuss gun safes, let’s talk about trigger locks. Trigger locks, or gun locks, add an extra layer of security to prevent the activation of a firearm. They go on to your weapon first before you put your guns in the safe.

    There are three main types of trigger locks: trigger lock on rifle

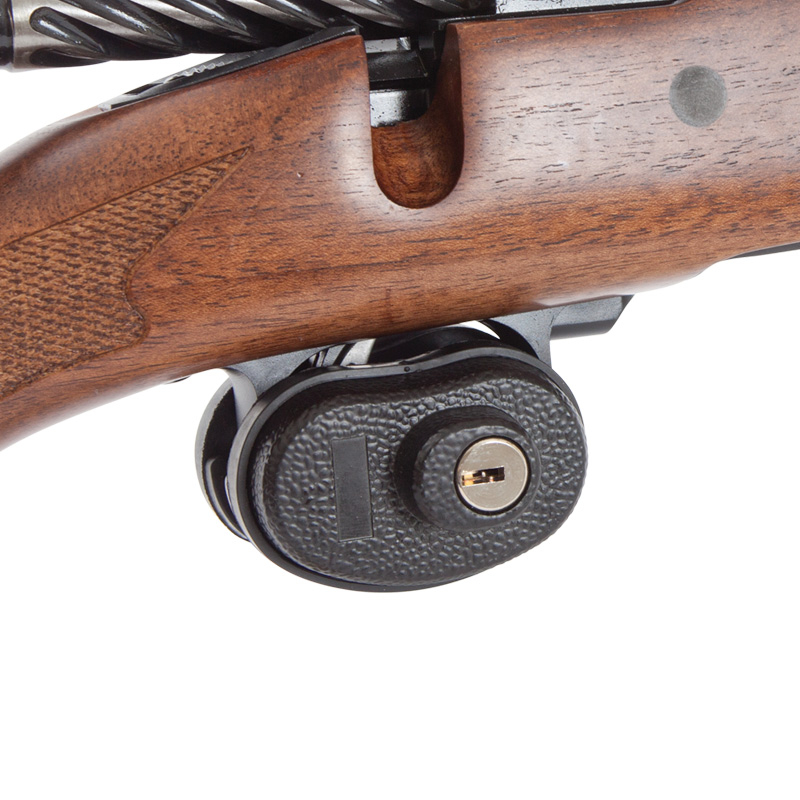
    • Biometric (fingerprint) trigger locks
    • Keyed trigger locks
    • Combination trigger locks

    Any of these choices work, but for keyed and combination locks, you need to protect the key and combination like it’s your actual weapon. If your children get their hands on the method of unlocking the device, your trigger lock is null and void. While trigger locks are recommended for childproofing your guns, they are not a substitute for a gun safe. 

    Childproof Gun Safes

    While shopping for a childproof gun safe, you need to consider where you’ll put it, what size you need, and what features you want. If you plan on keeping your gun safe in the master bedroom, which is an ideal location for families, you have a few options at your disposal. The bedroom closet is a good place to keep a gun safe as it is spacious and easy to hide from kids, even if they’re in your room (while supervised, of course). 

    Another option is a wall safe. Wall gun safes usually require more work to install, but they can be easily hidden. Another benefit of wall safes is that you can place them at certain heights that would be near impossible for children to reach.  bedside gun safe

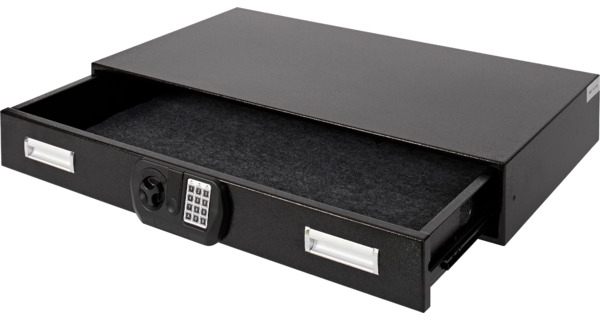
    If you can easily keep your kids out of your bedroom, a bed safe secures your gun while allowing the quickest access to it in an emergency. These can be under the bed gun safes or nightstand gun safes, also known as bedside gun safes. 

    Choosing the right size gun safe can be challenging for new gun owners, but it’s pretty easy to figure out once you know how many guns you’re storing, if they’re long guns or handguns, and what else you plan to store in it. The amount of gun safe features are also overwhelming at times, but this guide on Choosing the Best Gun Safe for the Money has tons of helpful information and instructional videos about picking out a gun safe, moving a gun safe, and storing a safe. Check it out if you want to learn more about gun safes before buying one to practice gun safety at home.

    Some other types of gun safes for childproofing your weapons include RFID gun safes, biometric gun safes, and carRFID chip opening a gun safe 
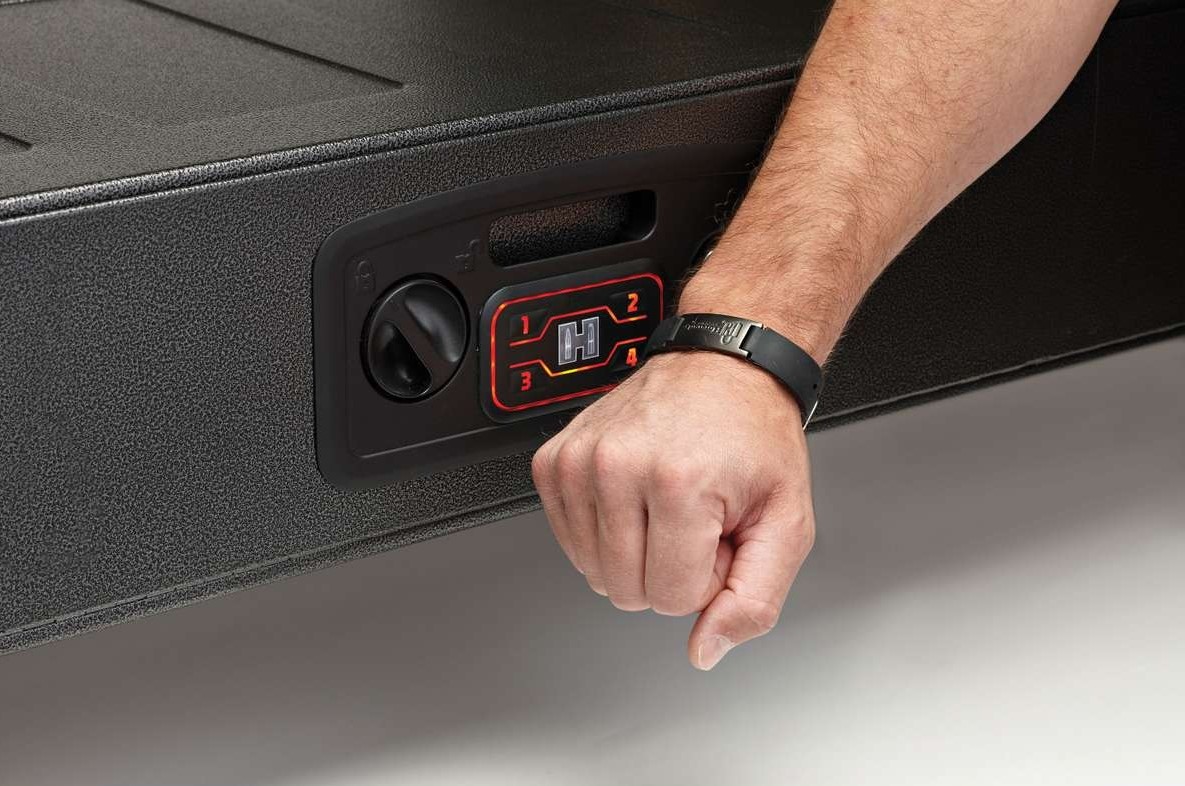
gun safes. RFID (Radio Frequency Identification) safes are accessed with a chip, usually hidden in a fob card or bracelet. Like we discussed with certain gun locks, if your kids get a hold of the chip method, they can access your safe. Thankfully, RFID chips are easy to keep close by and on your person. If you’re mindful about the chip’s location at all times, then RFID gun safes are a good choice for you since they also provide quick access to your weapon when needed. Hornady RAPiD gun safes are a popular choice if you want RFID access.

    Car gun safes are great because you can lock your car for further security (just keep the keys out of reach). However, they do not provide quick access during nighttime emergencies, and they are not ideal if other people in the household use your car, especially teens who just got their license.  vaultek wifi biometric gun safe

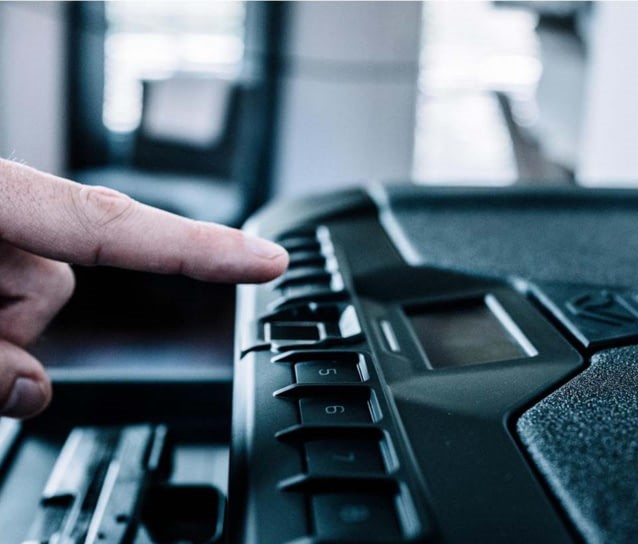
    If you have some extra room in the budget, biometric gun safes, or fingerprint gun safes, provide the best balance of security and quick access to your weapon. Some brands like Vaultek have Wi-Fi-enabled child-proof biometric safes that you can monitor to see if your children attempt to access it while you’re away.

    Play It Safe

    When it comes to gun safety at home, you should protect your family and never take any risks. By now, you should know several ways to childproof your guns and how talk to your children about firearm safety. Remember, whether you’re looking for a pistol, rifle, or shotgun safe, keeping your guns out of your kids’ hands is the number one priority. Your next step is finding a safe that meets your gun ownership needs. 

    Hopefully, this guide will help all you parents out there who want to safely store a firearm at home with children. If you have any unique childproofing tips or advice on talking to your kids about guns, share them with us in the comments below!

    No Comments on Gun Safety at Home: How to Childproof Your Guns

    Read More
  • Review: Fujinon Techno-Stabi TSX1440 Binoculars

    Jun 21 • Optics, Reviews, Binoculars • 3950

    What Are Image-Stabilized Binoculars?

    Image-stabilized Fujinon Binoculars use a gyroscopic mechanism to continuously compensate for movement, giving the viewer a steady image. Stabilized binoculars can be helpful when you are moving such as sailing on a boat or on a safari, but they’re also helpful when using magnifications over 10x when even the slightest shaking of your hands can make viewing difficult without some kind of rest. Instead of needing a tripod to stabilize the image, the gyro-stabilized binoculars do all of the work for you. The Fujinon Techno-Stabi TSX1440 14×40 binocular gives you a steady image in any environment without all the extra gear.

    Fujinon Techno-Stabi TSX1440 Overview

    The Fujinon Binoculars Techno Stabi TSX1440 are 14x magnification image-stabilized binoculars with a 40mm objective lens (14×40). They use 4 AA batteries for a run time of 18 hours or you can use NiMH rechargeables for a 22-hour run time. The controls are simple and easy to use. After inserting the batteries, push the power button to turn on the unit and then push the stabilizer button to activate the gyroscope. You will quickly notice how sharp movements now seem smooth and delayed, allowing you to get a clear image in the most unstable circumstances.

    The buoyant chassis design means you can take them on the water without worrying about them sinking like an anchor if they go overboard. However, they’re not meant for use underwater and can only withstand about 1 to 5 minutes maximum exposure before becoming damaged, and will need to be cleaned off as soon as you retrieve them.

    Unlike older image-stabilized binoculars, the TSX1440 are relatively light and compact despite all the technology they contain. The focus knob on the right-hand side makes fine adjustments with the slightest touch, allowing you to easily bring any object into focus and the included neck strap lets the binoculars comfortably hang when not in use.

    Fujinon Techno-Stabi TSX1440 Specifications

    Specifications

    First Impression

    The TSX1440 14×40 Fujinon binoculars feel a little chunky when you first pick them up but you quickly get used to it, especially once your attention is on the clear and stable images they provide. Holding them in a single hand is still very doable thanks to the lightweight and balanced design. Having struggled to use binoculars over 10x without a tripod in the past, it really is impressive how easy it is to use this 14 x 40 binocular to pick up fine details at distance. When you factor in the weight and cost of a quality tripod, you really begin to appreciate the value that the TSX1440 offers. Especially when on a boat or in a moving vehicle.

    Summary

    While not necessary for every application, the Techno-Stabi TSX1440 Fujinon Binoculars are an excellent choice when you need high magnification in adverse environments. They provide headache-free use in bumpy environments and reduce the amount of support gear you have to haul in order to utilize higher levels of magnification. Their waterproof and user-friendly design makes these image-stabilized binoculars the perfect companion in a wide range of settings that include marine sports, safaris, professional fishing, and stargazing.

    No Comments on Review: Fujinon Techno-Stabi TSX1440 Binoculars

    Read More
  • Review: Fujinon Hyper-Clarity Binoculars

    Jun 21 • Optics, Reviews, Binoculars • 4434

    Fujinon Hyper-Clarity HC Binoculars

    Fujinon binoculars with HC Lenses are a great observation tool for a variety of activities such as birding, stargazing, watching sports, hunting, and more. Binoculars can range from pocket-size to tripod-mounted so selecting the right pair can depend on your application. If you want a great “do-all” binocular that’s easy to keep on hand, check out the Fujinon Hyper-Clarity binoculars.

    Fujinon Binoculars | HC Lenses

    The HC series of Fujinon binoculars have large diameter Fujinon HC Lenses with the Super EBC Fujinon multi-coating, designed to maximize light transmittance and deliver a bright and clear field of view while staying compact and portable. The Hyper-Clarity binoculars are accurately named, giving the user excellent viewing resolution and contrast which brings all the details of nature to life. They include objective and eyepiece covers, a neck strap, and a soft case.

    Specifications

    First Impression

    The Fujinon Hyper-Clarity binoculars are available in 8×42 mm and 10×42 mm models. I prefer the slightly increased magnification of the 10x model given that they are virtually the same size and weight, but if you prefer a larger field of view then the 8×42 is the model for you.

    The image quality these Fujinon Binoculars offer is well worth the money, offering bright and crisp images in almost all lighting conditions. They fit nicely in a backpack or range bag so you have them on hand when you need them. I really like the tactile feel of the matte finish and the knurling on the focus knob, both of which give positive control even with the sweatiest of hands.

    Most importantly, these binoculars really stand out when looking at wildlife. The 2-meter close focus lets you observe the tiniest, vibrant details on whatever critter pops up near you. The same image quality comes in handy when scanning through a herd to determine the age and health of each individual animal.

    Summary

    If you are looking for a high-quality, robust pair of binoculars for hunting or observing wildlife then make sure the Fujinon Hyper-Clarity binoculars are on your list. Offered in 8×42 or 10×42, both with their Fujinon HC Lenses, they are powerful yet portable and give you the ability to discern important details.

    No Comments on Review: Fujinon Hyper-Clarity Binoculars

    Read More
  • Person in various survival gear in a post-apocalyse wasteland.

    The Bugout Bag and The Family Bugout Bag 101

    Jun 18 • How-To, Survival • 2400

    A great many books, blogs, and articles have covered the bug-out bag. Many focus on some apocalyptic scenario where only the savvy survive and go on to fight marauding hordes, knee-deep in the ashes of civilization. That’s a cool story, but it isn’t grounded in more realistic concerns. Most don’t take into account far more practical considerations like a family bug out bag, localized natural disasters, and anticipating a bug out evacuation to somewhere as mundane as the local community emergency shelter. If your emergency bag is put together properly, it’ll get you started down the road as doomsday dawns, too. If you want the basic principles of a bug-out bag list that isn’t geared toward the end of the world as we know it*, read on!

    *If you’re really interested in stuff that will help you in the event of TEOTWAWKI (The End Of The World As We Know It), this will help you a lot, too.

    What is a Bug-Out Bag?

    People who frequently travel for work will often have a small piece of luggage ready to go at a moment’s notice that contains their personal necessities. If you’ve ever seen flight attendants come off of a plane, you’ve probably noticed that they each have something to this effect. My father was a railroader for 32 years, and railroaders commonly call their go-bags a “grip” because they’re typically duffle bags with handles as opposed to backpack straps. No matter the profession, these kits are geared toward comfort more than basic survival. They usually have a spare set of clothes, toothbrushes, various other hygiene products, and something for entertainment like a book. Those who work outdoors tend to add elements of a bug-out kit out of necessity and prior experiences where they wish they’d had those things.

    A bug-out bag (or “B.O.B”) is a survival bag that’s prepared in advance of any incident that requires someone to evacuate quickly in the event of an emergency, containing essentials for an unexpected and extended time away from home. They go by a lot of different names, and it’s helpful to be familiar with some of them:

    • 72-Hour Kit/Bag 
    • Emergency Kit/Bag
    • Go Bag
    • SHTF (“Stuff” Hits The Fan) Bag

    There are a few others to be aware of that are somewhat different from a 72-hour bug out bag:

    • EDC (EveryDay Carry) Bag – This is a small kit of basic essentials that you might need as situations arise but isn’t enough to serve as a bug-out kit unless it’s all you have. As the name suggests, it’s with you whenever you’re not home. This can be in a purse, satchel, messenger bag, sling pack, daypack, etc. Many people distribute various elements of the kit into their pockets, belts, and keychains. Multi-tools, a lighter, a whistle, pepper spray, and similar items would fall into EDC.
    • Car Kit – This is a survival kit that typically stays with the vehicle and includes specific tools and repair components. These should not be relied upon for a bug-out scenario on their own, as vehicle traffic may be impossible due to congestion, breakdown, or separation from your car.
    • Get Home Bag – This is a bag kept in the workplace, vehicle, etc. that is enough to get you home. It has more elements than an EDC Bag, but not as much as a full bug-out pack.
    • GOOD (Get Out Of Dodge) Bag – This is a survival go-bag that’s specifically designed to leave an urban area to travel to a safer city or to strike out into the wilderness.
    • INCH (I’m Never Coming Home) Bag – This could easily be considered the most in-depth survival bug-out bag. It is assembled to be a long-term bug-out bag kit that will meet all of your needs as you travel away from the epicenter of the disastrous event with no plan of ever returning.

    All of these types have the same foundation of bug-out bag essentials, tailored to your needs and the level of preparation that you desire or require. For this article, I’ll be covering the basics for a kit that will get you through 72 hours but will still have enough gear to keep you going beyond that timeline (there is no fixed set of time that an emergency may last). Bug-out supplies will vary from person to person, and there are no absolutes for exact equipment or brands that are needed. If you opt for a pre-packed and ready-made bug-out bag, be prepared to add, remove, and modify different components to ensure it’s tailored to you. It’s really better to build your own emergency survival kit rather than relying on a one-size-fits-all that a stranger came up with. No two bug-out bags will be exactly alike since different people will prefer or prioritize certain pieces over others. Instead, it’s better to think of them as components of a system of survival.

    Man drinking through water filtration straw from polluted water.

    A small water filter will save time and energy, making even brackish water safe to drink.

    What to Put in a Bug Out Bag

    To keep your priorities straight, start by thinking about the “Rule of 3’s” for human survival. Although not scientific or exact for every person, the “Rule of 3’s” serves well as a rule of thumb in any life-threatening situation. It states that you can survive:

    • 3 Minutes Without Air – We’re not just talking about holding your breath underwater here. Yes, that might come into play, but it’s far more likely that you’ll encounter poor air quality. With the coronavirus pandemic, we’ve all become quite used to wearing masks of all sorts. However, when it comes to air quality, a cloth or simple medical mask is not going to protect your lungs. You’ll want at least an N95 mask or respirator in the event of heavy smoke, a big concern for those of us who live in wildfire areas. If you live in an industrial area where spills, explosions, or other toxic contaminants are a danger, you’d do well to research a higher-grade gas mask.
    • 3 Hours Without Shelter – “Shelter” includes appropriate clothing, so as long as you’ve checked that box, you’re generally okay while you’re moving. Where this really comes into play is extreme environments. In blistering heat, shade becomes shelter. In wet conditions, shelter keeps you dry or provides a space to dry out in. In freezing conditions, shelter helps you preserve precious body heat. The natural elements really can kill you in three hours or less, so this isn’t something to push through or ignore.
    • 3 Days Without Water – You’ll be in rough shape if you go three days without water, but it is survivable. This window is much narrower in hot, arid climates or when you’re exerting a lot of energy and sweating. If you’re bugging out, you’re going to exert more energy than usual. That’s why water is third on the list; it’s the next thing that can kill you.
    • 3 Weeks Without Food – Again, you’re going to be in rough shape if you go this long without eating. In this context, it’s helpful to keep in mind in case you’re tempted to pack a Thanksgiving dinner’s worth of food. Instead of planning to starve for weeks or lug around a bunch of heavy food, just be prepared with the bare minimum and realize that you’re going to be on rations.
    Person holding large hoard of toilet paper.

    Keep things in perspective. Toilet paper is a comfort, but unlikely to save your life.

    Notice that toilet paper is not on the list of things you can’t survive without. If we learned one thing from the pandemic panic-buying in 2020, it’s that a lot of folks seem to prioritize toilet paper above all else in an emergency situation. Yes, pretty much everyone puts some in their emergency kit, but don’t go overboard. One roll maximum will be plenty.

    The “10 Essentials of Outdoor Activity” translate very nicely to an emergency go-bag checklist. Ensure you have each of the following elements, and you’re well on your way to having a solid foundation of go-bag contents.

    Multi-Tool in snow next to compass.

    Don’t forget the essentials when packing your bug-out bag.

    Bug-Out Bag Checklist

    1. Navigation – A GPS, map and compass, or even cellphone map apps fall under this category. It’s wise not to put all of your faith into electronic devices and keep a backup paper map just in case. This can be a simple printout from an online satellite view of your surrounding area or one with all routes of escape highlighted and marked out.
    2. Illumination – Headlamps are preferred for bugout bags because they’re hands-free and compact. Bring two or three sets of extra batteries so that you don’t have to worry about conserving power during your initial evacuation. If you can, find a headlamp that has a red LED to preserve night vision, a regular white LED, and a strobe function. The strobe is an excellent signaling device that can lead others to you.
    3. Protection – This is a broad category that covers things like sunscreen and insect repellant, sensible clothing, and the like. It also takes threats to your personal safety into account. Although you definitely can use your knife or other hand-to-hand combat weapons to defend yourself, it’s less optimal to be in such close proximity to an enemy and leaves you vulnerable to injury. A lot of people prefer a firearm, particularly a handgun, for bug-out situations. Just be sure to continually practice and keep your gun skills sharp. Due to legalities or comfort level, some people opt for self-defense spray instead. No matter what your defense tool is, make sure that you know how and when to use it, and keep it close at hand at all times. It does you no good buried in your pack.
    1. First Aid – A small, simple first aid kit will do. Keep it within your level of skill and training. If you’re a first responder, you already know what you need in your kit and realize that your first aid kit is going to be more complex and bulky. If you’re not trained to use it, there’s absolutely no need to carry any additional first aid equipment.
    2. Knife/Tools – A knife is a must in any survival kit. Don’t skimp; get yourself a quality knife that you can trust your life with. A multi-tool should also be in your kit and kept easily accessible. Even though most have at least one knife blade, it’s still best practice to have a larger knife for bigger jobs.
    3. Fire – Fire serves so many purposes like heat, cooking, comfort, and signaling that it’s a must-have in any survival kit. Keep at least two ways to start a fire in your kit. A simple lighter will do for one, but for the other, make sure you have a fire-starter that can stand up to the elements or doesn’t require additional fuel.
    4. Shelter – Aside from proper clothing, you have a lot of shelter options. A tarp is super-versatile and can be used to construct all kinds of quick shelters. A lightweight tent is a more weather-resistant option, usually weighing less than 5 pounds. Sometimes a lightweight sleeping bag (also under 5 pounds) is all you need, especially if you combine it with some form of tarp. A sleeping pad under 2 pounds is not only more comfortable, but it will also keep you from losing body heat to the ground.
    5. Food – Three days’ worth of food is enough. Calorie-packed snacks are good on the go, just keep in mind that candy and other sugary sweets come with a crash after the rush wears off. There are a lot of survival foods and MRE’s available, and they’re perfect because they need little to no preparation. Avoid packing foods that require more preparation than just boiling water. Also, this is about surviving, and you’ll likely have to sacrifice flavor or preferred meals over getting energy into your system.
    6. Water – Water is heavy; one liquid gallon is roughly 8.34 pounds. For this reason, throwing a portable water filter into your kit is a must. A canteen with an included cooking cup is ideal for durability and versatility and removes the need to bring a separate cooking pot. Since you want to avoid cross-contamination by drinking from the same container that you used to collect untreated water, bring another water container or hydration system. It’s pretty common to find packs that accommodate water bladders, which are perfect because they lose weight and volume as you drink from them.
    7. Clothing – Make sure you dress appropriately. If you don’t usually wear outfits that are matched to the elements, keep a set in your kit. Rather than packing your sensible boots or shoes, just keep them attached to the outside of your bug-out bag by the laces. To cut weight and volume, a lot of people will only keep one outfit in their kit that includes wicking base layers, an insulating layer, and a wind/weather-resistant layer like a poncho. The only spare clothes they’ll pack will be one or two pairs of socks designed for hiking. Gloves are another must, as they’ll protect your hands from blisters and injury in addition to protecting them against the cold.

    Extra Considerations:

    1. Your Mind Should Be Your Sharpest Tool: Learn as much as you can as often as you can. Articles like this one are a great jumping-off point but couldn’t hope to be entirely comprehensive (in fact, we have another one here with some different ideas). Watch TV shows, check out online videos, and read up. Take everything with a grain of salt, and use a critical eye to spot things that you just don’t see as practical or realistic.
    2. Papers: Bring identification and other important documents like birth certificates and social security cards. Children should have current pictures of family members with names and contact information on the back in case of separation. Cash is king. Expect that you won’t be able to use credit or debit cards, cryptocurrency, or any other electronic payment system. If you have to barter, you’re trading off the resources that you brought along for a reason.
    3. Hygiene: Basics like a toothbrush, toothpaste, and some soap will not only keep you clean, but can help lift your spirits, add a touch of normalcy, and get you feeling human again.
    4. A Plan: Factor for your environment, be it urban or rural. Set destinations that you’ve been to before and are familiar with. Make sure everyone in your party knows where you’re going so that if you get separated or are starting from different places, you can rendezvous at the predetermined spot. Map out alternate routes in case your primary ones are impassable for whatever reason.
    5. Communication: Having communication with others in your party can be a relief if you get separated. You can also consider bringing an emergency radio that will allow you to check in on what’s going on around you.
    6. Don’t Rely On Rescue: Your mindset should be self-rescue, not being bailed out by government entities or neighbors. Sure, you can plan to head to the local emergency shelter, but don’t plan on there being room for you.
    7. History: Research some historical situations and what worked or didn’t work. Hurricane Katrina in 2005 is a prime example to learn from. Don’t get laser-focused on certain scenarios like floods or civil unrest. Use a more generalized approach.
    8. DON’T Raid Your Camping Gear in an Emergency: This wastes time and leaves too much to be forgotten. If you intend to use existing camping gear in your bug-out kit, make putting it back into your kit the first priority when you get home from a camping trip.
    OpticsPlanet Bug Out Kit Components

    OpticsPlanet Bug Out Kit Components

    Considerations When Choosing Bug Out Bag Items

    • Your Bag: It might seem obvious, but this is an area where a lot of people go astray right from the beginning. Your bug-out bag needs to be a backpack that fits your body, has a lumbar belt, and is suited to all-day carrying. You need to factor the weight of the pack itself into the overall pack weight (covered below). A bugout bag should never be a duffle bag, garbage bag, or another improvised carrying system.
    • Versatility: Carefully consider each item that goes into your emergency bug-out backpack. If at all possible, make sure that each item can serve at least two functions. Use your imagination, or line up similar items and see what can stay and what can go. Can you boil water in your hydration kit? Do you need signal flares if you have another distress signal like a whistle or a strobing light? Can containers be used for other purposes, like a dinner dish?
    • Weight: Overall pack weight should be no more than 20% of your bodyweight if you’re inactive (exercising less than 3 hours per week), and no more than 30% if you’re very physically fit. Minimize weight wherever possible. Check out ultralight camping and hiking gear and lightweight backpacks. Don’t think of your gear in terms of pounds; think of it in terms of ounces. The ultralight hiking crowd thinks in terms of grams, the more weight you can shave off, the better. The last thing you want to do is have to decide which piece of crucial gear you’re going to ditch just to carry on. To check if your bugout bag is overweight, simply weigh yourself, calculate the maximum weight of your kit, and add that to your body weight. Then, put your loaded pack on and get back on the scale. If you’re over the limit, it’s time to go back through your gear and subtract.
      (Note: inactive people should not have a pack exceeding 45 pounds and active people shouldn’t exceed 60 pounds, even if that’s below the percent of your body weight.)

      Here’s an example: a 175-pound man who’s got poor fitness shouldn’t have a pack more than 20% of his weight, or 35 pounds. When he gets on the scale with his loaded pack, the needle shouldn’t be over 210. If he’s in great shape, he gets 30% or 52 pounds of pack weight, and the needle can climb up to 227. That’s only a difference of 17 pounds, but it counts a lot when you’re trekking miles over uncertain terrain.
    • Volume: Even lightweight gear can sometimes be bulky, throwing off your balance and tiring you out. Use as much compression on sleeping gear and clothing as possible. Vacuum sealers are perfect for anything you can fit into them. Not only does it remove all of the air, but it makes stackable/packable units that are sealed against moisture. Remove excess packaging on food or other items and then seal them up in a vac-bag. Same goes for clothing items, first aid kits, and the like.
    • Cost: We all like to save money, but cheap gear fails. If you’re on a budget, get what you can and slowly replace it with better equipment as you can afford a piece here and there. You’re trusting your life to this stuff, and you can’t depend on being able to easily replace it once you’re evacuating.
    • Durability: Hand in hand with cost, your gear should be durable. Something that’s flimsy or runs the possibility of failing after a few uses is not doing you any good. Test it out a few times at home, and make sure you can rely on any given piece of equipment.
    • Non-Essential or Impractical Items: Do you actually need 1,000 rounds of ammunition, an axe, a machete, a crockpot, and the entire library of Harry Potter books? Are you going to rappel down cliffs, build complex rope bridges, or pole vault over chasms? If you’re not a combat-hardened operator, don’t pack like you are. Be realistic about what you can carry and what’s just dead weight. Basic hygiene is important, shaving and makeup kits are not.
    • Personalized & Individualized: Modify your kit to your needs. If you take medication, make sure you have some stored separately in your go-bag. Every person in your party needs their own bag (with consideration for kids covered below in “The Family Bug Out Bag”). Avoid breaking up essential gear like shelter between two or more people. If you get separated or someone loses their pack, you’re all up the proverbial creek sans paddles.
    • Distribute Weight Properly: Pack heavy items toward the top of your bag and lighter items on the bottom. If it’s practical, consider lashing your sleeping bag and/or shelter to the outside of your pack. Keep necessary gear where it can be easily accessed on outside pockets. Use your shoulder straps and lumbar belt to carry the bag above your waist, and use sternum straps to keep the pack from shifting too much. If you’ve fitted it properly, your pack should feel like a turtle shell and pretty much a part of you.

    The Family Bug Out Bag

    Another thing emergency bugout preppers often overlook when doling out advice is that many people are also looking out for families, and that can bend some of the rules. If you have very little kids who aren’t going to be able to hoof it out with you, then someone is going to have to pack them in a purpose-built child-carrier backpack. That means someone else is going to have to take up the slack and carry the lion’s share of the bugout supplies. This doesn’t mean that weight limits should be exceeded. It means that it’s going to take more planning and consideration of what can be shared between two adults.

    Man with a child in child-carrier backpack.

    A child-carrier backpack is the best option when bugging out with little ones.

    Luckily, child-carrier backpacks will have compartments for diapers, formula, binkies, and all of the other basics babies and toddlers need.  You might want to consider cloth diapers and wipes, which can be cleaned and reused. Disposable diapers didn’t come along until 1960, and we’ve been raising babies for much longer than that. There are online tutorials on how to use them, or you could just go ask your grandma. If you absolutely have to go with a stroller or wagon, make sure it’s robust enough to endure a long trip. You won’t be meandering around the park or shopping mall, you’ll be going over potentially rough terrain. If the stroller or wagon breaks down after a mile, you’ll be in for the exhausting and potentially dangerous task of piggybacking or shifting them from hip to hip. You’re also going to have to face the tough choice of what gear will need to be sacrificed to carry on.

    You know your kids and their capabilities, but as a general rule, a 10-year-old should be able to carry their own bug-out bag and know how to use everything in it. Younger kids can carry certain elements of their kits, like snacks, water, and extra clothes, within reason. Again, this means that someone else is going to need to pick up the slack and forgo their own needs, but child-rearing is all about sacrifice.

    Testing & Trial Runs

    Now for the fun part. You’ve got your bugout bag, and you’re ready to take on the world no matter what it throws at you. You will never be caught with your pants down. So, prove it. Randomly grab your pack, throw it on, and roam the neighborhood for a mile or so. Try it at night, in the rain, without planning it out. You’ll most likely come home ready to make some adjustments to your system. If you’re feeling hardcore and want to test the GOOD theory, take it to the next level and follow your map out of town to your rendezvous point.

    A really fun way to test your plan and setup is to have a fellow preparedness enthusiast call you at any hour of the day or night and say, “Emergency test starts now,” and hang up. That’s the cue for you and anyone you’re going to bug out with to leap into action and out the door by more closely replicating the real-world timing of disasters in a controlled scenario. Time it to see how long it takes to set your plan into action. It’s an eye-opener and well worth any minor inconvenience or discomfort you may experience at the time. Fair is fair, so you get to call that person anytime you want and say, “Emergency test starts now,” and hang up on them.

    So now you’re up to speed on the basics of building your bug-out bag and putting it to the test. We’ve covered the essentials to bring and the needless things to leave behind. From what you’ve learned, you can scale down your kit to an EDC or build it up to an INCH, and you know how to define both. If it’s applicable, you’re ready to put together a family bug-out bag and get the kids in on the plan. Let us know what you liked and what you’re not sure I got right in the comments below, and best of luck to you!

    No Comments on The Bugout Bag and The Family Bugout Bag 101

    Read More
  • flashlights

    How to Choose a Flashlight: A Torch Buying Guide

    Jun 17 • How-To, Tactical Gear • 3629

    For most people, knowing how to choose a flashlight is easy. You just go to the hardware store and grab whatever seems reasonable. While that will work fine in a pinch, your approach should be more involved if you actually need a flashlight like, say, if you work in a profession or participate in activities where you must rely on a flashlight for extended periods of time. If that’s the case, keep reading. 

    In this torch buying guide, we’ll cover how to buy a flashlight. It’s easy when you know what to look for. We’ll go over the factors to consider. Yes, there are factors to consider. There are a lot, actually. In this article, we’ll cover topics like flashlight styles, lumens vs candela, price, and flashlight features like bulbs, batteries, controls, and light color. 

    Styles of Flashlight

    Before choosing a flashlight, you should consider how you’re going to use it. Hikers need to see so they don’t twist an ankle. Police officers will occasionally search for a fleeing suspect. And utility workers tend to work in remote locations during inclement weather. Determining exactly how you’re going to use a flashlight will dictate the features you should look for before buying one. 

    Fortunately, there are multiple styles of flashlights that each have a set of characteristics preferable for certain activities.

    • Penlights are about the size of a pen, as the name implies, and will fit in your pocket. 
    • Tactical flashlights, used by first responders, are durable and designed for ease of use.
    • Weapon lights, although grouped with tactical flashlights, can be fixed to a firearm.
    • Headlamps wrap around your head, so you can illuminate what you look at hands-free. 
    • Lanterns function just like old-timey ones except they use bulbs instead of fire. 
    • Spotlights vary in size from hand-held to mountable and will illuminate a large area.

    However, this article will primarily focus on the standard tubular flashlights like a penlight and tactical flashlight. 

    Flashlight Power: Lumens vs Candela

    There are two units of measurement used to rate flashlights. These include lumens and candela. Finding the right balance of the two will help determine depth of use. 

    The main rating, lumen, measures the total amount of light emitted. Typically, the higher the lumen count, the more expensive the flashlight, so you don’t always need the most lumens.

    Another rating to consider, though, is candela, which measures the light’s intensity. Candela will determine the flashlight’s suggested or intended purpose.

    lumens v candela

    Light concentrating in one spot washes out the page. This would be considered a high candela count.

    For example, a flashlight with a high lumen count and narrow beam will throw light a great distance. In that instance, the candela will be higher because the light is concentrated in one direction. In other words, it’ll shine light far away, but not over a large area — similar to a spotlight.. 

    On the other hand, a flashlight with the same lumen count and a wide beam will have a lower candela count because the light is dispersed over a wider area. This means the throw will be shorter, similar to a desk lamp.

    Flashlight Features

    When you think about how to choose a flashlight, you’re really thinking about choosing the right flashlight. While style will dictate how you use it, flashlight features will affect quality and price. 

    Bulbs

    Incandescent bulbs are common, but they’re a little dated, and they have their drawbacks. Today, the vast majority of flashlights nowadays use LED, or Light Emitting Diodes. They function by pushing an electric current through a microchip. 

    Compared to incandescent bulbs, LEDs have no moving parts or filament, they’re highly resistant to shock, and they draw a very low current, so they won’t wear out your batteries. While a typical incandescent bulb might last seven or eight hours, an LED can last 100s to 1,000s of hours. 

    flashlight LED bulb

    An LED bulb inside of a flashlight.

    Batteries

    When you’re talking about batteries, it’s easy to get lost in the minutia, so we’ll try to keep it simple. A flashlight will either be rechargeable or use disposable batteries. There are pros and cons to both. 

    Rechargeable flashlights are available in two configurations. You can either recharge the battery while it’s inside the flashlight (similar to your phone), or remove the battery and then recharge it. The power cell will consist of either NiMH or Li-ion. 

    The main benefit of rechargeable flashlights is longer battery life, but they tend to cost more up front. In general, a rechargeable flashlight is better for everyday carry or heavy use.

    Non-rechargeable flashlights cost less and tend to weigh less, but you have to keep buying batteries. Therefore, these are better suited for backup or pocket flashlights. 

    With battery powered flashlights, you’ll often hear a debate about alkaline vs lithium. Lithium batteries perform better, especially in the cold, and last longer. The drawback is they cost more. For occasional or emergency use, alkaline batteries are adequate for the average person. 

    Modes

    For most handheld or tactical flashlights, operation requires a simple push of a button. That button is located at the head of the flashlight, on the tail-cap, or both. Yet, when the flashlight has multiple modes, and there’s only one button, it can be hard to tell just by reading the description how to operate it. 

    tail cap button

    The Streamlight Stinger flashlight is equipped with a tail cap button.

    A tactical flashlight will typically have four modes: high beam, medium beam, low beam, and strobe. While the differences are self-explanatory, the main takeaway should be how they drain the flashlight battery. Manufacturers will provide estimates, but in general, high beam uses more power because it provides more light, whereas low beam uses less power because it provides less light. 

    How you switch between modes depends on the brand. With lower-end flashlights, you might have to toggle through each setting just to turn it on and off, whereas higher-end flashlights require some technique. For example, the power button on the Streamlight Stinger does four things:

    • Half press the button to flash or hold the light 
    • Fully press the button to lock the light on
    • Depress and hold to cycle through intensities
    • Double-click the button to activate the strobe

    Light Color

    A standard flashlight uses white light, but depending on what you’re doing you may want to consider using another color. Filtering the light can give you an advantage in certain situations. 

    • Blue or red filters are useful if you’re trying to avoid detection because they aren’t visible from far away. 
    • Green is useful for night fishing because it’s very soft and won’t spook the fish. 

    Additionally, there are dedicated special purpose lights that, for example, use ultraviolet light, which bouncers and TSA officers use to screen for fake IDs or counterfeit bills. 

    Price

    Flashlights will vary in price depending on quality, power, and features. Fortunately, there are a lot of middle-ground options. Reputable brands like Streamlight, SureFire, Fenix, and others make durable tactical flashlights with a dependable output and rechargeable battery. Following that standard, you’ll usually find pocket lights for less than $80, and standard hand-held lights for less than $125. 

    How to Choose a Flashlight

    If you want to know how to choose a flashlight, remember to consider the style, power, and features. While price will always factor into your decision, you should be ready to drop about $100 if you want a good flashlight. 

    What qualities do you look for when choosing a flashlight? Tell us how you choose a flashlight in the comments below. And, for all your flashlight needs, go to OpticsPlanet!

    No Comments on How to Choose a Flashlight: A Torch Buying Guide

    Read More