For some people, finding the perfect hard-use pants for the range, competitions, and tactical training is a never-ending task. For me, I have found my go-to pants for everything shooting and outdoors-related after stumbling into the Fjallraven Keb and Barents Pro trousers. These designs are both touted as trekking trousers for long days in the mountains and on the move, but they can easily do double-duty as tactical and shooting pants.
First Impressions
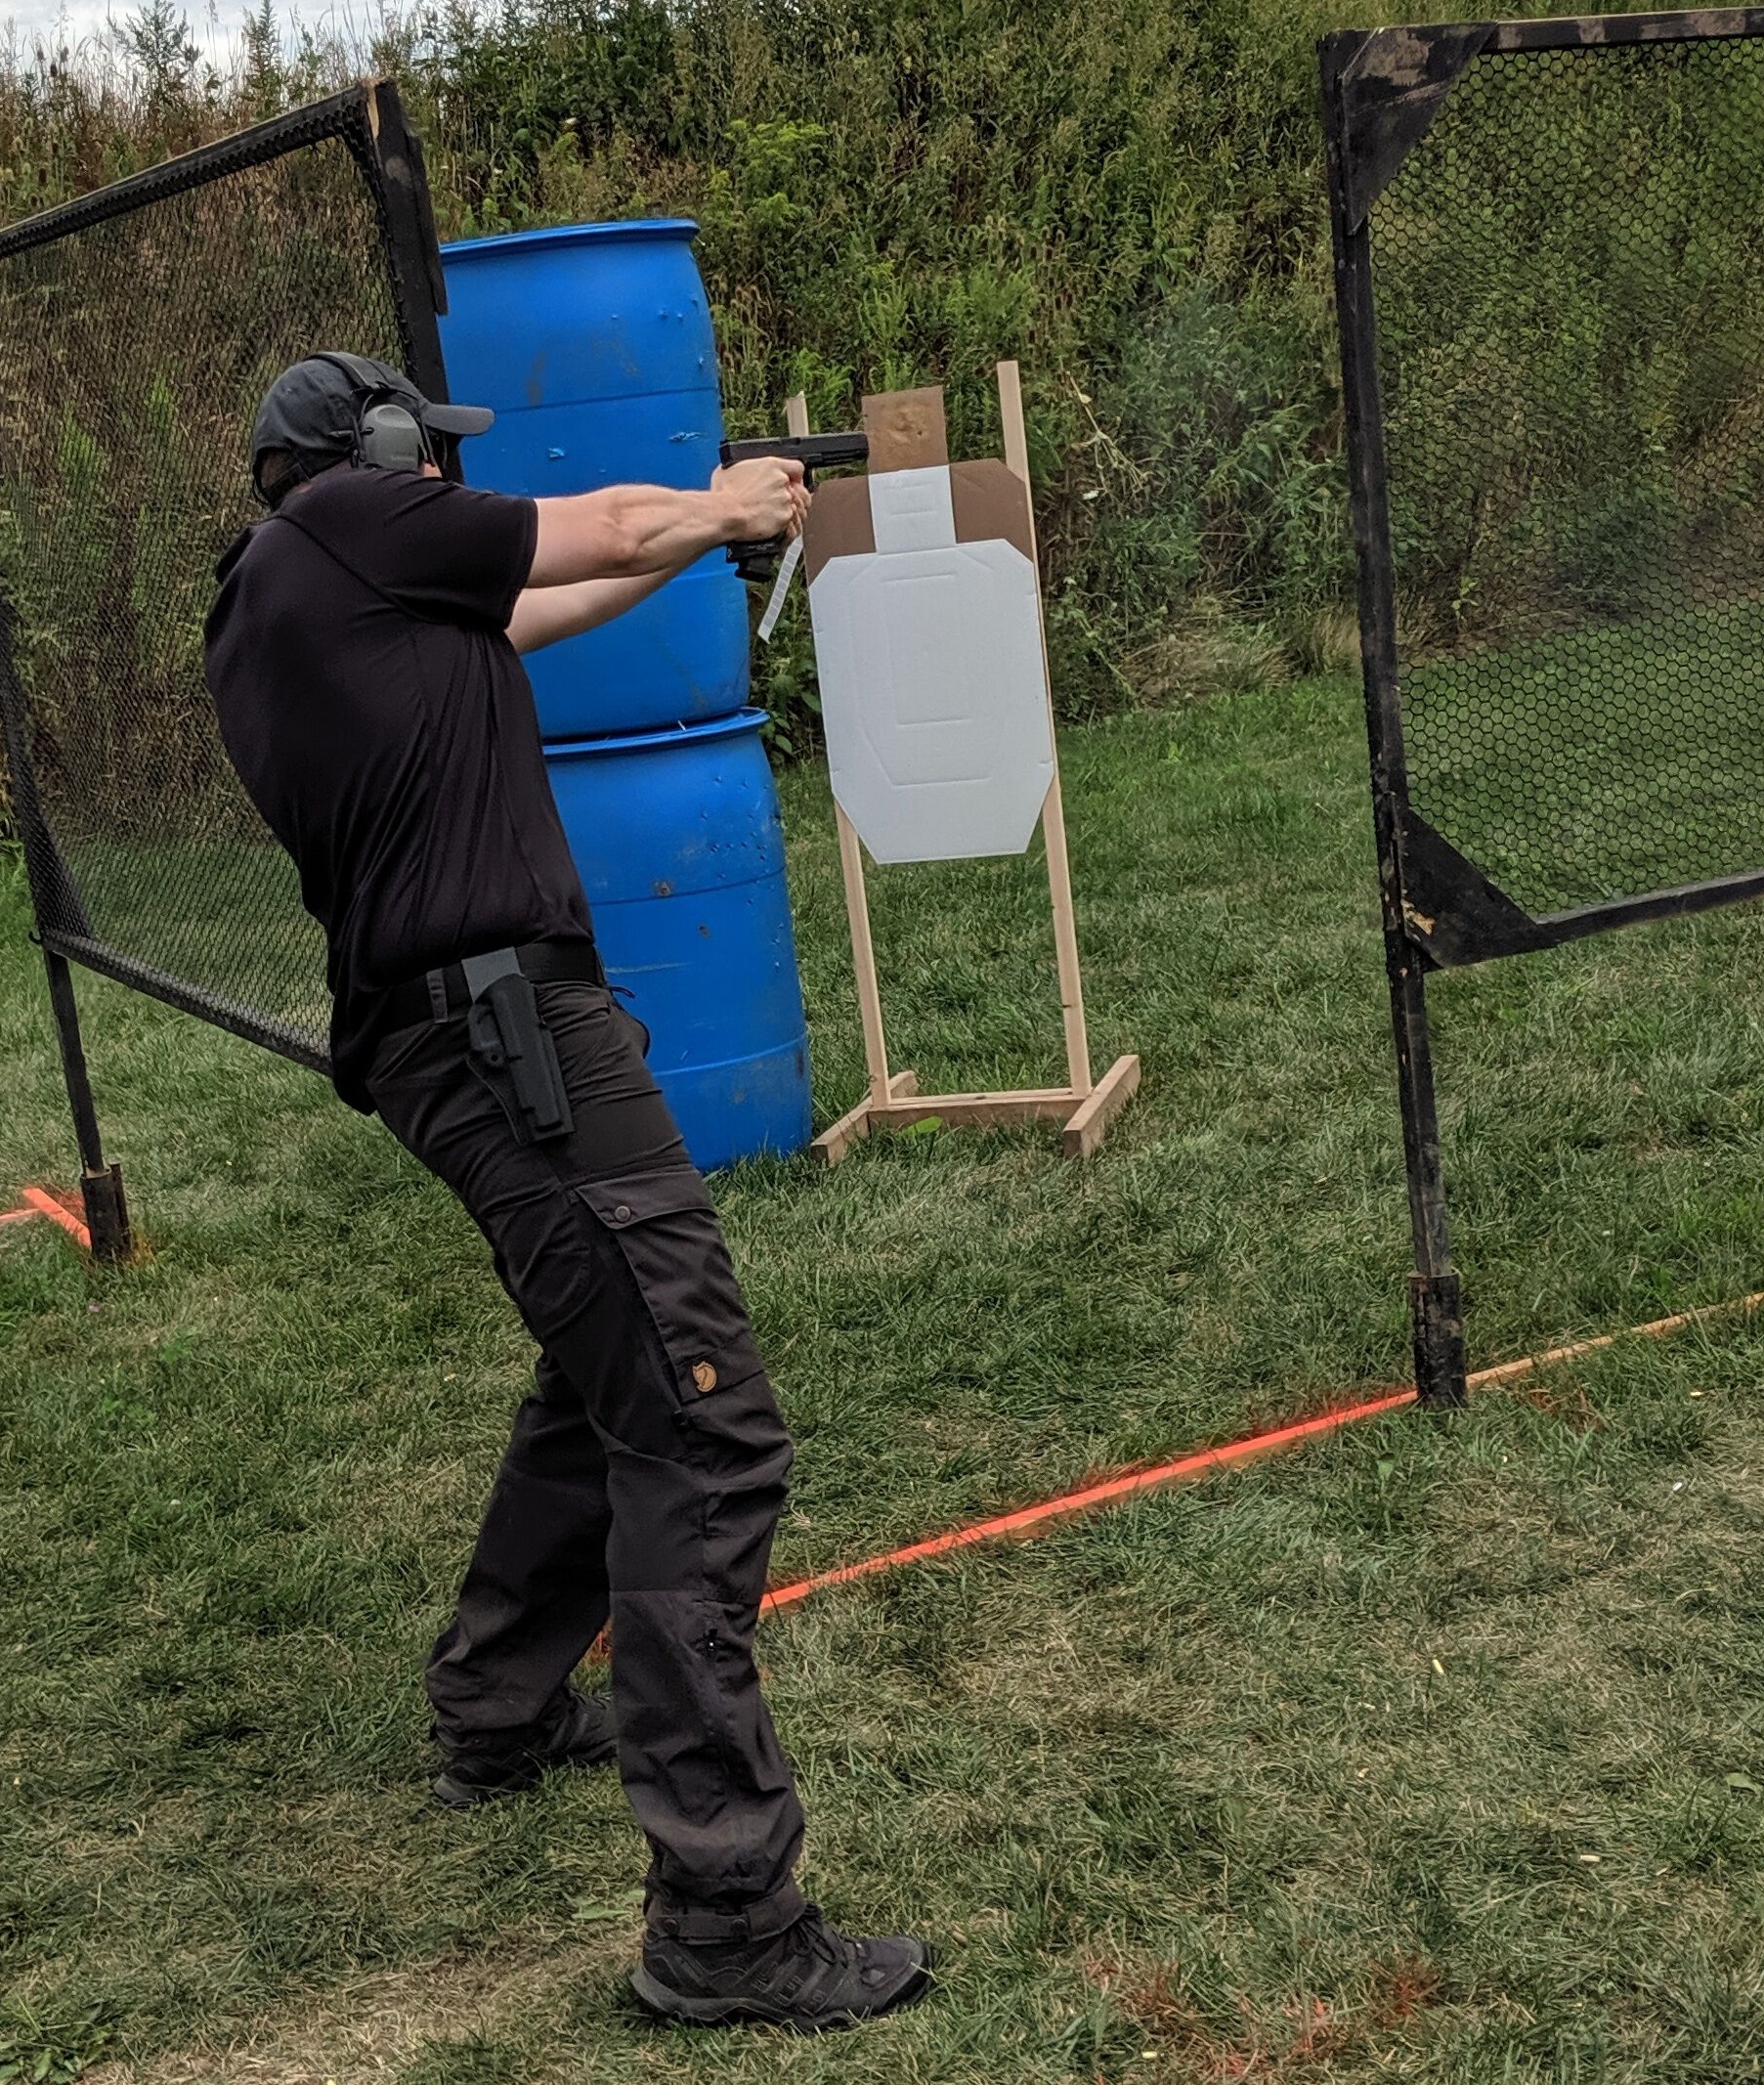
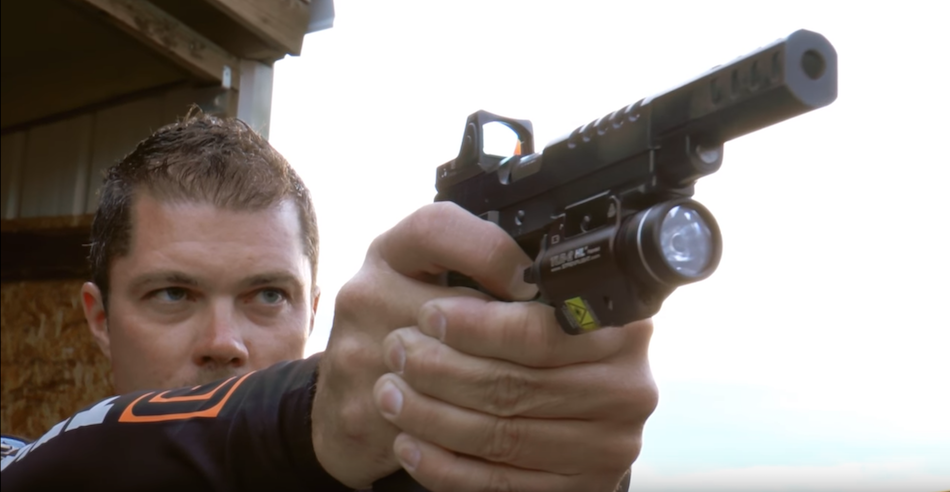
Tactical shooting practice in Fjallraven pants.
I had high hopes for these trousers after seeing Fjallraven’s waterproof shells and packs, and these trousers did not disappoint. Both pairs fit true to size, the Keb’s length was also true to length with an ingenious cuff system. The Barents Pro do come in a raw length that allows you to hem them to your preference.
I also immediately noticed a ton of other features that these pants have that are perfect for the tactical and shooting crowds. Most notably, the pocket layout on both pairs were designed by people who are active and need to get to their gear easily, even with bulky items on. The pockets on both pants fit extra magazines, gloves, some spare ammo, and my phone with ease.
Construction
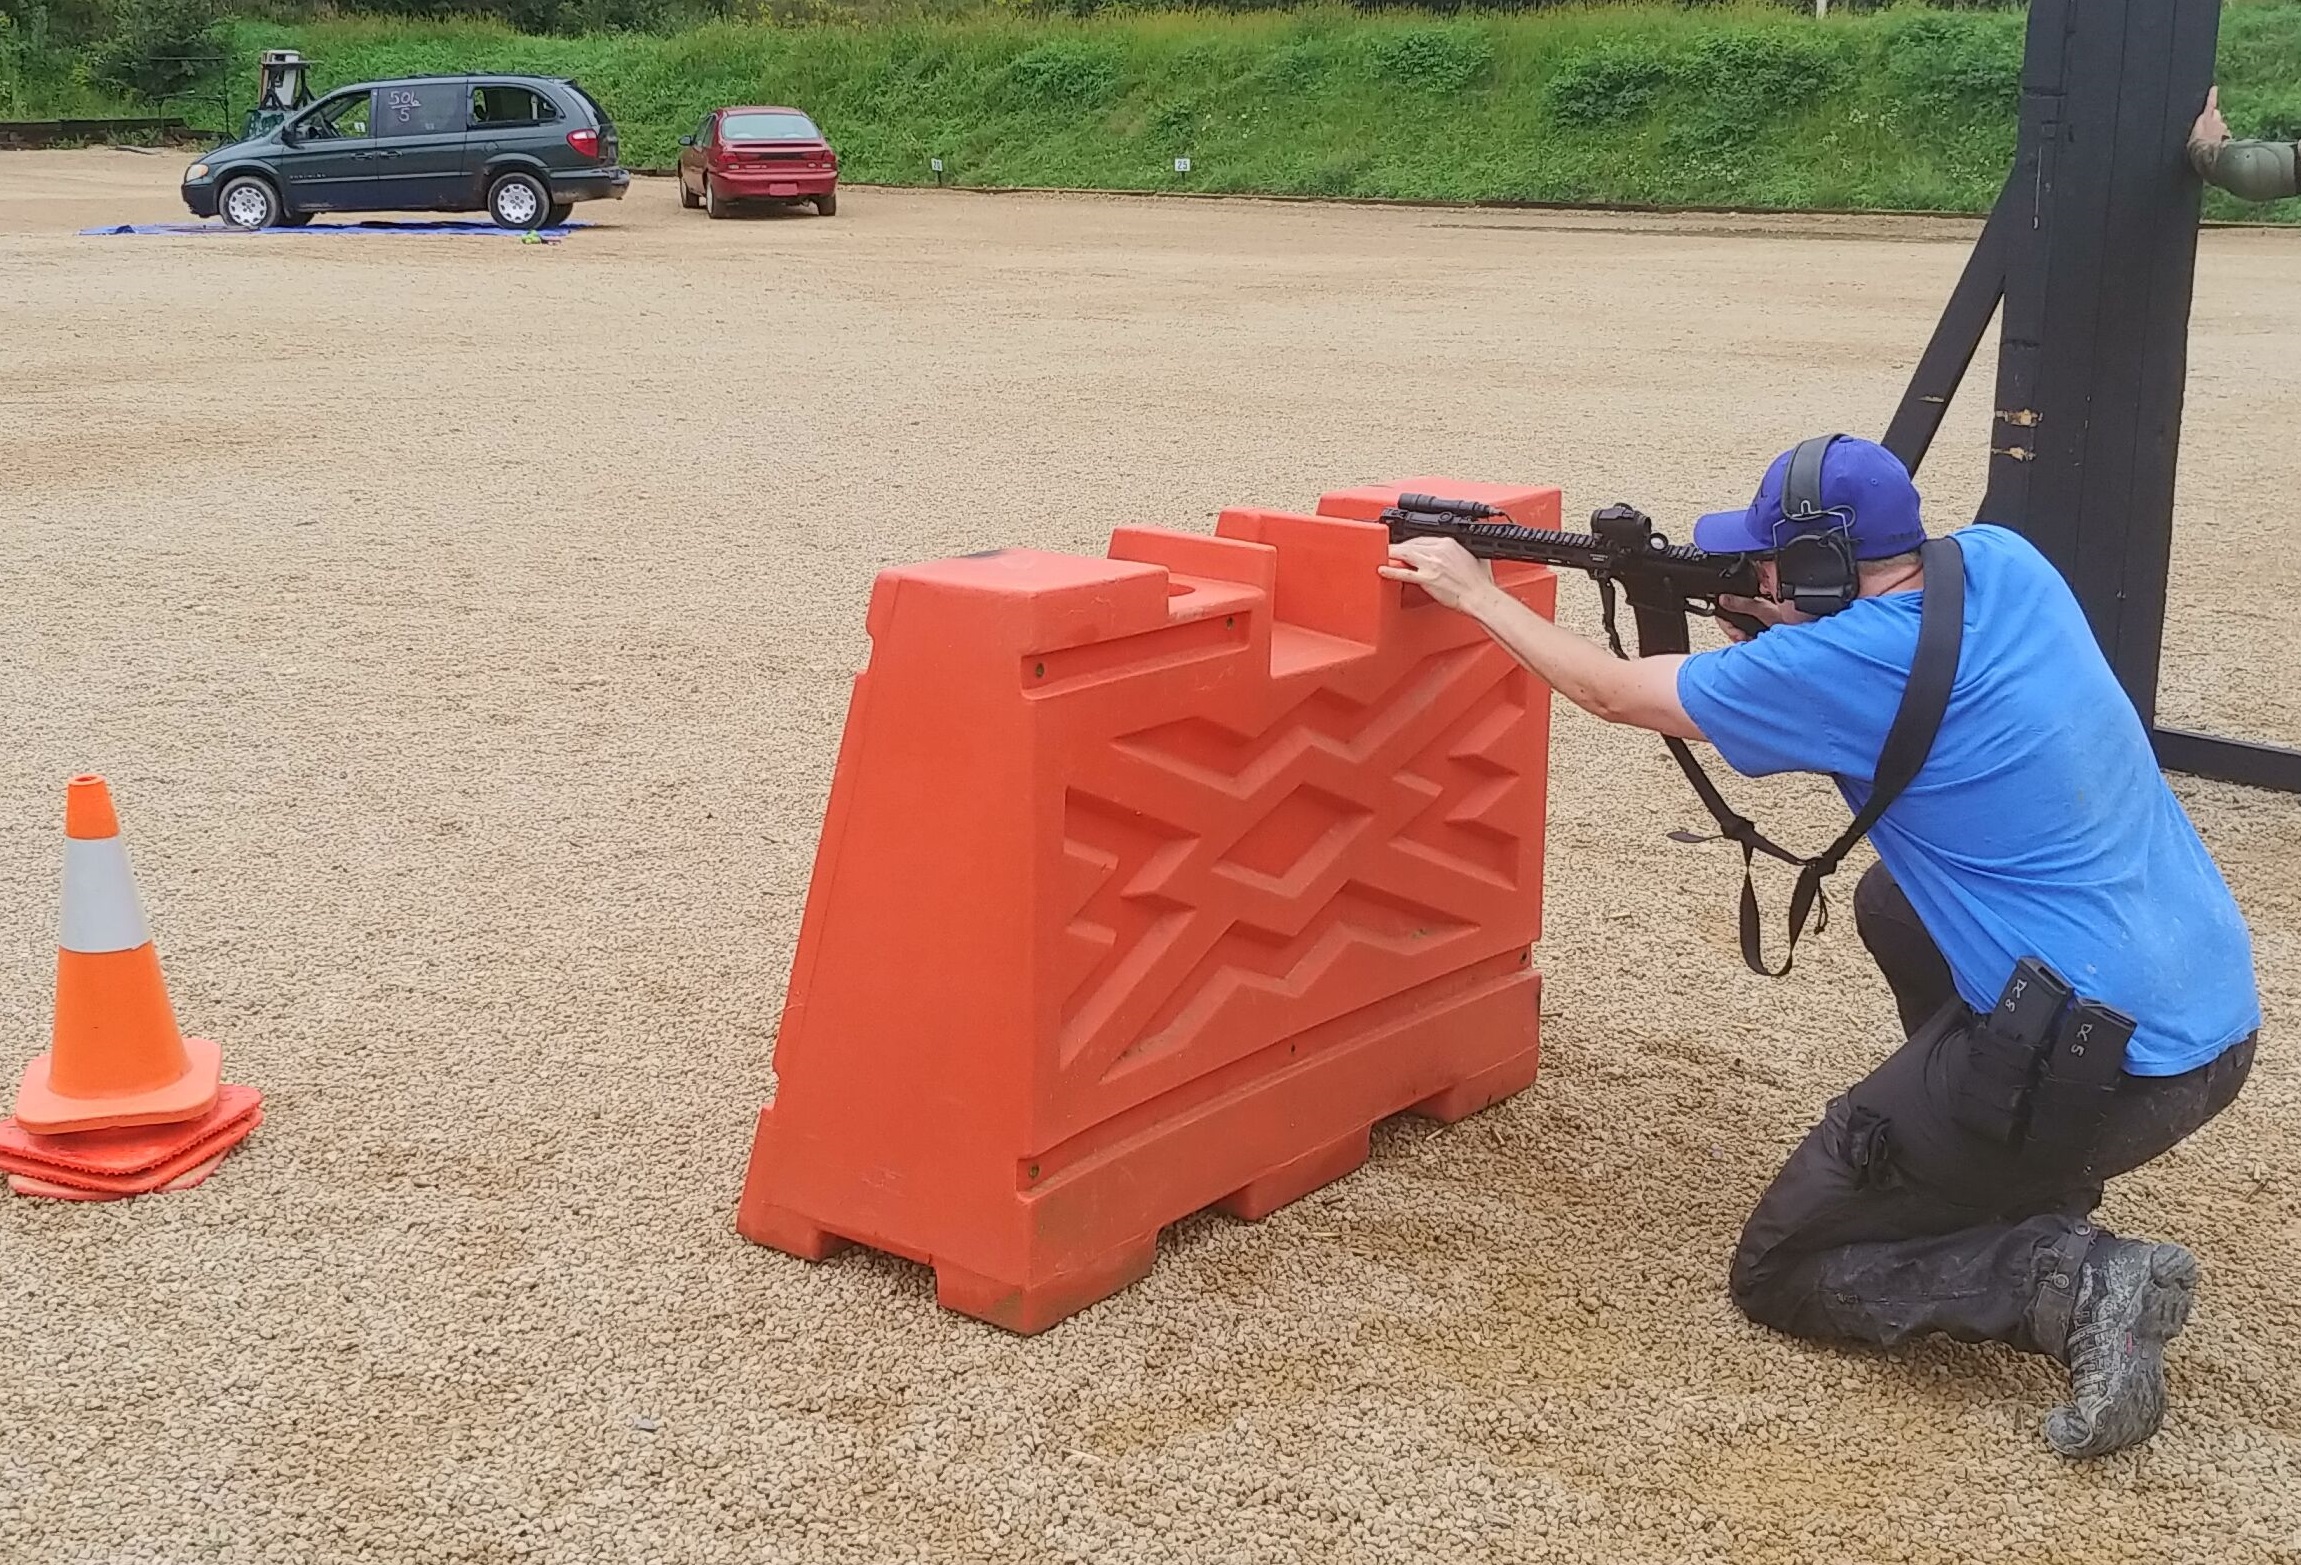
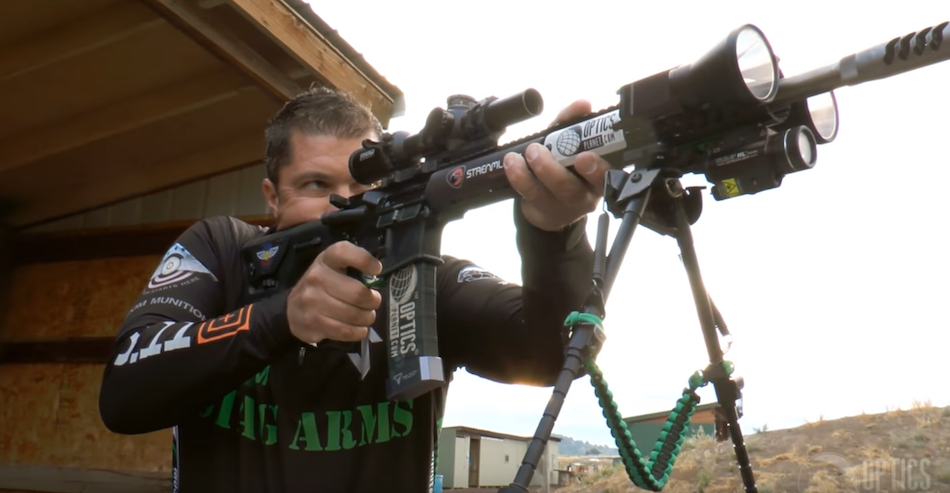
Kneeling tactical shooting in Fjallraven trousers.
Both pants are made out of G-1000, a 65% polyester and 35% cotton mix for the main material which is durable and weather-resistant, to say the least. The Keb has some stretch fabric sections which really aid in moving around and getting in and out of some more awkward positions. The Barents Pro come with a double layer of fabric over the knees and rear which really come in handy in kneeling and seated positions.
Uses
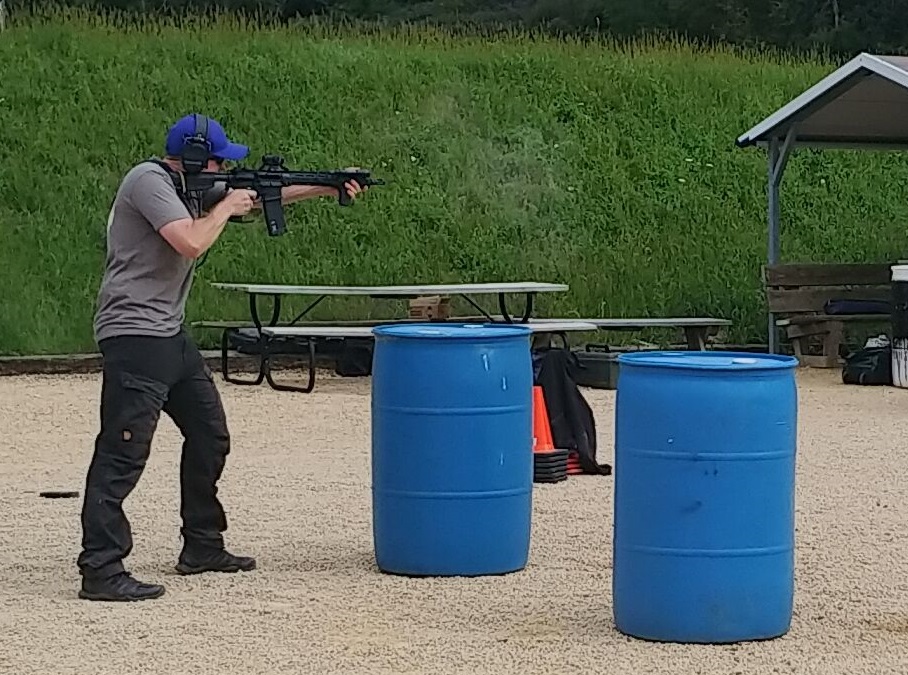
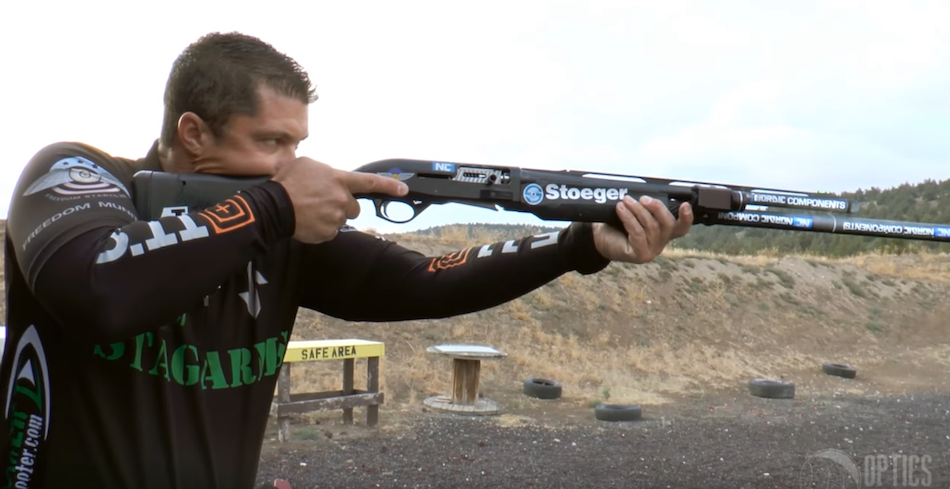
Standing offhand tactical shooting in Fjallraven trousers.
I’ve used them in various competitions, firearm training courses, hiking, and other outdoor activities. I’ve yet to do any damage to these pants, not for lack of trying though. Rocks, water, sand, empty shell casings, glass, and all the miscellaneous things that end up on a shooting range during long days of training were a non-issue. Both trousers also had no issues using my normal everyday belt or various inner/outer belt combos for whatever I was doing.
Final Thoughts
With the amount of use these trousers went through without even a thread coming out of place and the ease of accessibility for the things I needed most while on the range and outdoors, I am definitely impressed and wanting more. After seeing how these trousers hold up I’ve been on the hunt for an Övik hand warmer to help me finally keep my hands toasty in the field during those long fall and winter days and nights.
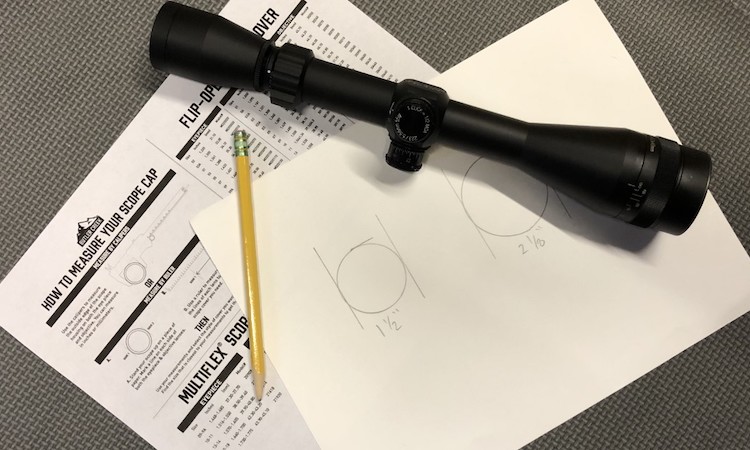
Finding the right size scope cover for your rifle scope is simply a matter of measuring and then cross-referencing the dimensions with the manufacturer, according to Butler Creek, a Montana company that has been making scope caps for most of its 90-year history.
Butler Creek product manager Will Hemeyer said that’s one of the most common questions they get: “How do I know what scope cap and scope cover, what size do I need to buy?”
Hemeyer explained there are three ways to measure to find the right size scope cap, but before you do, you’ll need to get a couple of things. You’ll need a pair of calipers or a ruler, and the Butler Creek sizing chart.
According to the instructions, you can do the first two at home. They require that you measure with calipers or a ruler.
If you measure with calipers, you just simply clamp them around the outside edges of the rifle scope housing. That means both the eyepiece and the objective. Hemeyer suggested using calipers will get you more precise measurements.
Measuring with a ruler is a two-step process. First, you trace both ends of the rifle scope on a piece of paper, and then you use the ruler to measure the diameter of each ring. While the ruler won’t be as precise as the calipers, Hemeyer said it’s a good approximation. However, if it falls between two sizes, you should select the smaller of the two.
Once the measuring is done, all you have to do is cross-reference the measurements with the sizing chart to find the correct size scope cover. The guide is organized by model and lists sizes for eyepiece and objective.
The third way Hemeyer suggested requires access to a Butler Creek chart that usually accompanies the scope caps inside of a retail store. With the chart, you match the scope to rings printed on the chart.
In these times of wildly fluctuating ammo supplies,* shooters are looking for the best dry-fire training system. Many are turning to laser target practice to incorporate the skills of dry-firing with the simulation of live-fire accuracy. Since most kits cost over $100, shoppers want to make sure they’re spending wisely to get the best laser dry-fire training system for the money. Still, in the long run, they’re cheaper than a few hundred rounds of live practice ammo, and they’ll last a lot longer.
Your shooting skills can diminish after just a week without practice. If you have a gun for personal defense, line-of-duty, or are a target shooter, you should be practicing consistently. Read on to learn more about what a laser training system is and explore the pros and cons of the different types.
*To see our frequently updated ammunition inventory that’s in stock and ready for shipment now, click here.
What Is Laser Target Practice?
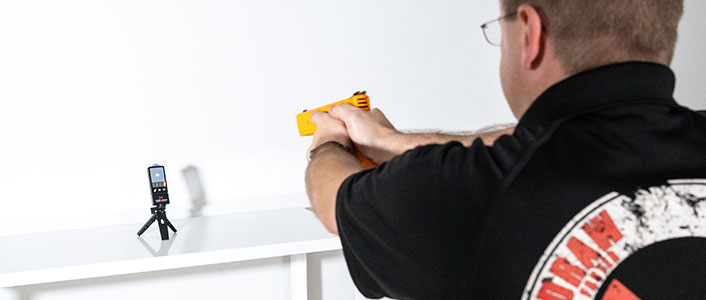
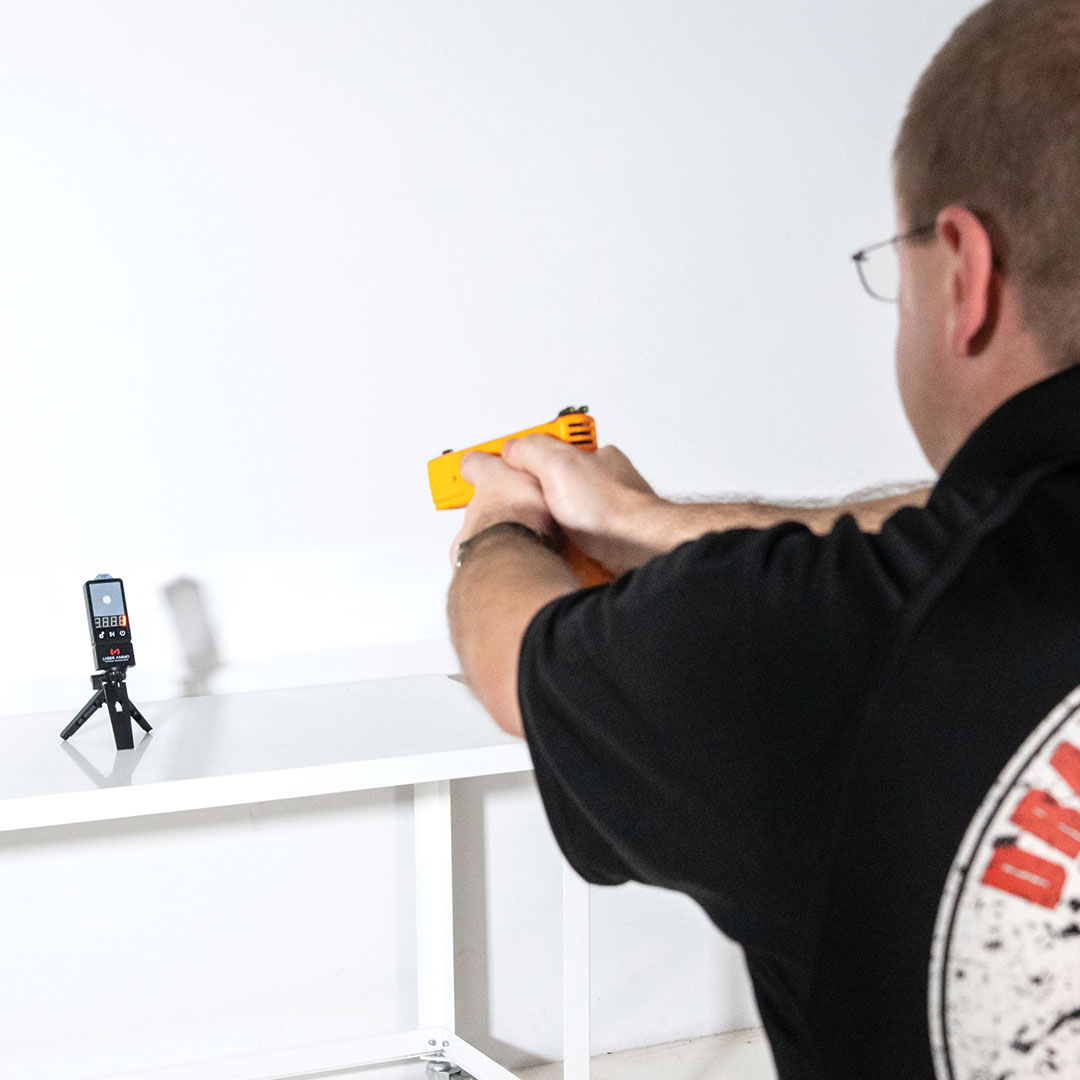
Laser Training With Pistol and Target
Have you ever been to a carnival shooting gallery booth that uses a replica gun to shoot light at targets that fall down or make noise? Then you’re already familiar with the concept of laser target practice. This is also like video games that use a plastic gun instead of a joystick or controller. Laser trainers are far more realistic and accurate than a carnival or video game, though. It’s a form of dry-fire training that is more reactive than the traditional method. They shoot lasers that help to track target acquisition, trigger control, and shot placement, allowing ammo-free practice for reinforcing skills of new shooters and helping train away bad habits in existing shooters. They don’t require any trips to the range, so they’re ideal for training at home in your spare time. Some have reactive targets or use on-screen targets, while others simply show the laser dot on a wall or paper target.
Laser Training On-Screen Reactive Target
Laser Training System Types
There are two basic types, and your budget and needs will determine what the best dry-fire training system is for you. One uses your existing firearm, and the other is a complete kit with a training gun and targeting system. All are battery-operated, which is really the only additional expense once you’re up and running.
Existing Firearm Systems
When using an existing firearm, remove all live ammunition from the room where you’ll be practicing to ensure that it cannot be introduced to the firearm, leading to an accidental or negligent discharge. Always follow the 4 Rules of Firearm Safety.
Universal In-Muzzle/In-Bore Trainers
These are the simplest systems, where the laser device is simply placed in the muzzle (bore) of the firearm. Some can be used in combination with snap-caps to protect the firing pin and allow you to chamber rounds from a magazine if desired.
Pros: inexpensive, works with multiple calibers and types of firearms, including rare and uncommon calibers
Cons: will need to be zeroed every time they’re set up in a different firearm, cannot practice holster draws
Universal in-muzzle/in-bore trainers are the best dry-fire training system for those on a budget who want versatility for multiple firearms.
In-Chamber Systems
In-Chamber Laser Trainer
These are essentially reactive snap-caps that fit into the chamber of the firearm. They are specific to the caliber of the gun, like a 9mm laser trainer. They’re best for double-action firearms that drop the firing pin with every trigger pull. Single-action semi-automatics with an external hammer like a 1911 won’t need to have the action worked each time, but you will have to pull the hammer back each time. If you don’t have a double-action pistol or an external hammer, the slide will need to be worked each time you fire to reset the firing pin. They will not feed from a magazine and remain in the chamber each time you work the action. With revolvers, you’d need at least two for repeat fire, or you’d need to rotate the cylinder back to the chambered round each time you fire.
Pros: training on your gun allows for holster draw-and-fire exercises, rarely (if ever) needs to be zeroed, durable and will last through thousands of shots, available in common calibers, good choice on a budget when compared to full laser training kits and sets
Cons: each one is limited to a single caliber, not available in uncommon or rarer calibers (although some may have adapters sold separately), will eventually need to be replaced
In-chamber systems are the best dry-fire training system for those who want to use their own firearm and are looking for a more reactive setup than plain snap-caps.
Laser Training Pistols
Laser Training Pistol
These are pistols that are replicas of actual guns, like a Glock dry-fire kit for example. Although they look like dummy guns (aka “blue guns”), they are not the same. They are molded from the exact shape of the firearms they represent, utilizing a laser and target system that is usually sold in a set. Some even have simulated recoil on each shot so that you can practice target acquisition.
Pros: no chance of accidental/negligent discharge, no need to reset firing pin after every shot, can practice realistic simulations of draw-and-fire holster exercises, included target system allows you to fine-tune your skills
Cons: limited models available, doesn’t have the same “feel” of weight and trigger pull as an actual gun, can be expensive, if it’s a different model than your gun it will not exactly replicate grip and other specifics
Laser training pistols are the best dry-fire training system for safety and specific models, especially for shooters who want to fire repeatedly without resetting firing pins and are looking for the most accurate setup.
To recap, the two basic types of laser training systems are laser training pistols and those used with existing firearms. For your current gun, you can choose from those that go in the muzzle or those that are chambered. They all have their pros and cons depending on your needs, preferences, and budget. Shop the three most popular brands here:
Eye dominance is a term usually mentioned during the initial stages of marksmanship training. It’s a rather self-explanatory term. Just like how most people have a dominant hand, they also have a dominant eye that more accurately relays visual information to your brain.
For shooters, especially beginners, it’s important to identify your dominant eye because it could dictate how you physically shoot and orient your gear. In this article, we’ll define eye dominance, tell you why it’s important, show you how to find your dominant eye, and give training tips for shooters who are cross-eye dominant.
What is Eye Dominance?
In simple terms, eye dominance is the eye you use to focus. While it seems logical that handedness would dictate eye dominance, or vice versa, it doesn’t.
According to medical experts, the left side of the brain controls your right hand while the right side controls your left hand. Yet, vision is controlled by both sides of the brain, so each side controls part of each eye. What that means is handedness and eye dominance develop separately.
However, there is a correlation between handedness and eyedness. In a 2011 study, medical researchers tested 100 subjects, of which 97 were right-handed, using two different eye dominance tests.
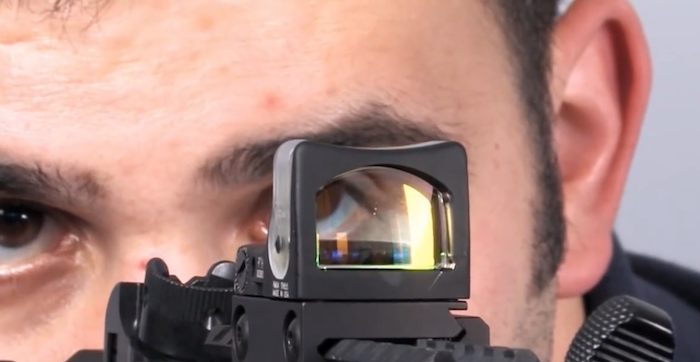
The shooter is holding a pistol with his right hand and aiming with his right eye.
The first test simply asked subjects which hand they preferred to use to perform individual tasks. The questionnaire revealed that 84 percent of the respondents were both right-handed and right-eye dominant.
The second test, called the Miles test, is a self-performed vision test, which I’ll get into later. It showed 75 percent as both right-handed and right-eye dominant.
But as the saying goes, correlation does not equal causation. The variations were more complicated within the remaining groups.
On the first test, data showed 13 percent of right-handers as left-eye dominant and 66 percent of lefties as right-eye dominant. That means 15 percent of all subjects have cross dominance, meaning they were right-handed but left-eye dominant and vice versa.
For the second test, data showed 24 percent of the remaining righties as left-eye dominant and 66 percent of left-handers as right-eye dominant, which means 26 percent of righties and lefties were cross dominant.
In the end, the study found “no significant relation between dominant eye and dominant hand.” However, researchers did suggest that “eye hand dominance could serve as a factor in athletes or guiding young players on whether to hit left or right hand or to switch hit.”
The shooter is holding a rifle with his right hand and aiming with his right eye.
Eye Dominance and Marksmanship
In 1996, the federal government studied how eye dominance affected novice shooters’ ability to learn basic rifle marksmanship. Specifically, they wanted to know more about cross dominant shooters. For the study, they monitored 308 Army recruits during basic training and their marksmanship scores.
During training, recruits are taught how to shoot their service weapon, and then at the end of rifle training, they’re given a qualification test.
Researchers found that recruits with cross dominance had significantly lower scores than those with common alignment. According to the study, the average score of recruits with uncrossed dominance was 86.1 percent while cross-dominant recruits had an average score of 56.5 percent.
As a result of the study, the researchers determined that eye dominance influences how new shooters learn marksmanship skills. They explained that since it’s easy to determine hand and eye dominance, the military should employ specialized training to teach cross-eye dominant shooters.
In the most practical sense, that meant instructors needed to ensure that their cross-dominant shooters are “holding the rifle with the appropriate hand or need to change.”
Eye Dominance Test
The Miles test is the most popular and practical way to test eye dominance. How to determine eye dominance is really easy.
Find an object off in the distance to focus on.
Form a triangle with your hands while centering the object.
Close the triangle so it gets smaller.
While focusing on the object, close your right eye.
Open your right eye and then close the left eye.
Interpreting the results is also easy. If, for example, the object remains center when you close your left eye, your right eye is your dominant eye.
The inverse of that is when you close your right eye and the object shifts out of sight, it affirms that your left eye is NOT your dominant eye.
Training with Cross Dominance
For those whose dominant eye aligns with their dominant hand, there isn’t much to change when it comes to training or learning the fundamentals of marksmanship. But as we’ve already learned, cross dominant shooters might have a difficult time.
Savage shooter and instructor Patrick Kelley said in a video that the biggest challenge for cross-dominant shooters is determining which shoulder to use. He should know because he is one. Kelley is right-eye dominant, but left-handed.
The shooter is holding a shotgun with his right hand and aiming with his right eye.
For rifles, Kelley suggested using the shoulder that aligns with your dominant eye. “If you’re right eyed, use your right shoulder,” he said. “Make it simple and use your right shoulder.”
For shotguns, he said you should again use the shoulder that aligns with your dominant eye. “It knows what it needs to see to break a shot,” he said.
Lastly, for handguns, Kelley said a lot of cross dominant shooters get tripped up on which hand to use to shoot a pistol.
He suggested using your dominant hand because using your dominant eye only requires a slight shift of your head. “Just move your head a tiny bit one way or the other way to get a good line up on your sights,” he said.
Overall, Kelley’s parting advice is to use the shoulder commensurate with your dominant eye for long guns and your dominant hand for handguns.
“That is all you need to know about cross dominance and eye dominance,” he said. “Pick one and practice. You’ll get good at it no matter how you’re set up. Even if you’re weird like me and cross dominant.”
Parting Shots
If you take away anything from this article, hopefully it’s this: Identify your dominant eye before you begin marksmanship training. It’s easy, especially if you employ something as simple as the Miles test. After that, let your dominant eye dictate how you hold long guns, and let your dominant hand dictate how you hold a handgun.
What are some training methods you use to train cross dominant shooters? Share them in the comments.
In 2020, gun owners developed a strong desire to practice shooting at home. That’s because the gun industry had a record-setting year for gun and ammo sales as many gun buyers responded to the Coronavirus pandemic, social unrest, and political dissent. Demand, especially for ammunition, continued to outpace supply at the beginning of 2021.
Now, shooters want to learn how to practice shooting at home because it either costs too much for ammo or they just can’t find it. In this article, you’ll learn ways to practice and sharpen your shooting skills without live rounds.
Why You should Practice Shooting at Home
Shooting is a sensorial experience. You hear the bang, feel the recoil, see the muzzle flash, and smell burnt gunpowder. Some people shoot for that experience alone. It’s a thrill like driving a fast car. Others do it because they enjoy the challenge of controlling a small explosion and hitting their mark. A skilled shooter aims to master the mechanical movements of operation.
Great marksmanship requires perfecting a series of basic movements. These include standing, gripping, drawing, aiming, breathing, and pulling the trigger. Adding ammo into the mix will reveal if you’re doing it correctly, but it will also exaggerate mistakes when you do them incorrectly.
No ammo? You’re not the only one.
Believe it or not, you can do a lot of the hard work off the range. You don’t need live ammo at all to refine the movements to shoot a gun. Instead, you develop muscle memory through practice and repetition while going through the motions.
What this all boils down to is a term called “dry fire.” Dry fire training – or dry firing, dry shooting, dry practice – means you follow all the steps necessary to shoot a gun without live ammo. And it’s a way you can practice shooting at home.
While shooting practice can improve technique, traditionally, dry firing has two downsides. First, you have to recharge your gun for every follow-up shot. And second, you can’t see progress until you get back on the range. This guide will highlight products that rectify one or both of those issues.
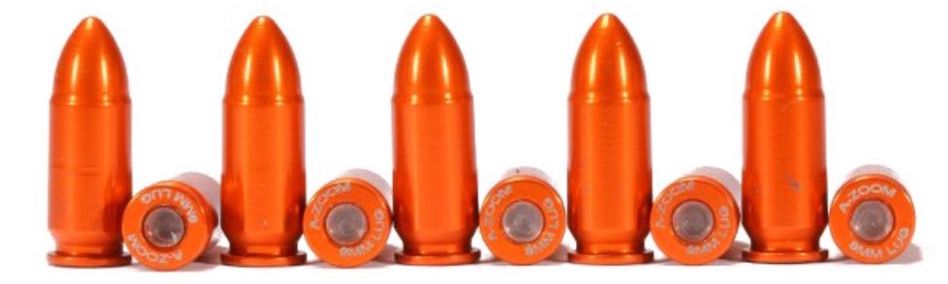
Snap Caps
A-Zoom Snap Caps for 9mm firearms.
Snap caps, or dummy rounds, are the most basic dry fire tool. They protect firing components in rimfire firearms, revolvers, and some older models. When you load them into a magazine, they add weight like live rounds. You can also create malfunction drills like double feeds and then practice remedial action. However, snap caps won’t enhance target practice at home, but we’ll return to this later.
Dry Fire Mag
A dry fire mag simulates trigger reset. The advantage to using it is you can rapid-fire or engage multiple targets without re-cocking the gun when you practice shooting at home. While the dry fire mag simulates trigger reset, it doesn’t actually reset the trigger.
The way it works is you insert the magazine into your pistol with the trigger cocked. Next, you pull the trigger so it breaks. Afterward, the de-cocked trigger will press against the magazine. There’s a tab inside the magazine that presses against a spring, which engages the trigger so it feels like the trigger is cocked.
Depending on the brand, the dry fire magazine will contain certain additional features. For example, the DryFireMag makes an audible clicking noise and you can adjust spring tension to increase or decrease trigger pull weight. Another one is the DAA Dry-Fire Practice Magazine. It has a weighted body so it feels like a loaded mag.
In short, a dry fire magazine will enhance the overall dry fire experience. A single mag costs around $100.
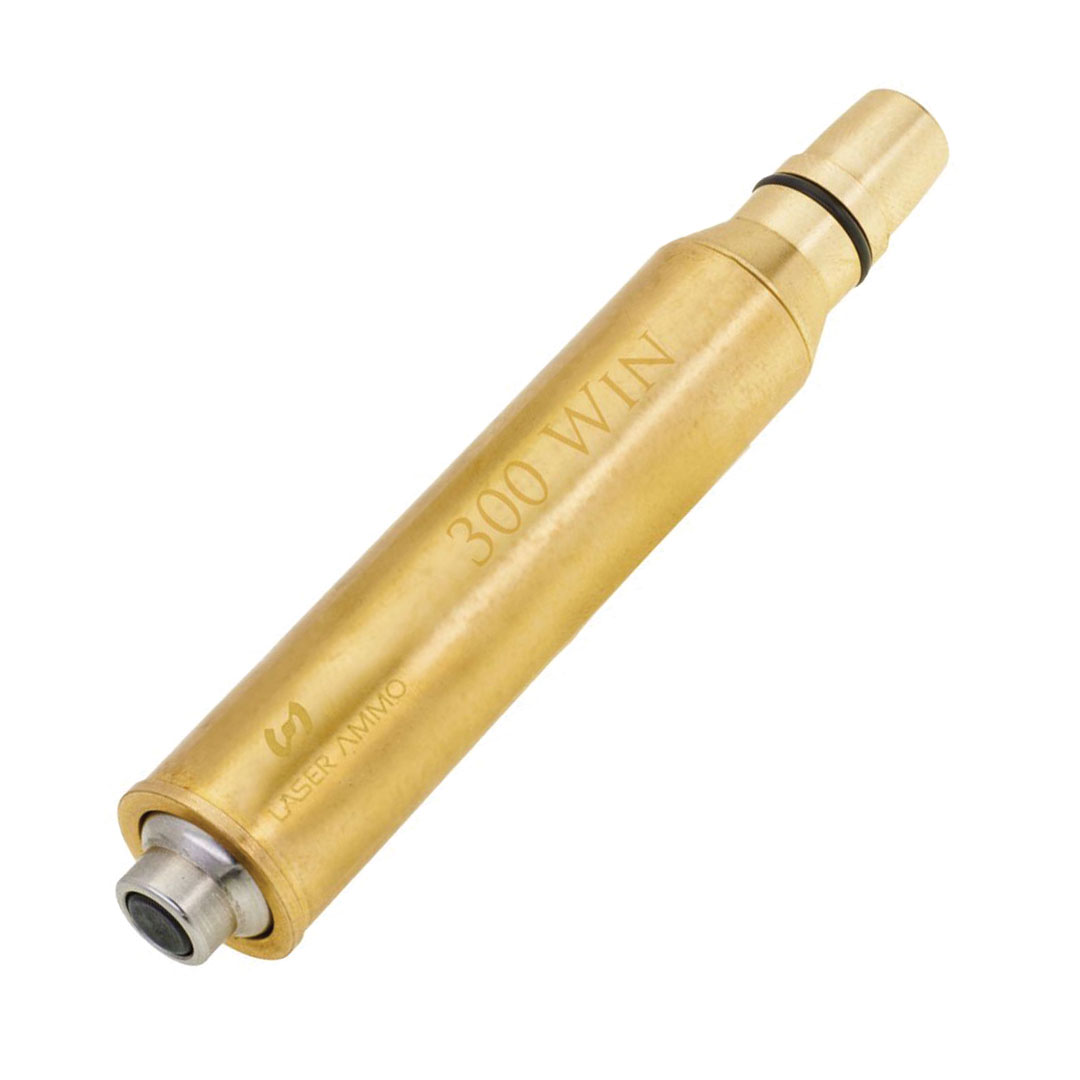
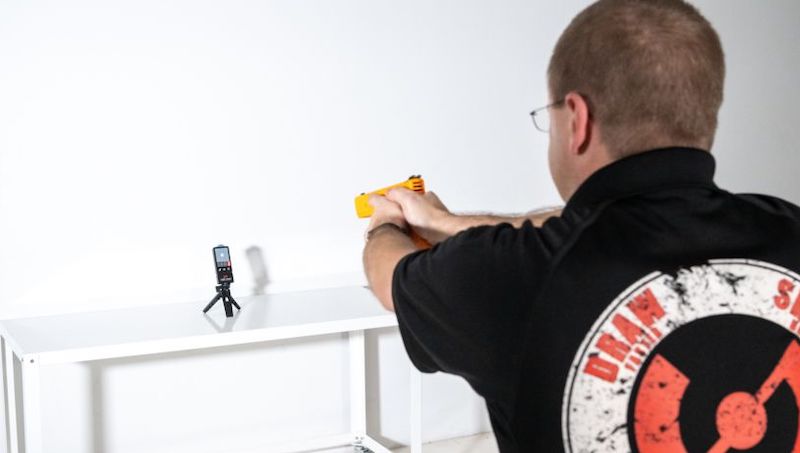
Laser Cartridge
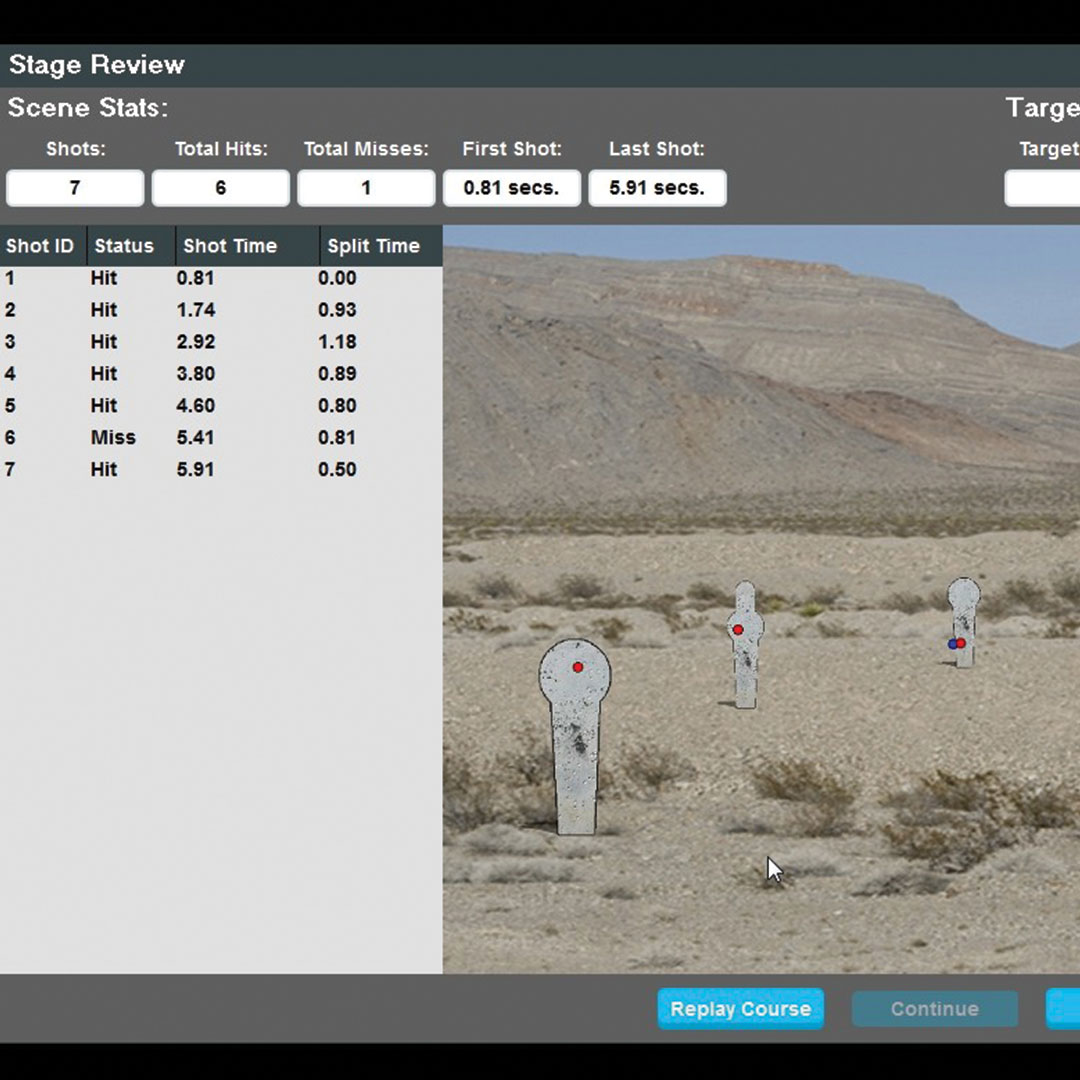
Training with a Laser Ammo electronic training target and 9mm laser cartridge.
A laser cartridge shoots out a laser beam so you can see the point of impact during dry fire practice. The cartridge is designed to lodge inside the chamber so it won’t extract when you recock your gun. The big advantage to laser target practice is you can see where you hit the target. A single cartridge ranges in price from $60 to a little more than $100.
While you can use a dry fire laser cartridge to shoot at whatever target you have, most laser cartridge manufacturers produce targets as well. These laser targets tend to be reactive in some way. They also tend to be on the expensive side at $200 to $300, but they offer some training benefits.
LaserLyte
LaserLyte offers a pistol cartridge that will fit .380- to .45-caliber pistols, a rifle cartridge fitted for .223 or 5.56mm, and a universal cartridge that will work with .380- to .45-caliber revolvers. LaserLyte offers a handful of targets for training or fun, including RumbleTyme, which vibrates and spins when you shoot it.
G-Sight
G-Sight offers pistol cartridges, but each one is sized for a specific caliber. These include standard sizes from .380 to .45. They also offer cartridges for .45 Long Colt and Makarov pistols. G-Sight sells basic paper targets, but for training purposes, they offer a free training app that includes drills and records shot placement.
A LaserLyte Laser Cartridge for 9mm handguns. It shoots laser beams.
Laser Ammo
Laser Ammo offers standard pistol, revolver, and AR cartridges, but they also have adapter kits, so you can re-calibrate the cartridge. They offer Glock-specific cartridges that vibrate as well.
Additionally, they offer both interactive and training targets with a host of functionality. For example, the Laser PET system records time and shots and also allows you to swap out the actual target to simulate different ranges. However, the systems will not work with non-Laser Ammo cartridges.
Dry Fire Training Attachments
A dry training fire system usually includes a device that you mount to your firearm and software that you need to download on a smartphone or computer. The system is programmed to collect and record several data points like shot placement, muzzle movement, shot time, etc. And then it will also help you analyze and interpret the results so you can improve your technique during target practice at home.
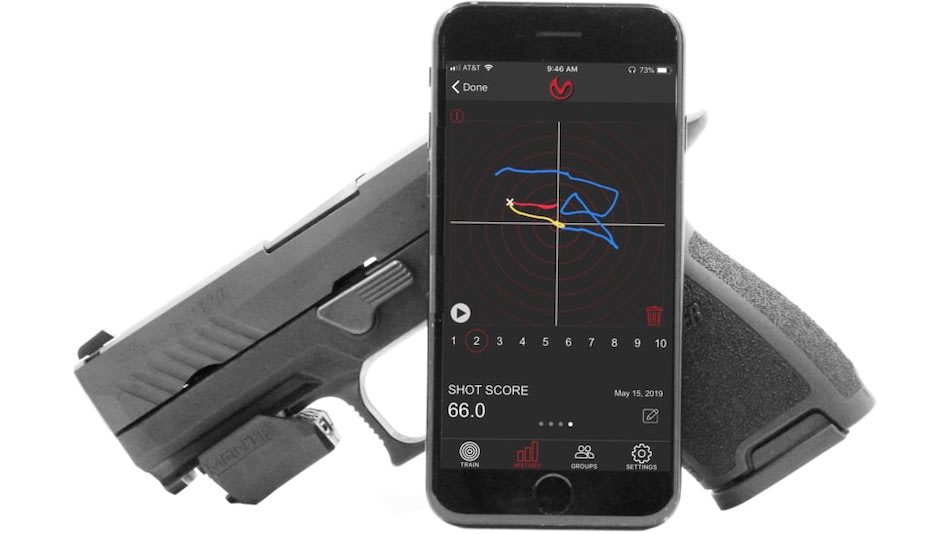
Mantis X
Mantis X is a smart sensor that attaches to a Picatinny rail and collects data points on your shots. You can then review the data for patterns using an app on a smartphone. The device was originally designed for live fire practice, but the company says its software has been updated for dry fire training. Also, Mantis X offers laser cartridges and kits that pair with the device.
The Mantis X3 shooting performance system.
iTarget
iTarget is a training kit that requires a smartphone. An iTarget kit comes with a target, a sled for your phone, and a laser cartridge. For it to work, you need to mount your phone in the sled, aim the camera at the target, load the laser cartridge in your pistol, and then point and shoot.
iDryfire
iDryfire is a scaled-down version of iMarksman, software designed for law enforcement and military applications. However, iDryfire offers target and scenario-based training as well. An iDryfire kit includes the software, a camera, and a training cartridge. It will work with any PC.
LaserHIT
LaserHIT is a training kit that functions using a smartphone but allows you to also pair with your TV, so you can see hits on target in real-time. A LaserHIT kit comes with a training cartridge, phone stand and tripod, and a wireless TV adapter.
Laser Trainers
Laser training guns range from very realistic to something more akin to a dummy gun. They operate like real firearms in that they have a trigger and sights, but they aren’t firearms. They were built specifically for dry fire. They shoot out a laser beam and are typically compatible with other laser training targets. It’s just another way to do laser target practice.
The purpose of a dry fire laser training gun is to significantly reduce the stakes of gun handling during target shooting or scenario-based training. There’s absolutely no risk of an accidental or negligent discharge. Despite that fact, you still treat it as if it were real and exercise gun safety.
A Smart Firearm Training Devices designed to replicate a Smith & Wesson M&P pistol.
SIRT
The Shot Indicating Resetting Trigger (SIRT) Trainer Pistols by Next Level Training have the look and feel of a real pistol sans the recoil, slide lock, and noise. The trigger resets, a laser beams out with every shot, and the magazine is removable.
There are multiple SIRT guns. They’re designed to replicate popular duty weapons and even some rifles, but red paint on key components indicates that they’re trainers. The price starts at $240.
Smart Firearm Training Devices
Not to be confused with “smart guns,” which is completely a different topic, Smart Firearm Training Devices are trainers that replicate popular duty weapons, but they look like dummy guns. Some are yellow, some are blue, and others are black with an orange tip.
On Smart Firearm Training Devices, the trigger resets, a laser beams out, and they have a removable magazine. Additionally, they make a gunshot noise when you pull the trigger and they’re equipped with warning sensors to flag safety issues like a finger lingering inside the trigger guard. The price starts at $240.
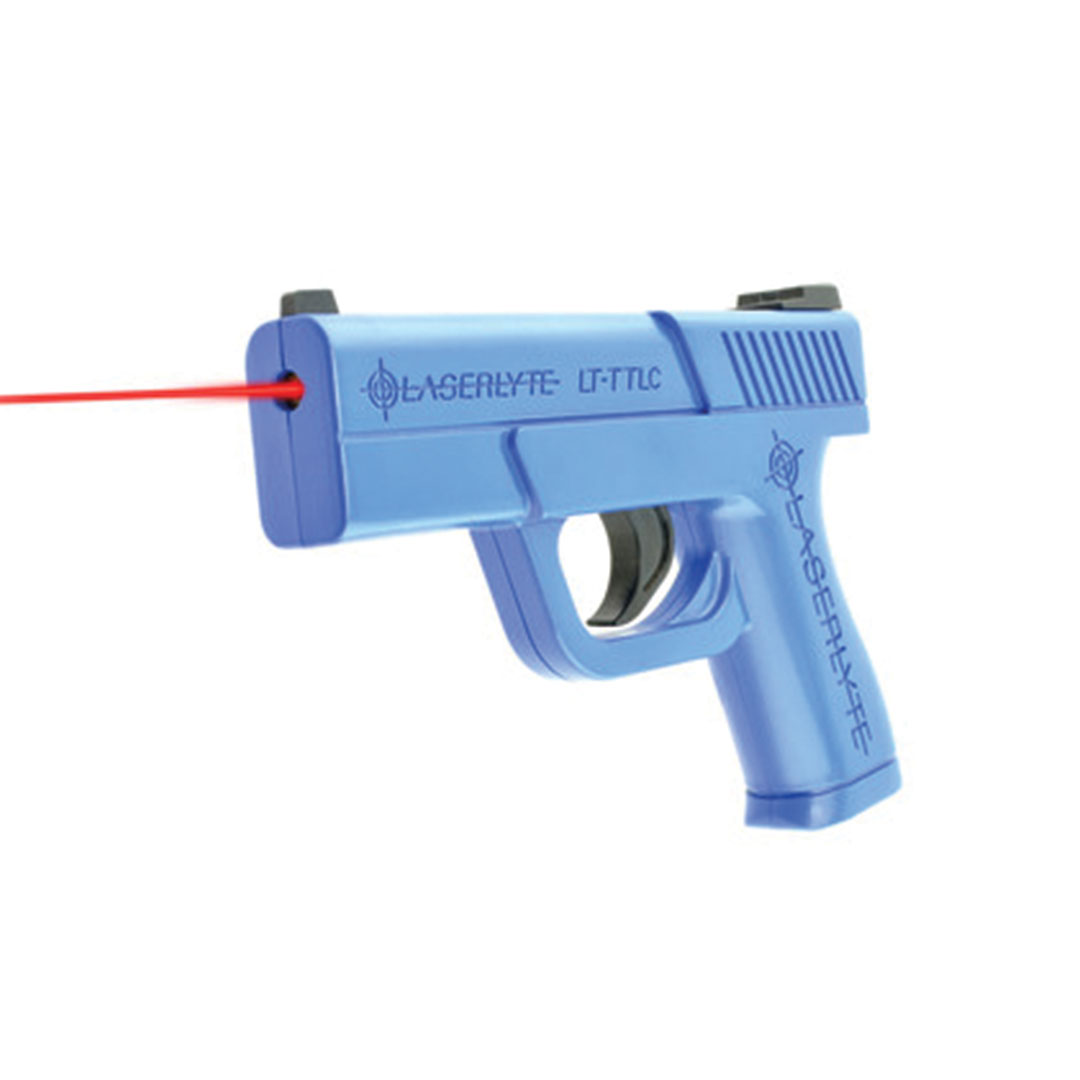
LaserLyte
LaserLyte training pistols have the weight and trigger pull of a real gun, but they’re available in three generic designs: a full-size Glock, a compact Glock, and a Smith & Wesson revolver. The price starts at $135.
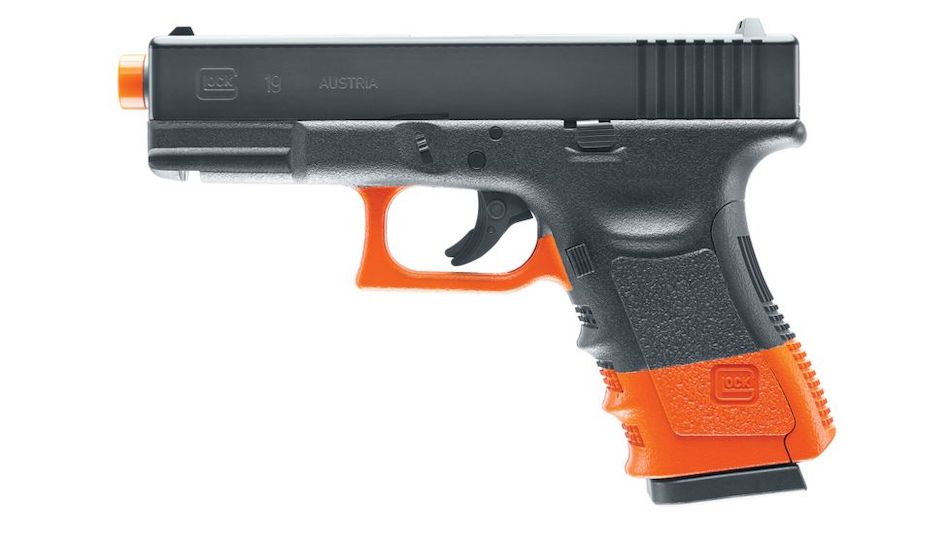
Airsoft Guns
Most airsoft guns replicate the looks of the firearm they’re designed after. Their controls are also very similar. Therefore, you can simulate all the movements of operating an actual firearm like racking the slide, inserting and removing magazines, pulling the trigger, and some of them actually recoil.
An Umarex pistol designed to replicate a Glock 19 Gen 3. The airsoft gun cycles using a CO2 cartridge.
Airsoft guns shoot plastic pellets or BBs, and they shouldn’t be confused with air guns, which generally shoot a metal projectile that can be deadly. An airsoft gun is powered in one of three ways: spring, gas, or electric.
Spring-powered are the most common types of airsoft guns. They’re inexpensive, usually made of plastic, and usually have to be cocked by hand.
Gas-powered are loaded with some kind of gas cylinder (compressed air, CO2, propane, etc), so they’re semi-auto and actually have recoil.
Electric-powered air guns generally shoot full-automatic, which won’t help you develop fundamental marksmanship skills.
While airsoft guns are easy to dismiss as toys, more and more shooters are giving them a serious look as a training tool. Plus, they require exercising the same technique, so they’re effective for shooting practice and target practice. Traditionally, gun manufacturers licensed other companies to make replicas of their guns, but recently major gun manufacturers like Sig Sauer have started producing airsoft guns on their own.
The Snap Cap Drill
Snap caps won’t necessarily improve dry fire training, but they can improve your live-fire training. That is whenever you can finally get back on the range. It’s called “The Snap Cap Drill.”
Beth Alcazar, an editor for USCCA magazine, explains the snap cap drill is essentially mixing snap caps in with live ammunition when you’re loading magazines. The idea is this: a snap cap represents a malfunction, so in response, you’re supposed to either take remedial action or change the magazine.
“The dummy round is one of your best friends, really, because you can use it for a lot of different things,” she said, but the most important thing, she added, is you can use snap caps as a “diagnosis tool.”
“We are naturally fighting what our body wants to do (when shooting). Physically and mentally, we’re fighting these things. We have this reaction … when that gun is moving and we are shooting, sometimes we have the natural reaction of bringing that gun down,” Alcazar said.
The key thing to look for during snap cap drills is flinching. If you are flinching during shooting practice, and it’s ruining your shots, you should condition yourself to remove or ignore that feeling of anticipation.
Parting Shots
As you can see, there are a lot of training tools available that allow you to practice shooting at home. Just to reiterate, this article covered the following products:
Snap Caps
Dry Fire Mags
Laser Cartridges
Dry Fire Training Systems
Laser Trainers
Airsoft Guns
What are some of the tools you use for dry shooting? Tell us in the comments below.