• man cleaning gun with kit supplies

    How to Clean a Gun: Beginner’s Guide to Cleaning Firearms

    May 27 • How-To, Firearm Maintenance • 3252

    Whether you’re a first-time firearm owner or need a basic refresh on gun cleaning, you’ve come to the right place. Learning how to clean a gun is an important part of becoming a responsible owner, and proper cleaning techniques will preserve your weapon and extend its lifetime of use.

    We’ll cover the essential gun cleaning supplies you need to clean a handgun, rifle, or shotgun and give you some pointers on how to properly (and thoroughly) clean your weapon. While there are specific guides out there like How to Clean an AR15 or your Glock pistol, you can apply the knowledge gained from this article and use the instructions in your owner’s manual to clean any type of firearm. With the season of spring in full fling, there’s never been a better time to brush up on your cleaning habits.

    Why is Cleaning Your Gun Important?

    • Safety

    Guns contain tons of small moving parts, and even one dirty component can impact the function of your firearm as a whole. Maintaining a clean weapon ensures your gun fires properly and accurately. A poorly kept gun can impact bullet trajectory and become dangerous to shoot. If you carry for personal defense, you need to be confident your gun will perform at any time.

    • Longevity

    When you don’t clean your gun after use, residue and moisture can accumulate over time, leading to rust, corrosion, and malfunction. Proper gun cleaning techniques prevent the buildup of contaminants to preserve your weapon’s service life and maintain its performance.

    • Learn More About Your Gun

    Complete gun cleanings require you to take apart your weapon and reassemble it afterward. You’ll get a closer look at its internal workings, which also gives you a chance to inspect gun parts for damage.

    How to Clean a Gun: First Steps

    If this is your first time cleaning a weapon, don’t just grab a gun cleaning kit and get to work. This is a gun, not a typical household chore. You must respect your weapon and understand the danger it presents in any situation.

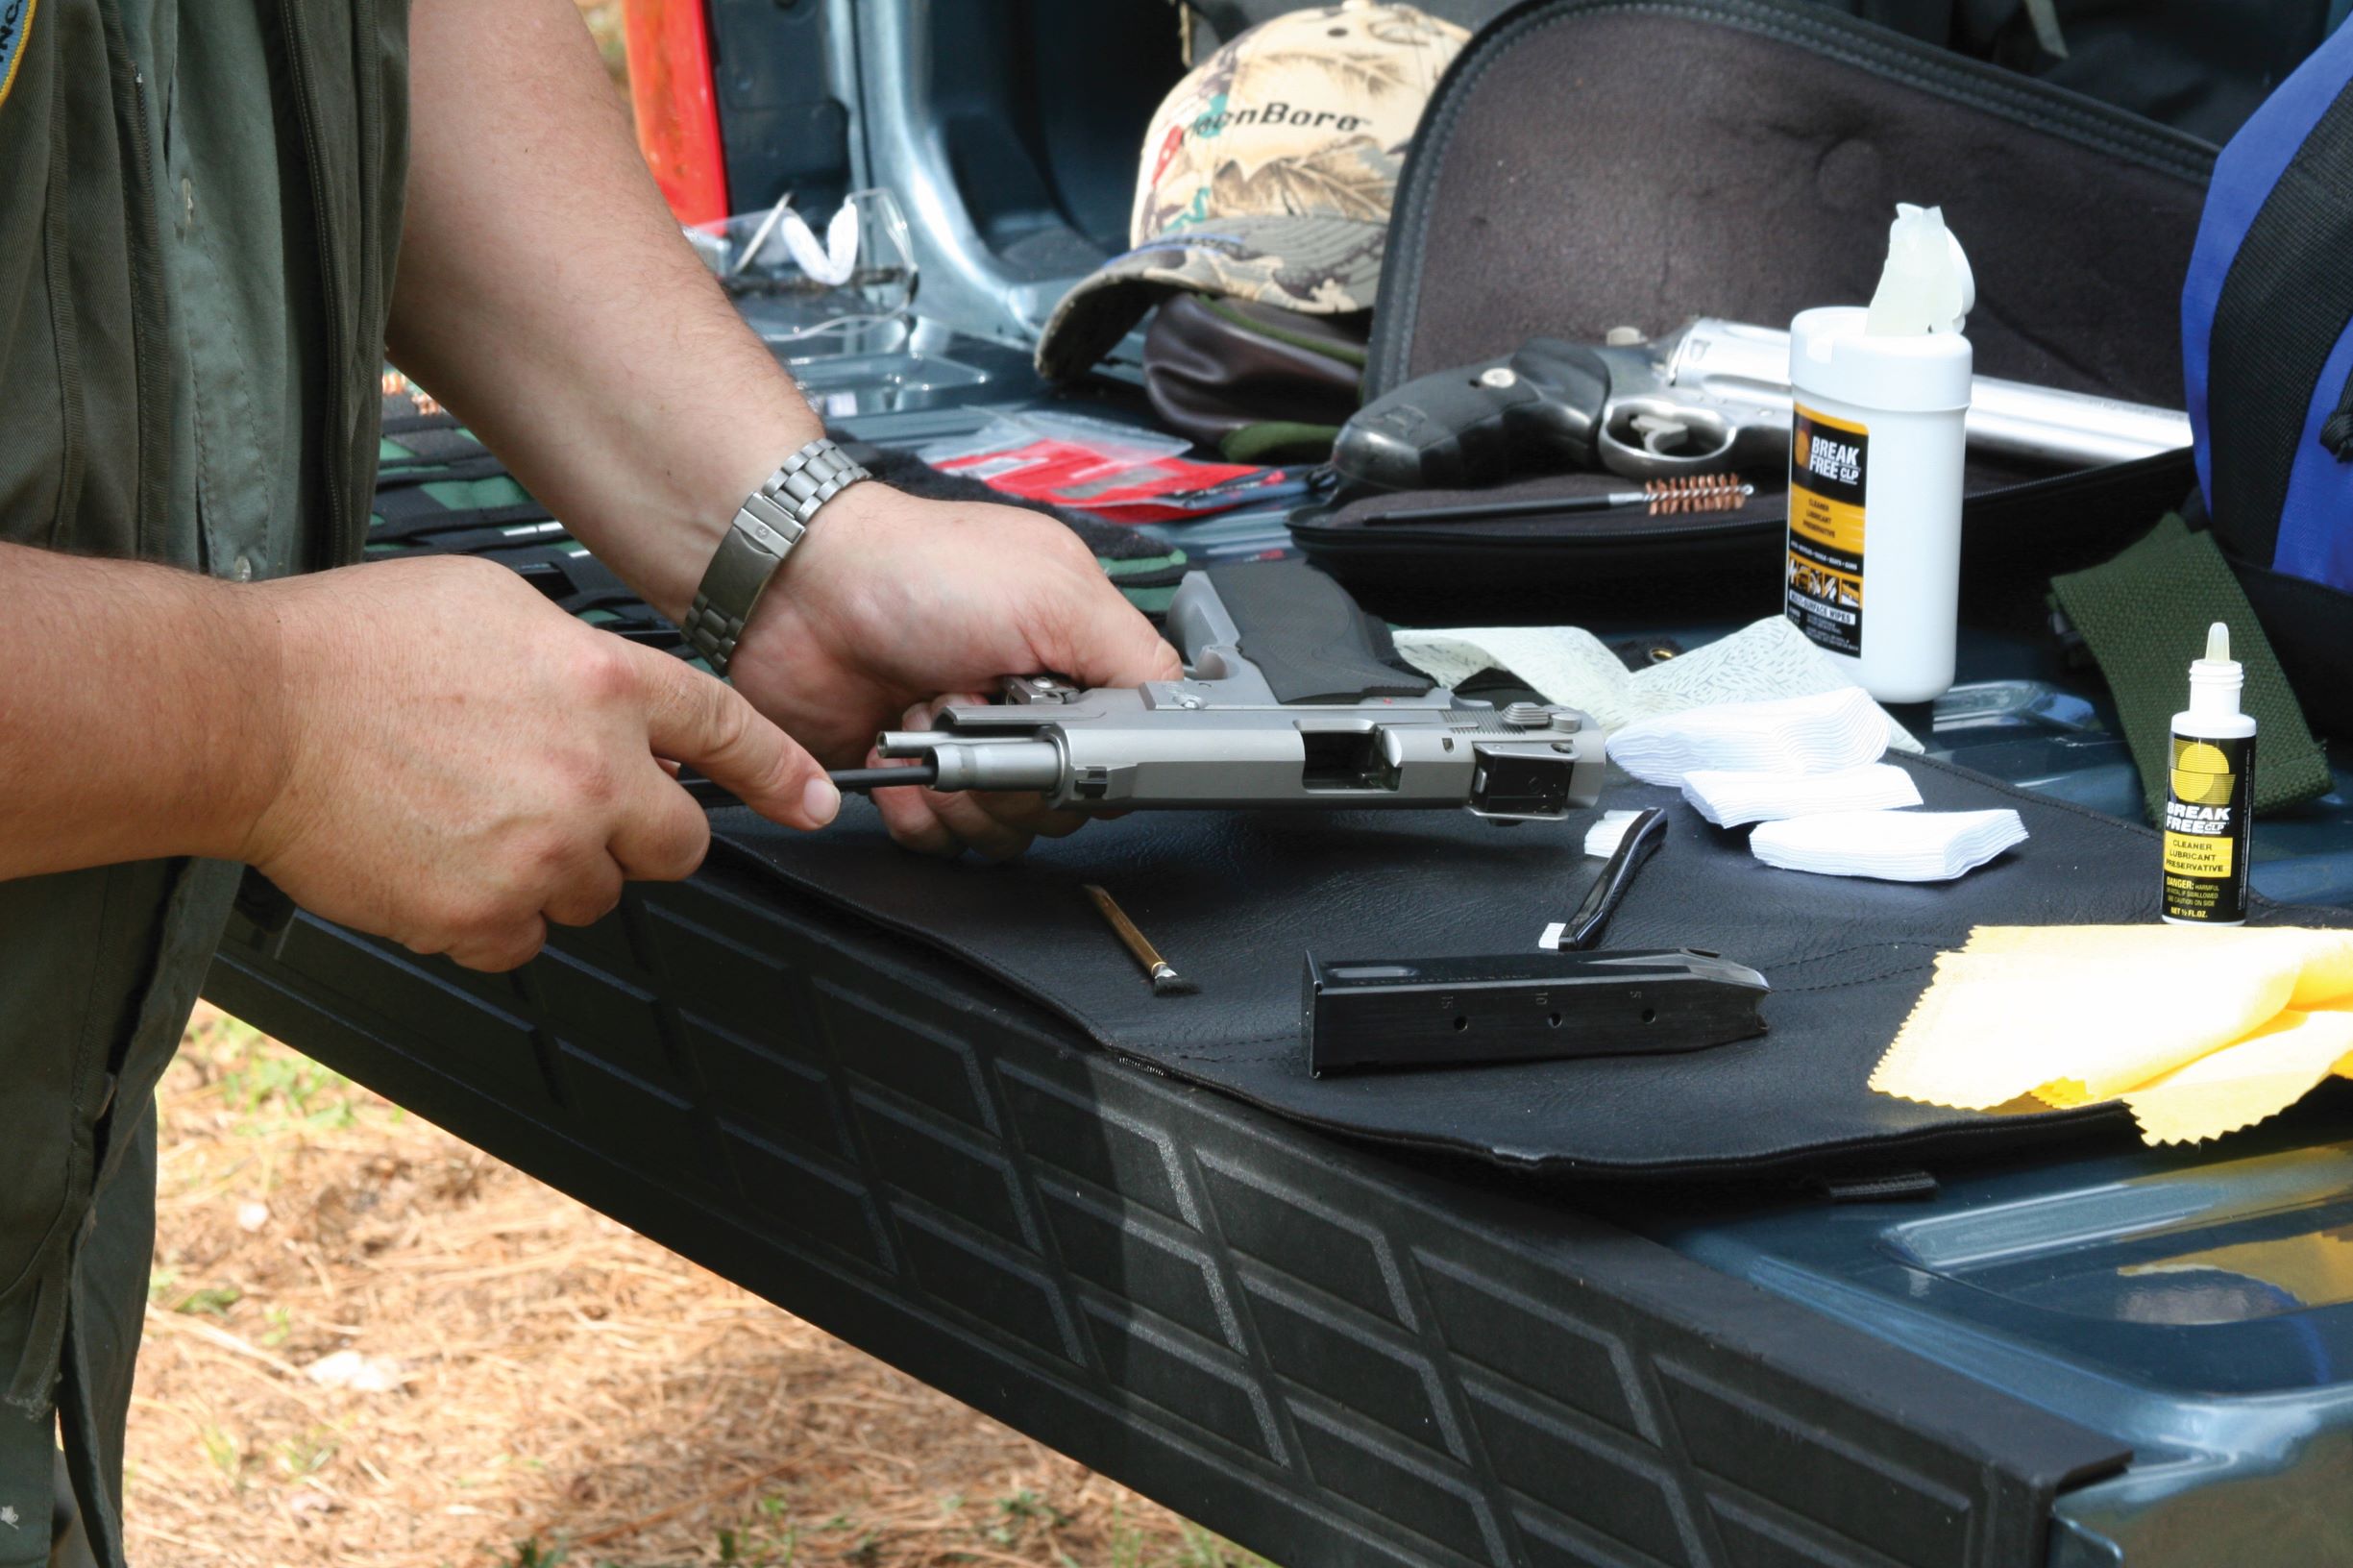
    Create a Safe Work Space

    If you haven’t already, read up on the 4 Rules of Firearm Safety. The first rule is to treat every gun like it’s loaded. Well, the first rule of gun cleaning is to make sure that your weapon is not loaded. Make sure all magazines are empty and safely perform a chamber check. We also recommend removing all live ammunition from your work area to completely eliminate the possibility of introducing a cartridge to your gun.

    As for location, you’ll need to find a clean, well-ventilated area with plenty of lighting. You don’t want gun cleaning chemicals or lead residue to contaminate areas where you eat, and you need adequate ventilation to avoid extended exposure to fumes.

    Prepare in Advance

    To us, the definition of “irritating” is being halfway through a task and needing to drop everything you’re doing to find a missing item. Avoid this by ensuring you have all of the gun cleaning supplies and tools you need laid out and ready to go ahead of time.

    “Ok, but what exactly do we need to clean our guns?”

    Glad you asked because now we’ll break down…

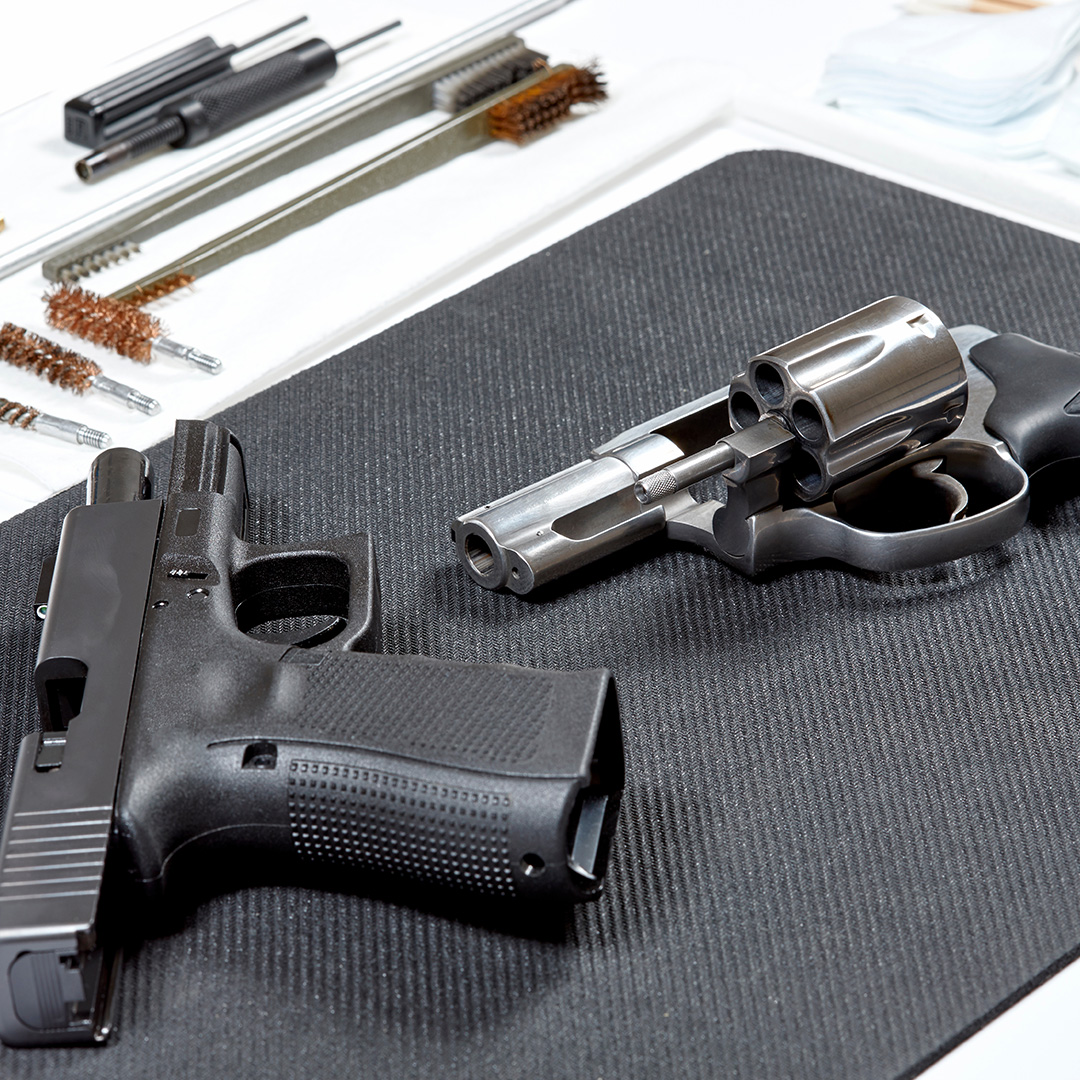
    What You Need to Clean Your Gun

    While your cleaning technique might change with different guns, these 7 gun cleaning supplies are universal and can be used to clean ARs, pistols, shotguns, and other firearms:
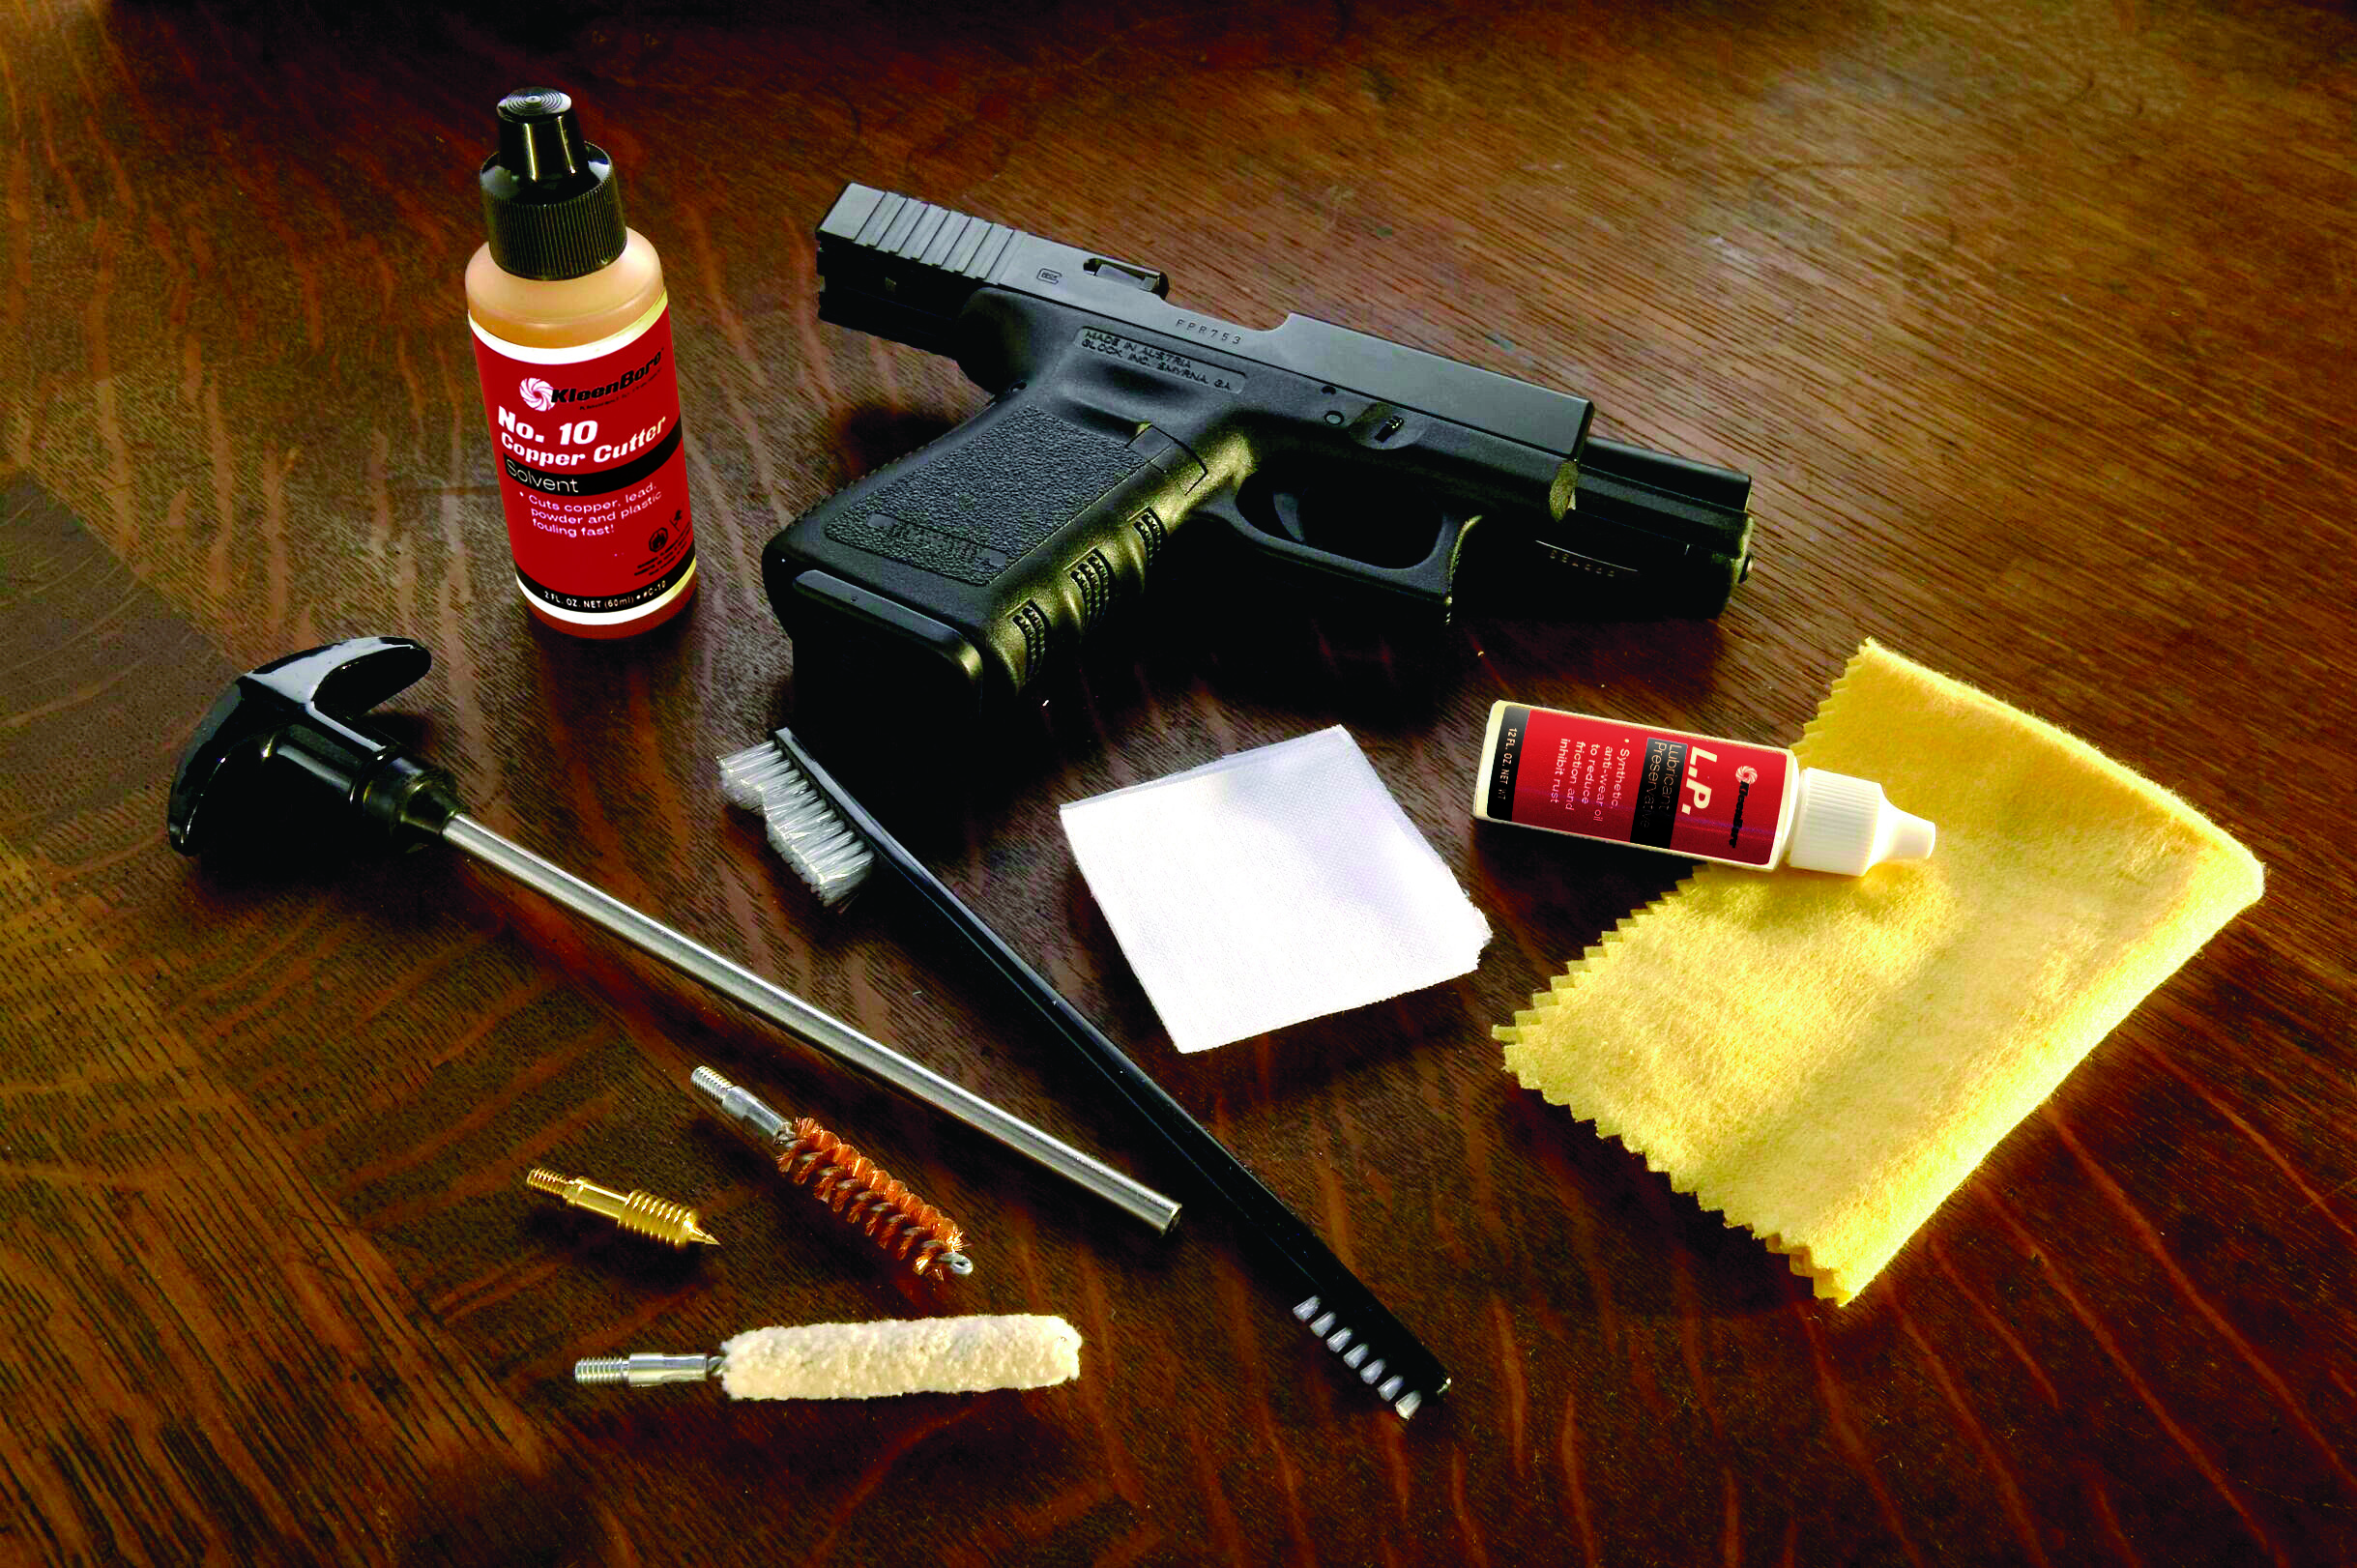
 gun cleaning kit supplies

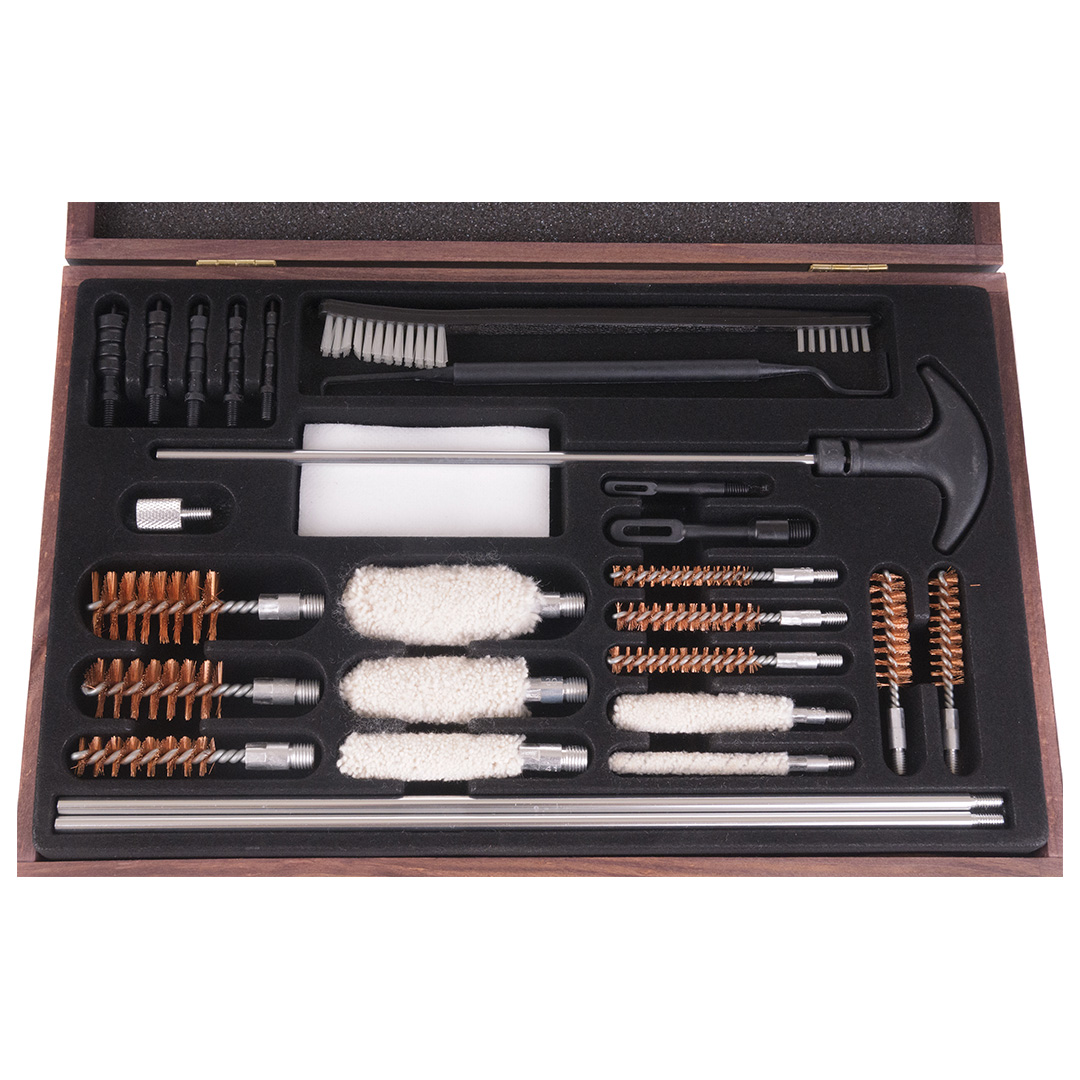
    To save money and effort, you can buy a gun cleaning kit that contains most, if not all, of these items. There are even caliber-specific gun cleaning kits that include the exact components you will need. If you don’t buy a caliber-specific cleaning kit, make sure to get bore brushes that are designed for your weapon’s caliber.

    Beyond the essentials, optional supplies like gun cleaning mats/pads, gun vises, and trays are handy for staying organized and creating an easier cleaning experience. Flashlights are also a good tool to have on hand in case any parts go rolling off the table into the abyss. Some people prefer to wear gloves while cleaning their guns to avoid skin contact with chemicals. Cotton swabs and microfiber cloths are also recommended for applying cleaning oil and other “gun goo.”

    How to Clean a Gun: The Basic Steps

    As we mentioned before, you should always consult your gun’s manual for any cleaning and maintenance information before diving into the act. Certain techniques vary depending on your gun’s model, but these are some of the fundamental steps for cleaning any type of firearm:

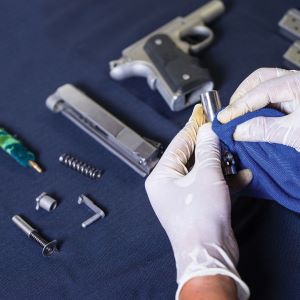
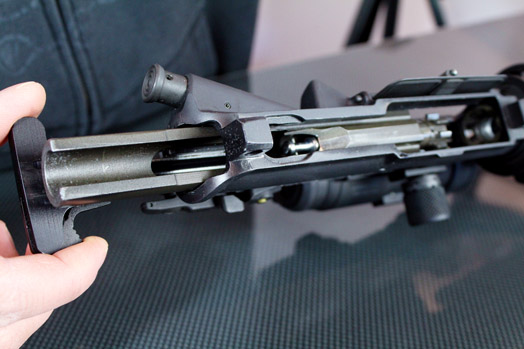
    1) Disassemble the Gun

    disassembling ar 15 for cleaning

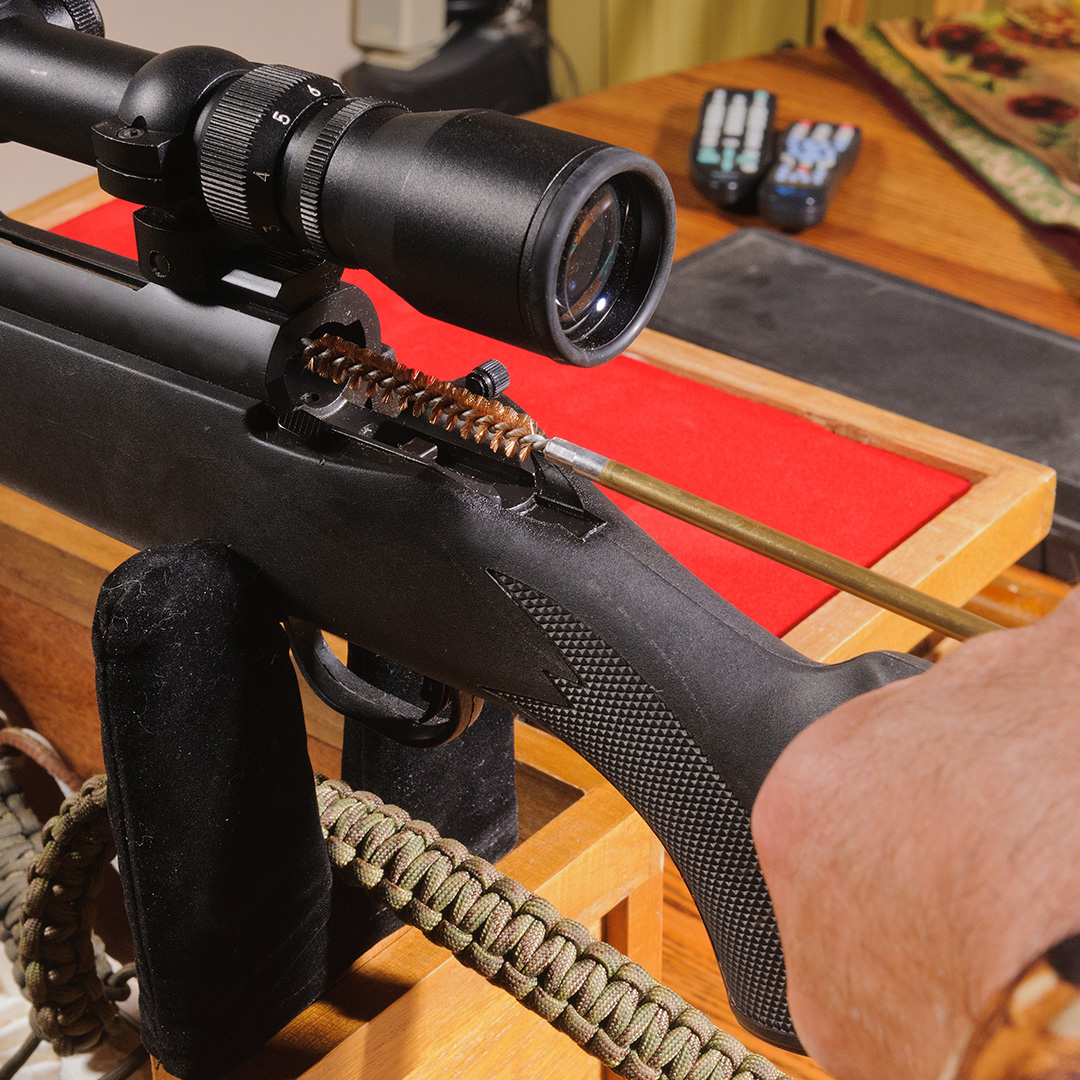
    2) Clean the Barrel and Chamber

    cleaning pistol barrel with rod

    Use a dry bore brush designed for your gun’s caliber and gently brush inside your chamber towards your muzzle. This loosens up any large debris or fouling within.

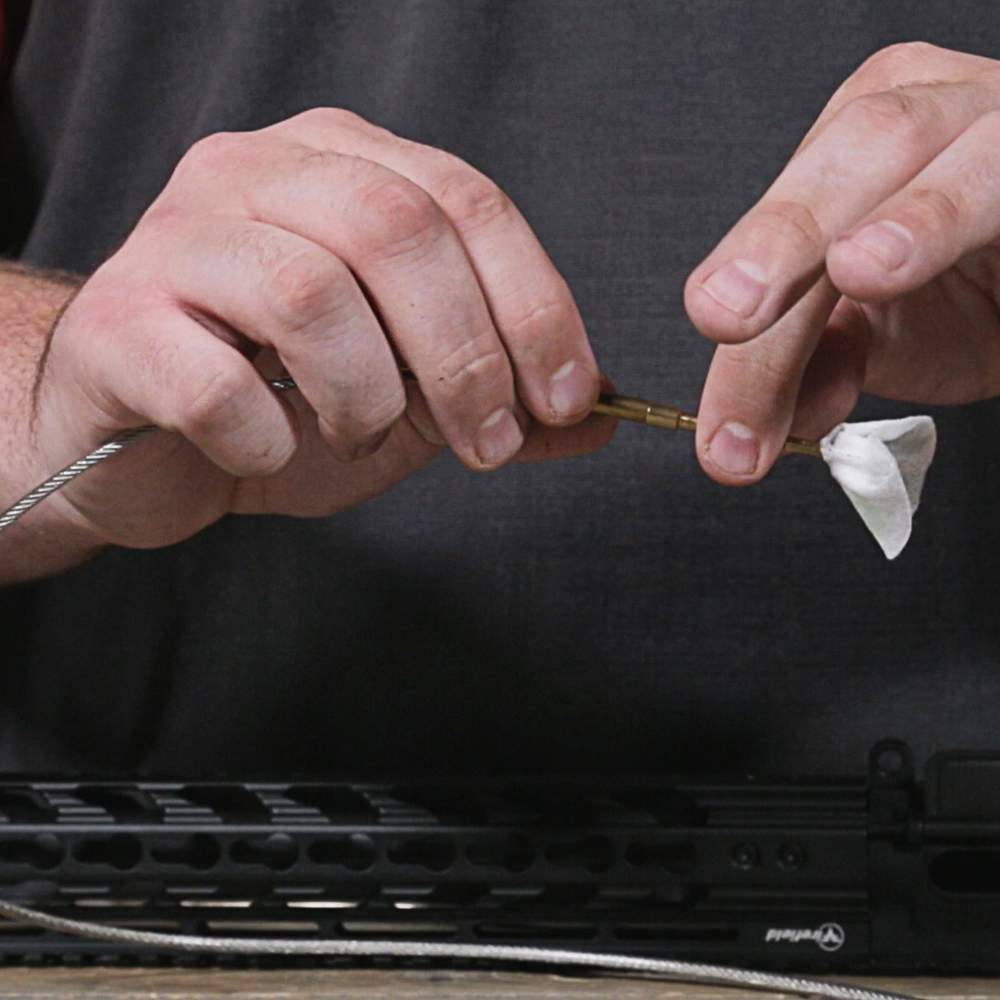
    Then, dip a cleaning patch in solvent and place it on the end of your cleaning rod. Secure the gun patch in place with a caliber-specific jag. Using the rod, push the patch through your barrel until it comes out the other side. Do not pull the rod and patch backward at any point, as this may pull any grime and residue back into the barrel. It should be one continuous motion until the patch comes out at the other end.

    cleaning gun bore with patch and jag

    After that, wait around 15 minutes for the solvent to work its magic. This is the perfect opportunity to start cleaning other parts of your firearm.

    When 15 minutes is up, you should scrub the inner barrel with a dry bore brush to work in the rest of the solvent. Grab a fresh, dry patch, place a jag on it, and run it through your barrel again (without dipping it in any cleaning oil).

    Now it’s time to introduce your gun to the bore snake. Lightly apply gun lubricant on the thickest part of the bore snake and run it through the barrel.

    Finally, use your utility brush to wipe away buildup from the barrel’s exterior and other parts that frequently accumulate debris, like the feed ramp.

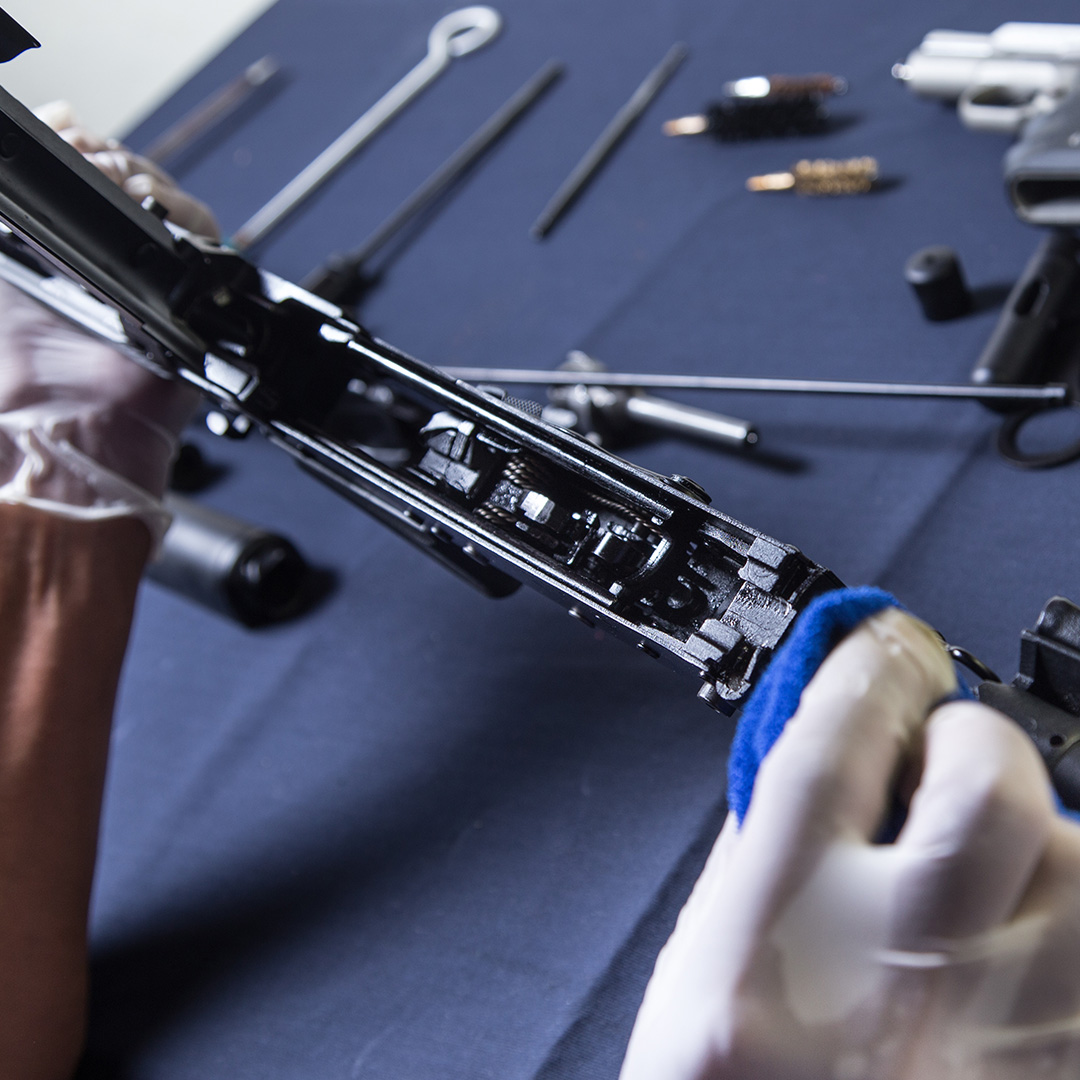
    3) Clean the Action of Your Gun

    cleaning AR bolt with gun brush

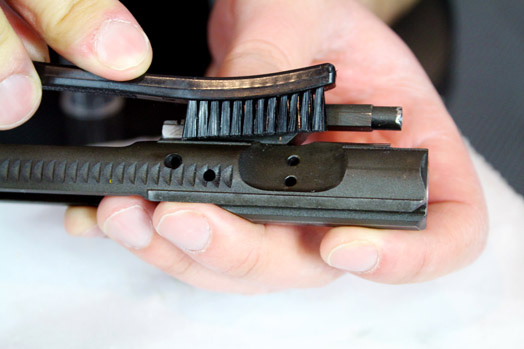
    The action of a gun refers to the parts that feed, fire, and eject rounds. This includes slides, trigger groups, bolts, and pumps.

    Start by using a dry utility brush to scrub away any dirt or debris you find. If that doesn’t clear all the residue, put some cleaning solvent on a cloth or cotton swab and gently work out those tough fouled areas. Wait about 10 minutes for that to dry before moving onto the next step.

    4) Lubricate the Gun

    lubricating gun with needle applicator

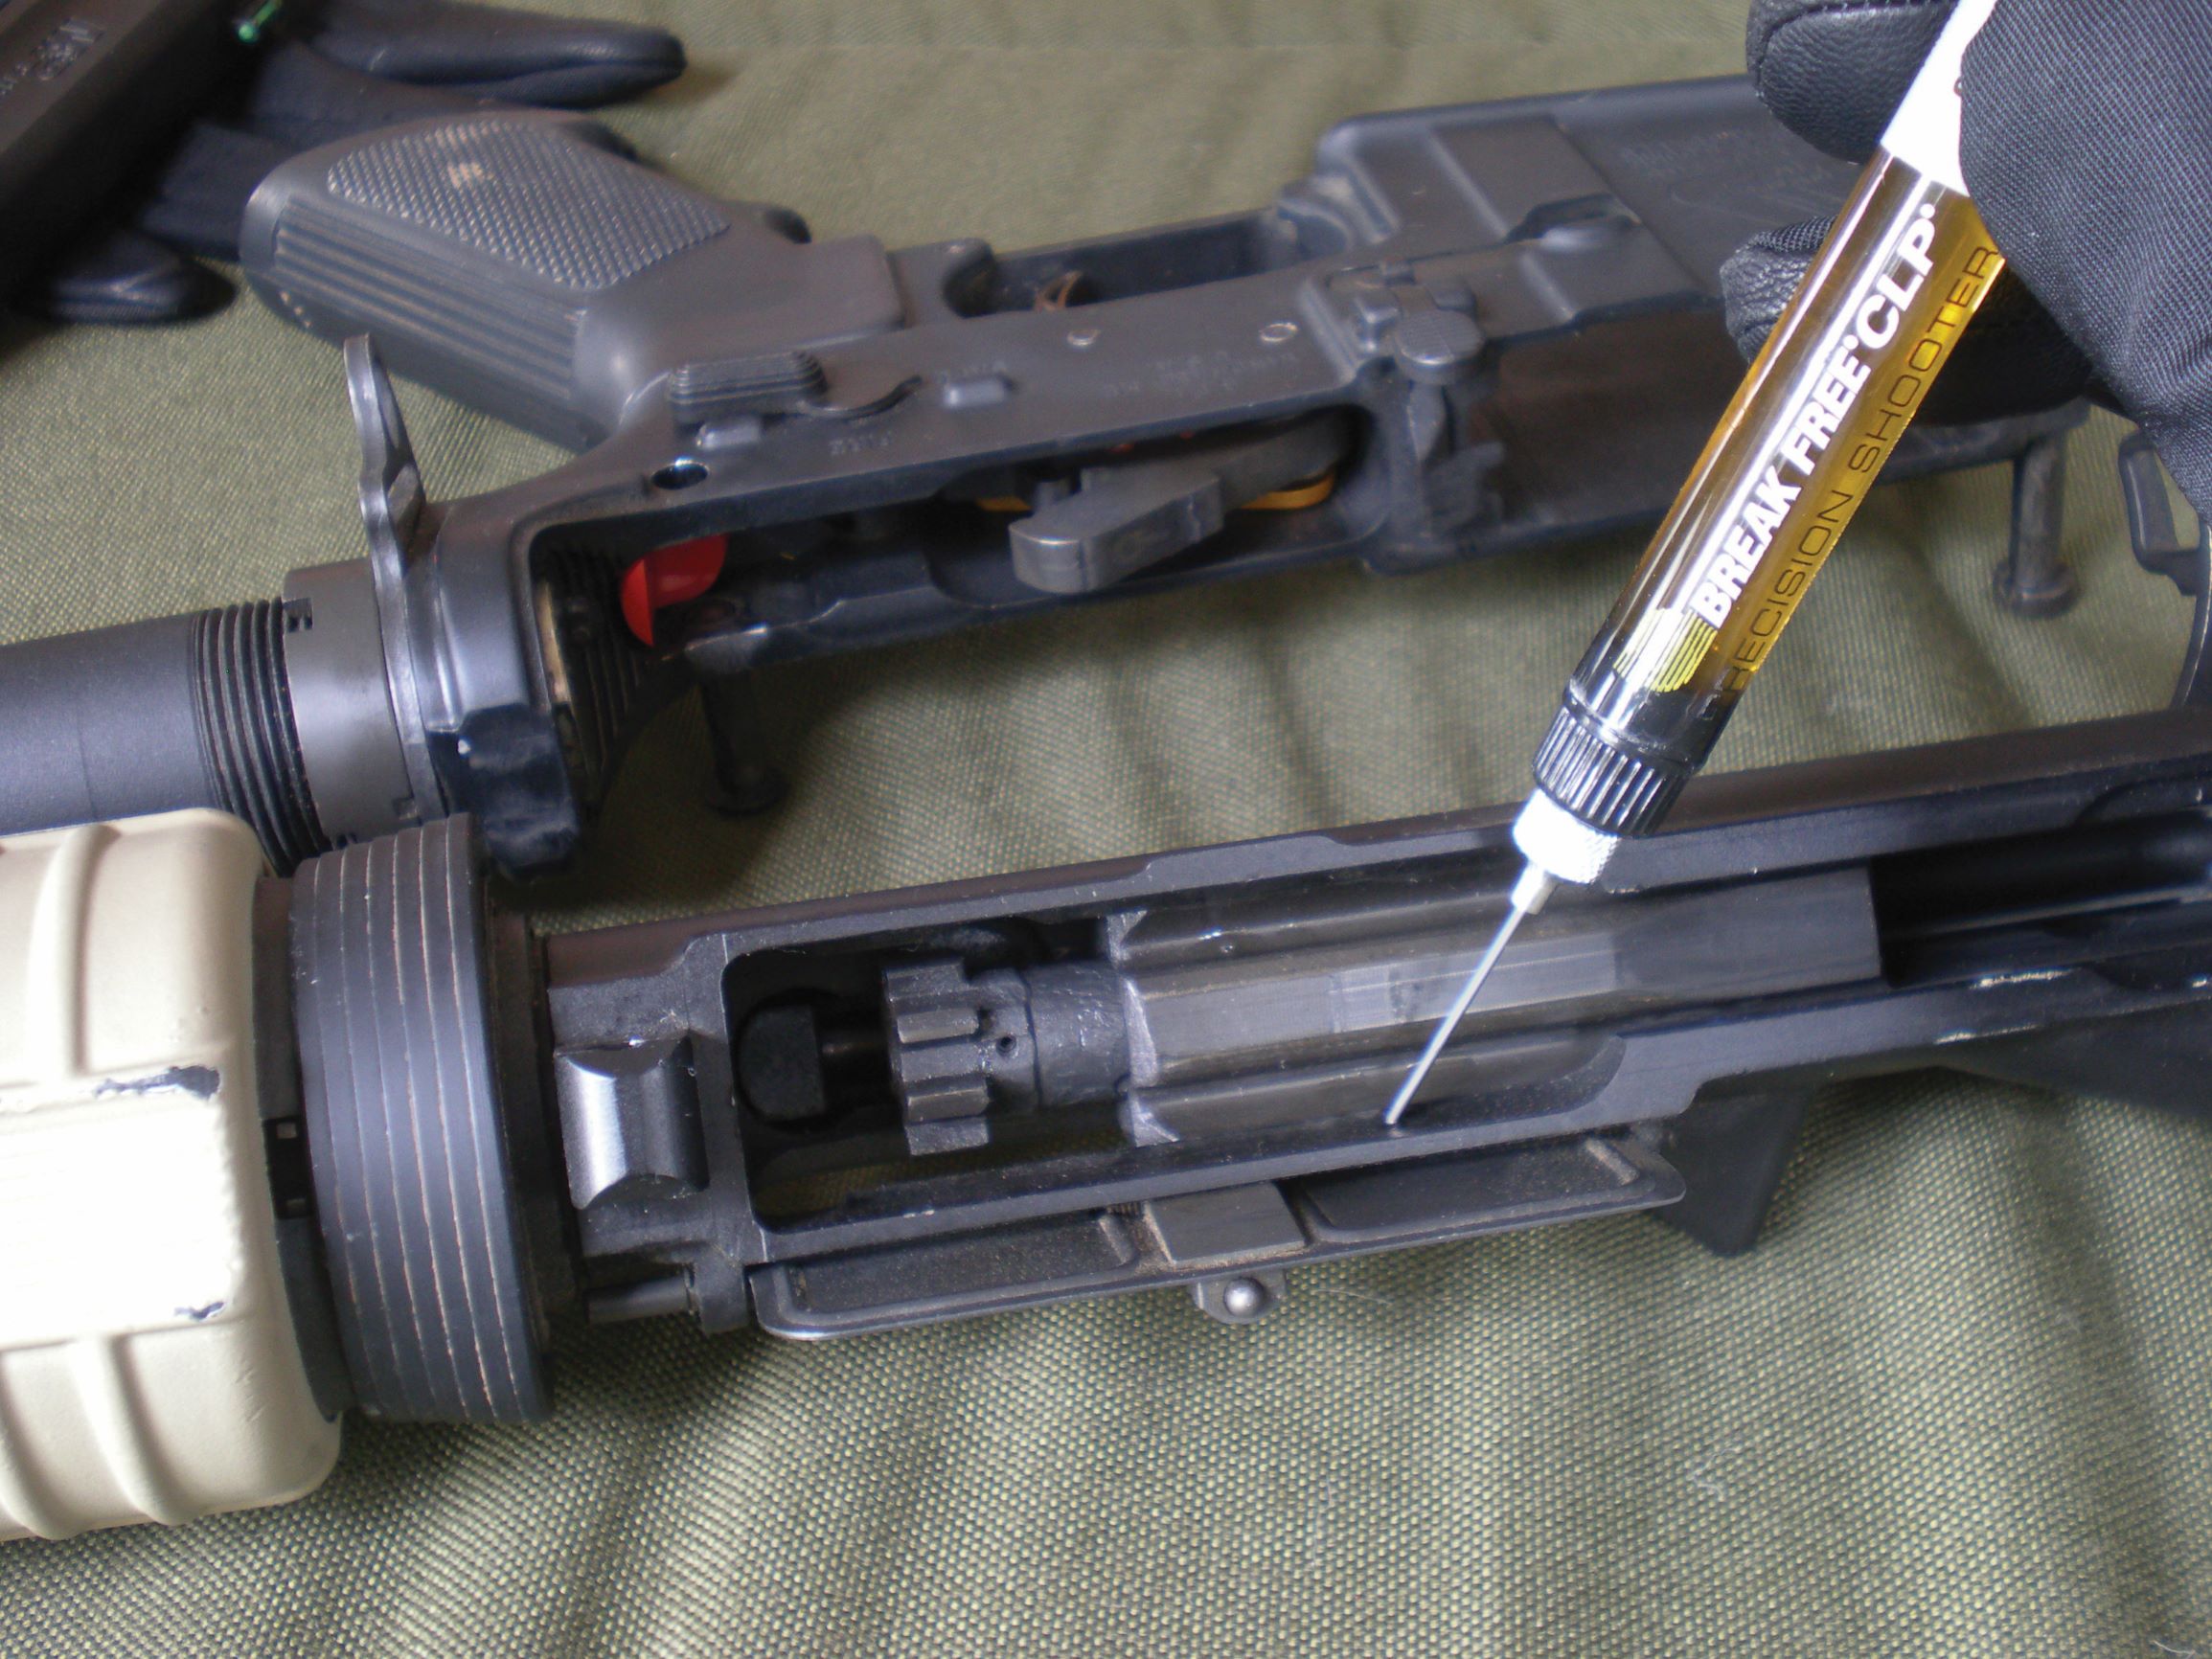
    The key to this step is “less is more.” Lubrication helps all of the moving parts within your gun function properly, but too much lubrication can reduce your weapon’s performance.

    Your manufacturer’s manual should have recommendations of where to apply lubricant, but if not, common areas include springs, rails, action, slide assembly, and other nooks and crannies within your weapon. Some folks use a needle applicator to apply the lubricant directly, and others prefer to use a cloth or cotton swab. Either method works, but we recommend using a swab or cloth to avoid accidentally over-lubricating your firearm.

    5) Reassemble the Gun

    reassembling ar 15 after cleaning

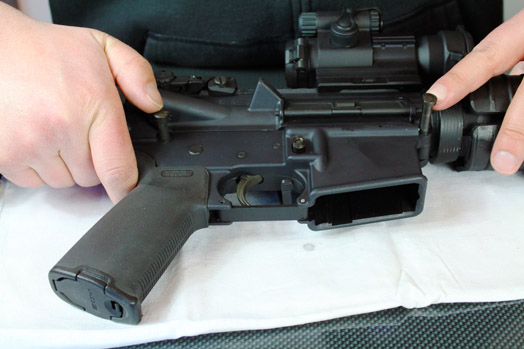
    After reassembling your weapon, you’ll need to perform a function check. When taking apart your weapon, there’s always a chance that a component or two aren’t properly aligned. You can perform a function check with simple dry-fire practice techniques to ensure the trigger mechanism, safety, slide, and other essential elements work properly.

    How Often Should I Clean My Gun?

    Now that you know the basic steps of how to clean a gun, it’s time to address the popular question of frequency. Unfortunately, there isn’t a comprehensive answer to this, as your gun use dictates how often you should clean it. However, a general rule of thumb is to clean your weapon after every 300 rounds fired.

    Range Training

    We recommend always cleaning your gun after going to the range. Range training involves a lot of shooting, and there are expelled particles and lead that can find their way into those hard-to-reach crevices.

    Competitions

    If you’re a competitive shooter, whether 3-gun or F-class, you’ll want to clean your gun after every match. A clean, well-maintained firearm will perform at its highest level, which is what you need to keep up with the competition.

    Hunting

    Unless you have a serious vendetta with the whitetail population, chances are you’re not firing your weapon nearly as much while hunting as you would during target practice or match shooting. That’s why it all comes down to the environment and conditions you hunted in. If you were in muddy areas or hunted in rain or snow, those elements can impact your weapon’s performance. We highly recommend cleaning your weapon after hunting in challenging conditions. If conditions were normal, you don’t need to do a breakdown cleaning of your firearm, but a little exterior touch-up is always nice. When you put your gun away until next season, give it a good cleaning before and after long-term storage.

    Everyday Carry (EDC)

    For Everyday Carry (EDC) handguns, it all depends on how often you’re firing your weapon and where you are carrying it. If you don’t shoot much or typically carry in clean, dry environments, we recommend doing a full breakdown cleaning once a month. After all, you’re carrying for personal protection, and you want to be confident that your weapon will perform in the direst of situations. This will clear out any lint, debris, or anything else that can accumulate from daily carrying.

    A Fresh Start for Your Gun

    Your weapon is a valuable item, and it is also a dangerous item when not maintained properly. Show your gun the respect it deserves by thoroughly cleaning it as necessary. Your performance is limited by what your firearm can do, so always make sure you have the best chance to succeed.

    You just learned how to clean a gun in 5 simple steps, and we hope you’re ready to take on the task yourself. Shop for gun cleaning supplies at OpticsPlanet today to get all of the tools you need to clean your firearm properly.

    No Comments on How to Clean a Gun: Beginner’s Guide to Cleaning Firearms

    Read More
  • hunter wearing camouflage and blaze orange

    What to Wear on a Hunt: 4 Things to Know About Hunting Clothes

    May 25 • Hunting, Apparel • 6652

    Hunting clothes are an essential, yet often overlooked, element of any successful hunting trip. Choosing what to wear on a hunt impacts your comfort, camouflage, protection, and utility. However, hunting apparel isn’t always universal, and you need different threads depending on the type of hunt and location. In this guide, we’ll break down what clothes you should pack for a hunting trip based on the temperature, weather conditions, and type of hunt. 

    How to Choose the Best Hunting Clothes for Cold Weather waterproof zipper on hunting jacket

    The first element to consider while choosing a hunting outfit is temperature. Wearing layers is the best way to maintain a comfortable temperature while outdoors. It is better to have too many layers than not enough. You can always remove a layer if it gets warmer throughout the day, but you can’t add extra layers if temperatures are colder than expected. 

    How to Layer Hunting Clothes how to layer clothes for different weather

    Layering your hunting clothes is the most important factor when it comes to temperature control, but this doesn’t mean you just toss a few random items of clothing on and call it a day. You need to select your layers of hunting clothing so that they work as a system (three-layer clothing system) to regulate your body temperature, keep you dry, and protect you from the elements. There are three main types of layers:

    • Base layer (inner-layer)
    • Mid-layer
    • Outer-layer (shell)

    Base Layer

    The base layer is the first to go on and has the most contact with your skin. Some examples of base layers include thermal underwear, socks, and long sleeve shirts.

    The main purpose of a base layer is to wick moisture away to keep you dry and comfortable.

    merino wool base layer long sleeve shirt

    Sweat is our body’s natural temperature control, and managing sweat properly will keep you dry and comfortable throughout the day. Most base layers fall into one of these three categories: 

    • Lightweight
    • Midweight
    • Heavyweight

    Lightweight base layers have excellent moisture-wicking and quick-drying properties, but they provide limited insulation compared to heavier base layers.

    They are most commonly made from polyester and other synthetic materials like spandex. Light base layers are ideal for warmer climates and physically demanding hunts. If you’re going elk hunting or hunting in mild conditions, choose lightweight base layers. 

    Midweight base layers offer a middle ground between lightweight and heavyweight layers. They are efficient at wicking away moisture but provide extra insulation for colder climates. Many midweight base layers are made from merino wool which offers additional benefits like next-to-skin comfort and enhanced odor control. You should wear midweight base layers if you’re hunting in cooler temps or expect moderate physical activity.

    Heavyweight base layers are for extremely cold and/or harsh conditions. They provide plenty of insulation to keep you warm, but they also need to be breathable and well-ventilated for comfort. Heavyweight layers can be made of synthetic materials or wool. These thick base layers are ideal for winter hunts and frigid temperatures.

    Mid-Layer

    Mid-layer hunting clothes build off the base layer to remove moisture and lock in heat. 

    The main purpose of a mid-layer is to provide insulation to keep you warm.

    mid layer pull over jacket for hunting

    Some examples of mid-layer clothing include synthetic down vests, fleece jackets, and puffer jackets, also known as down jackets. Here are some more tips on choosing mid-layer hunting clothes:

    • For warm weather and/or physically demanding hunts, you can skip the mid-layer entirely or wear it as your outer layer, creating a two-layer clothing system. 
      • Mid-layers are usually compact, so store it in your hunting pack or vehicle just in case!
    • For cooler conditions and/or moderately active hunts, you can wear a fleece or synthetic insulated jacket or vest. Polyester and merino wool are also suitable mid-layer materials.
    • For freezing cold conditions, you should wear a thick insulated jacket that traps the most warmth possible. Down jackets provide the best insulation, but they should only be worn with a waterproof outer layer.

    Down insulation is great for keeping warm, but it is ineffective when wet. That is why you should only wear them with an outer layer that offers weather protection. Synthetic insulation provides plenty of warmth for most hunts and is effective even if it gets wet, making it a better option for milder temperatures.

    Outer Layer 

    While the first two layers focus on warmth and dryness, the outer layer is all about protection. It is the first layer of defense between you and the wilderness.

    The main purpose of an outer layer is to protect you from the elements and your environment.

    The outer layer acts as a protective shell that shields you from harsh weather conditions and environmental hazardshunting parka with gore tex 
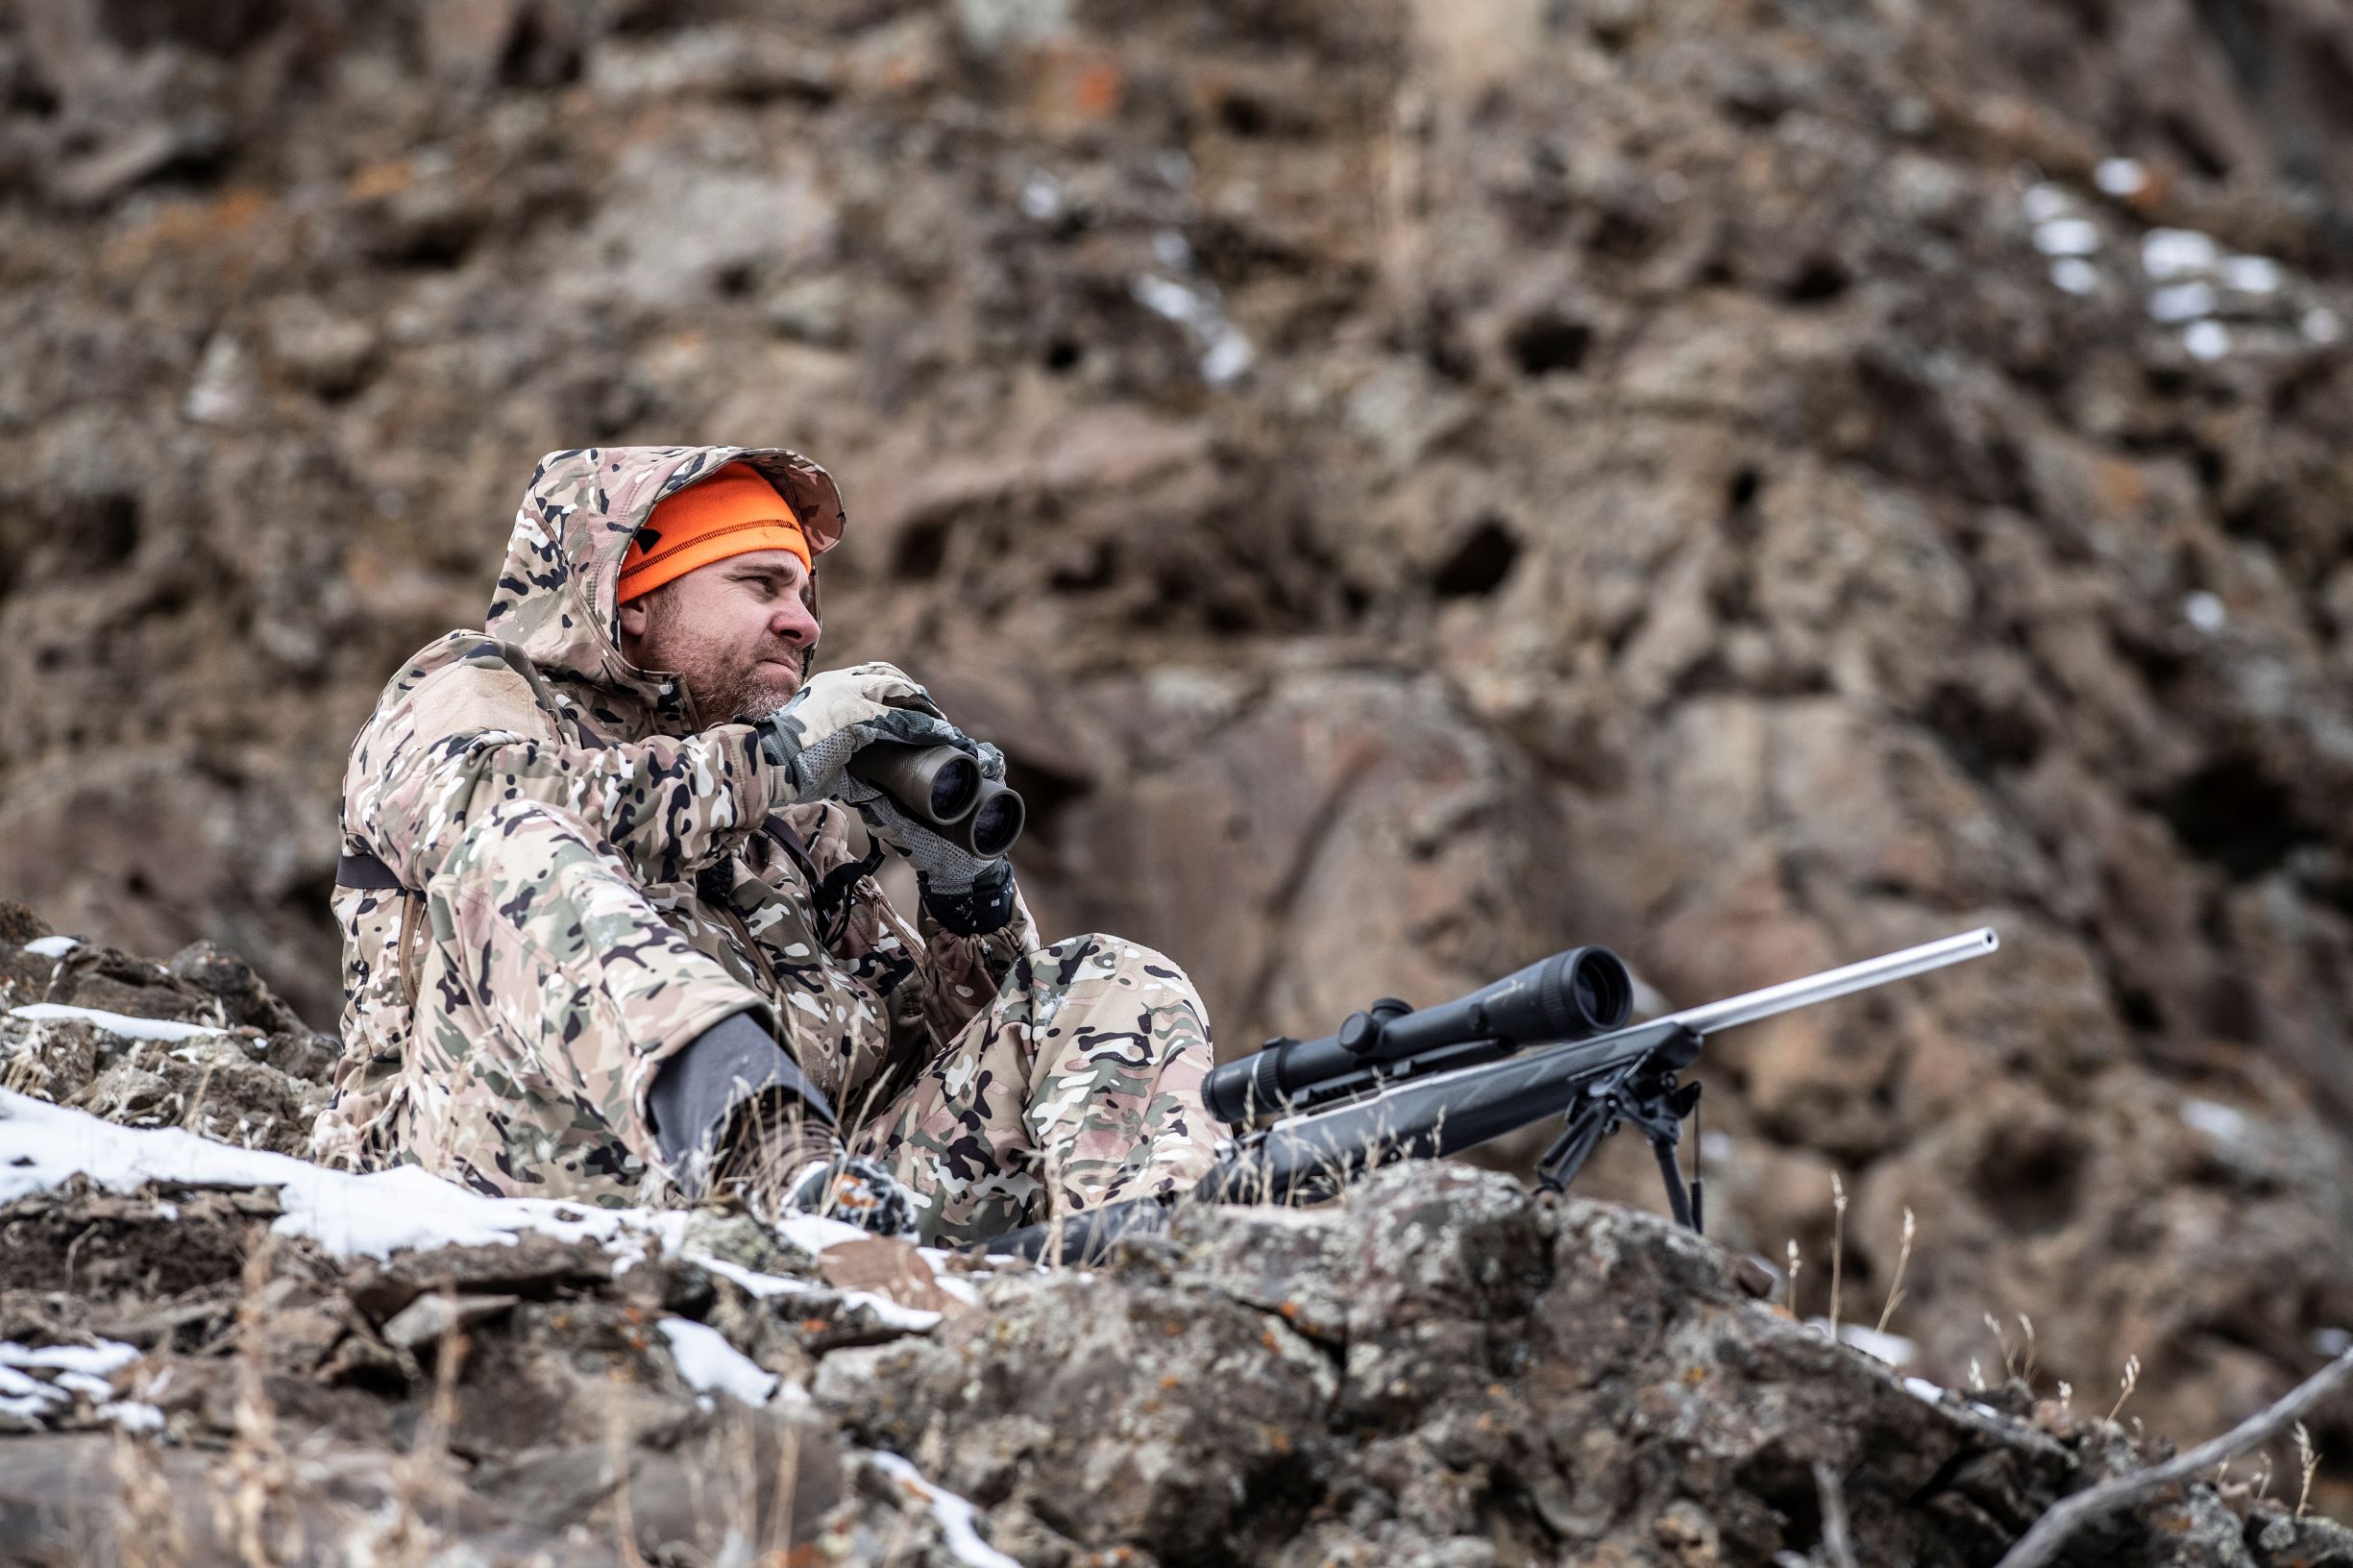
like branches and thorns. The thickness of your outer layer depends on the temperature: thick outer layers are better for colder temps, and lightweight outer layers are better for milder conditions. 

    Some materials, like GORE-TEX, have waterproof and breathable membranes that offer superior weather protection and breathability. A breathable outer layer helps manage moisture and improves comfort, and breathability is even more important in milder conditions or if you’ll be physically active. 

    The outer layer is also the first piece of clothing animals can see, so choosing the right camouflage is essential if you want to fill your freezer this hunting season. We’ll get into this in a bit.

    Biggest Mistake First-Time Hunters Make 

    The worst clothing choice a new hunter can make is wearing cotton. Cotton absorbs liquid like crazy, and it won’t dry throughout the day. Wet cotton socks in cold temperatures can be bad news, so make sure to avoid cotton materials at all costs

    How to Choose the Best Camouflage for Hunting Clothes

    Hunting clothes offer a vast selection of camo patterns to help you blend into nearly any environment. There are two main types of camouflage to consider for a hunt:

    • Mimicry camouflage mimics your surroundings using patterns with grass, leaves, bark, and other elements of nature. 
    • Breakup camouflage, also known as digital camo, breaks up your outline using various shapes and colors not necessarily found in nature. 

    However, choosing the optimal camo color involves much more than just matching your surroundings. You need to consider the animal you’re hunting and how they 

    perceive color to know which type of camo is right for you.

    How to Choose Camouflage Based on the Animal You’re Hunting

    Different animals see colors and patterns in unique ways. Knowing how your intended prey sees color is the key to picking out the best camo for your hunt. 

    • Deer and Big-Game Hunting: Deer and most large game struggle to spot differences in color, but they can easily see movement and differences in texture. Therefore, breakup camo is best for deer hunting. 

    deer hunter wearing breakup camouflage

    • Waterfowl: On the contrary, ducks and other waterfowl can see colors well. Mimicry camo is best for waterfowl hunting, as long as your pattern resembles a marsh with tall grass, cattails, and other natural elements of wetland habitats.waterfowl hunters wearing mimicry camo

    Blaze Orange and Hunter Safety 

    The camouflage discussed above is for the animals, but blaze orange is for other hunters. The bright, fluorescenthunter wearing blaze orange clothing 
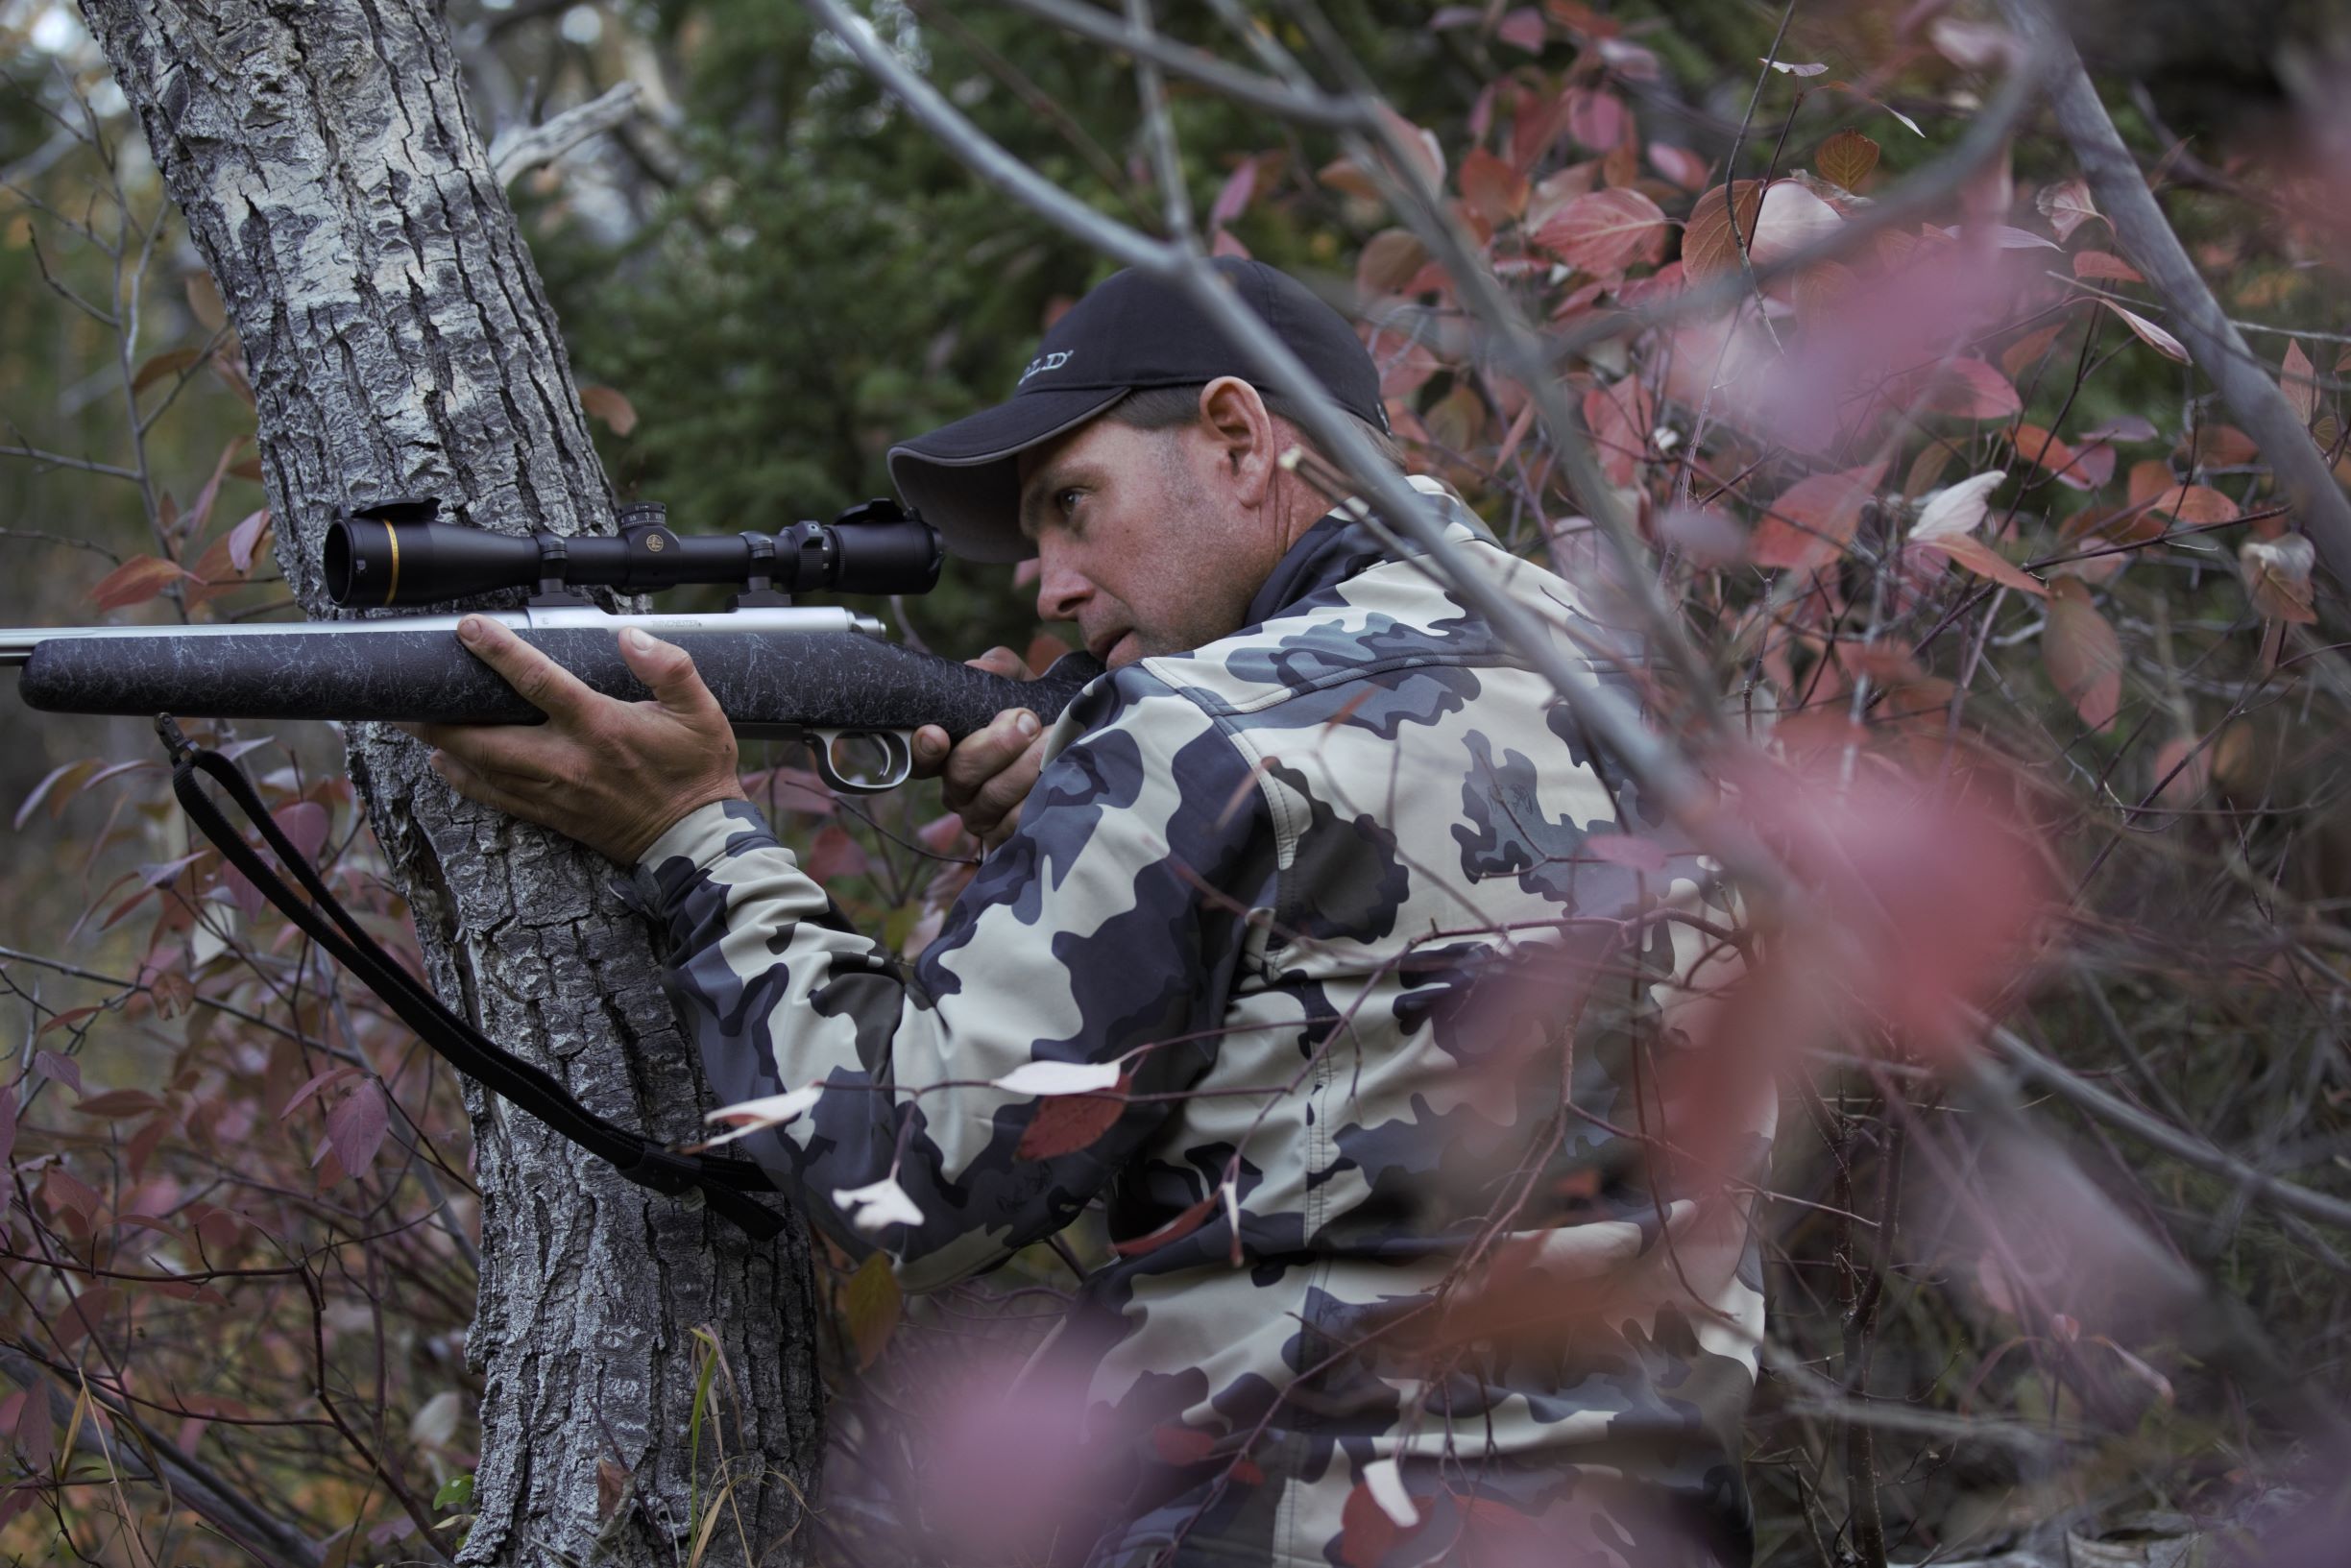
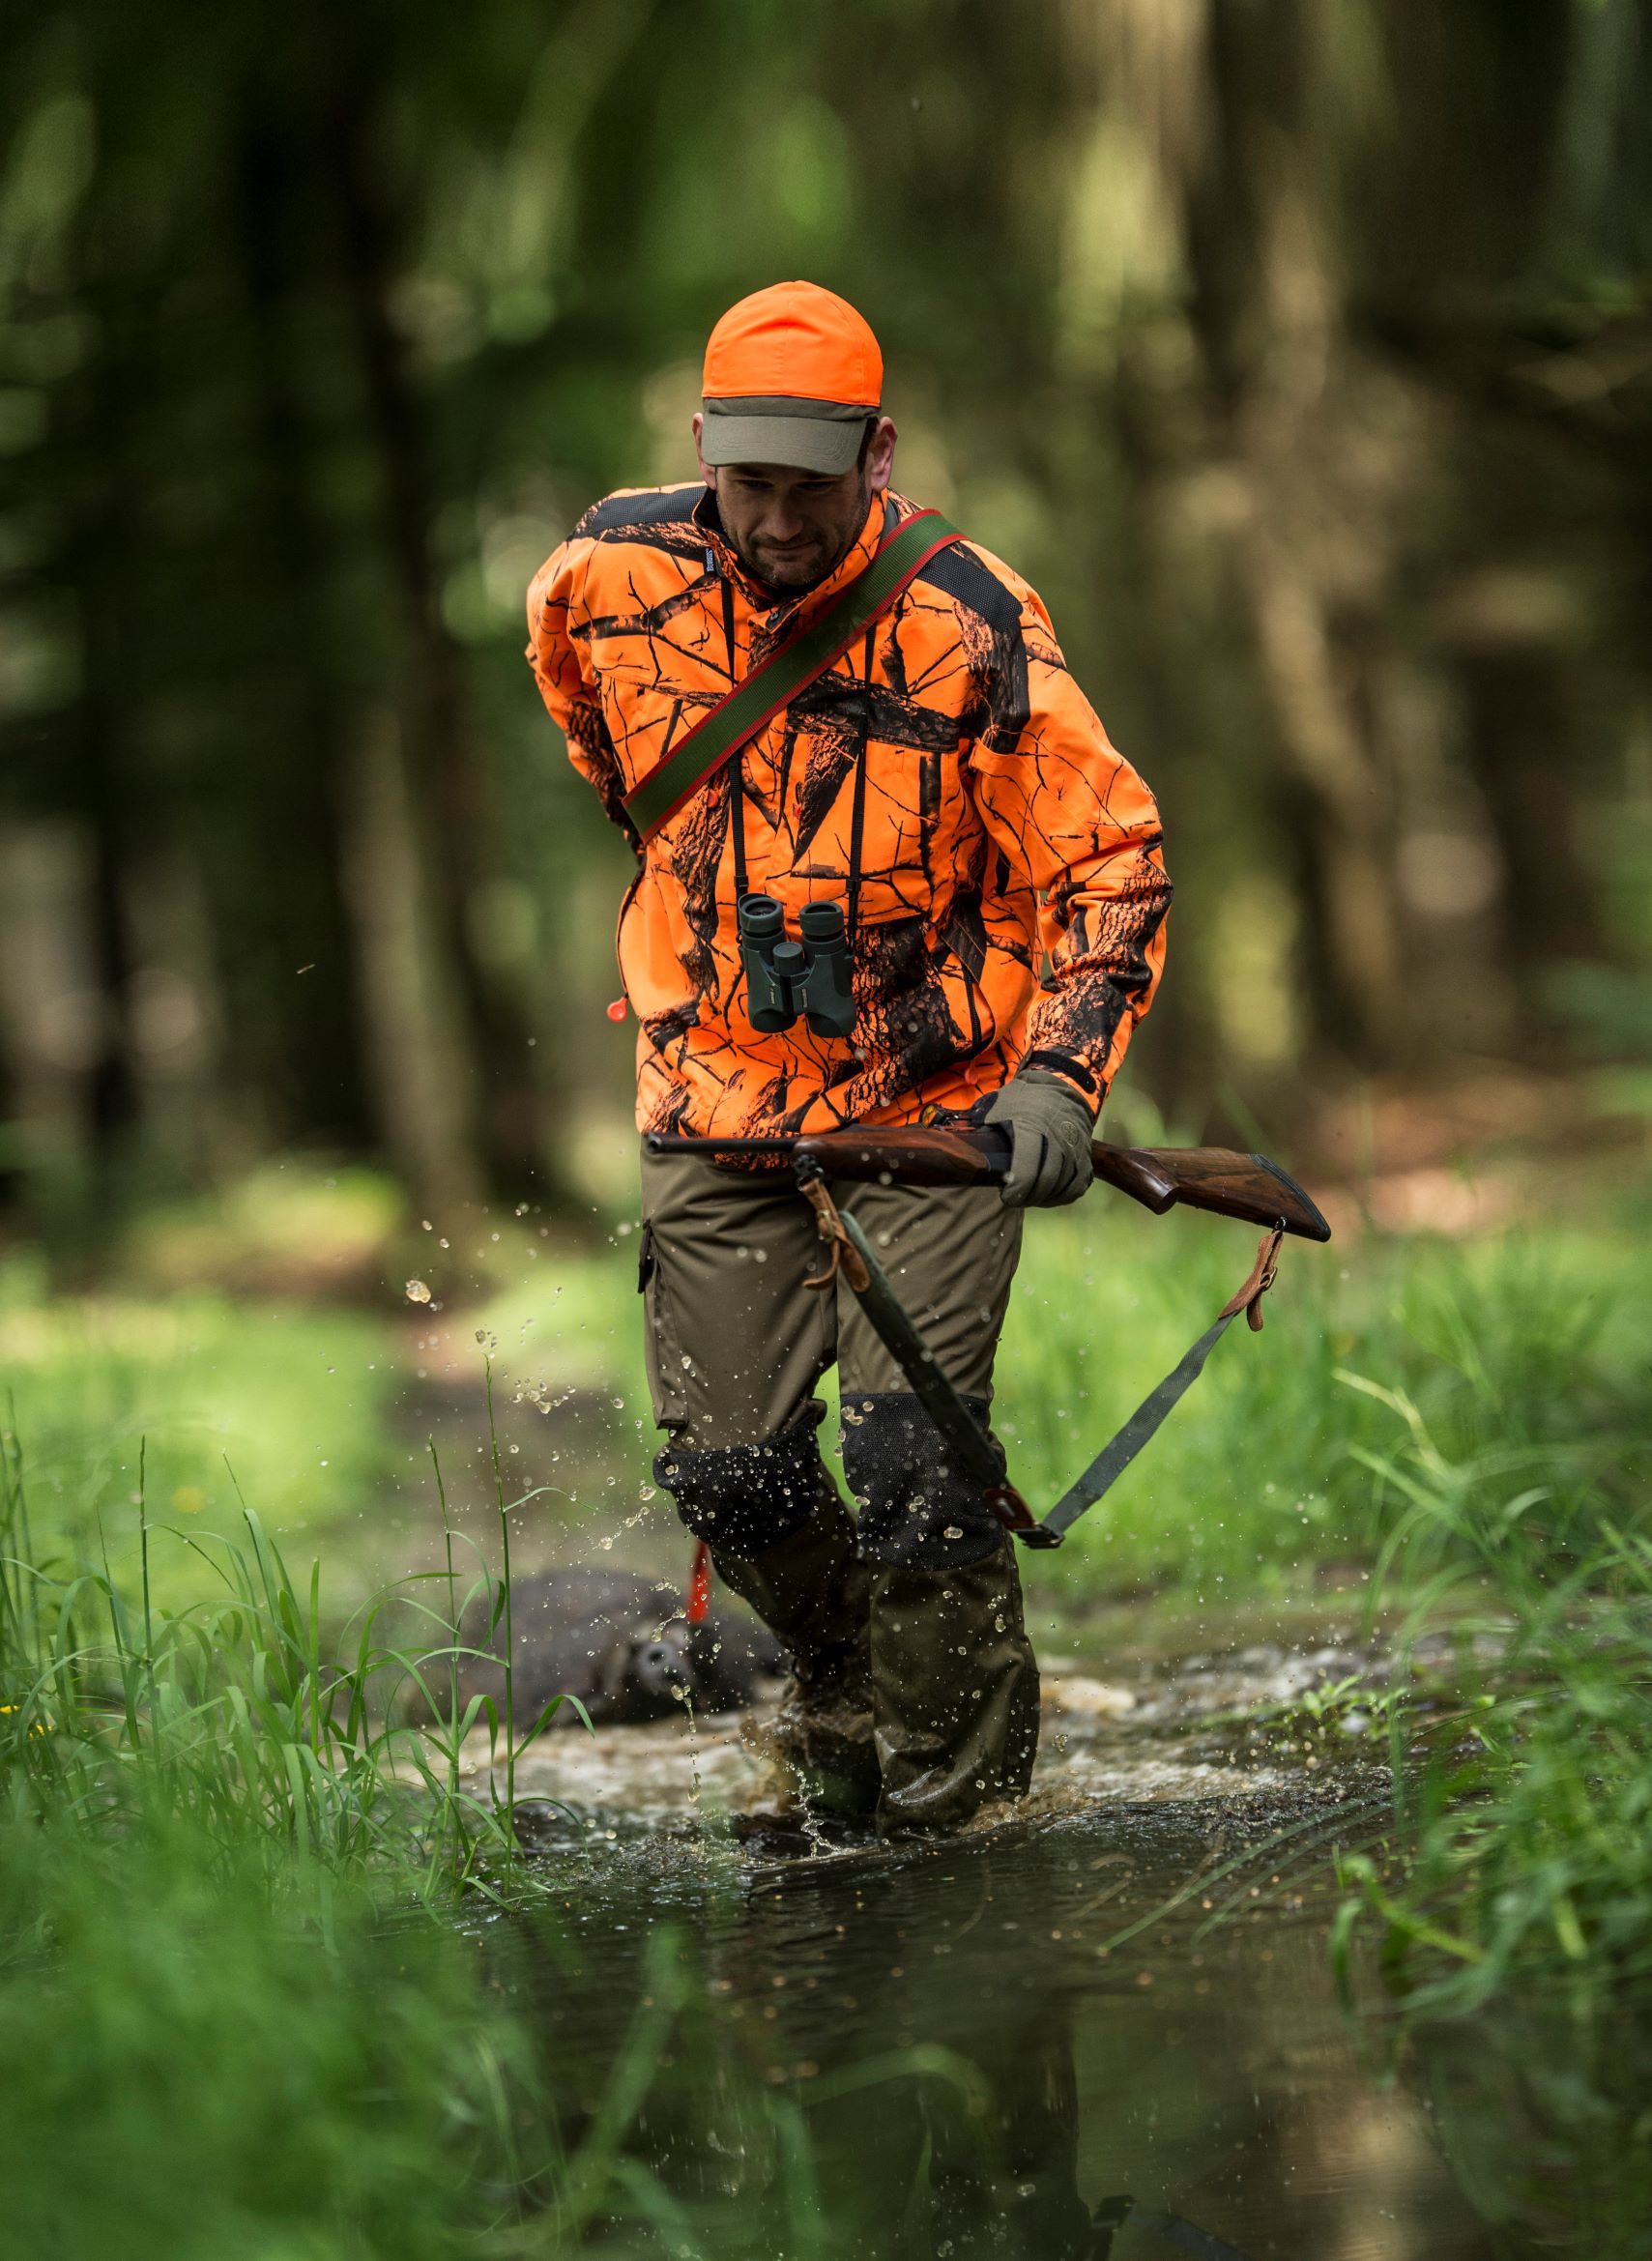
orange color, also known as safety orange, is easy for other hunters to spot and helps create a safer hunting environment. Most states require some type of blaze orange, whether it be a minimum area of coverage or certain apparel. Make sure to look up your local and state laws before heading out to the hunting grounds. 

    Deer and other big game can’t see the bright orange color well, so wearing blaze orange won’t impact your efficiency on a hunt. Ducks and waterfowl can see colors well, which is why many states do not require blaze orange for waterfowl hunting. You should still wear safety orange clothing while heading to the hunting site, and many hunting clothes are reversible with one side camouflage, the other blaze orange.

    How to Choose Hunting Pants

    There are many types of pants that suit hunters well, but you need to keep camouflage in mind while shopping for hunting pants. Once you have the camo down, you need to consider comfort, warmth, and features that fit your needs. 

    Good hunting pants have these qualities:

    • Durability: You need tough pants that will hold up in harsh conditions and protect your legs from sharp thorns and branches. 
    • Quiet Fabric: Some synthetic fabrics can be noisy (swish, swish, swish). Look for “silent” or “quiet” hunting clothes that minimize sound during movement.
    • Scent Control: This isn’t a must if you have other forms of masking your scent, but it is certainly a nice feature to have that will further hide your scent from prey.
    • Comfortable: Stretch fabric, elastic waistbands, and crotch gussets are examples of features focused on comfort. You want hunting pants that are easy to climb in and out of treestands with, and this is especially important for more exerting hunts.
    • Gear Storage: Good hunting pants resemble good tactical pants when it comes to utility. You want plenty of useful pockets and sturdy belt loops that can support a holster and other equipment.

    Consider the three-layer clothing system when shopping for hunting pants. There are lightweight pants for warm weather, insulated pants for frigid temperatures, and hunting pants designed for mild conditions. 

    What Else to Wear on a Hunting Trip

    men wearing hunting clothes

    Depending on where you’re hunting, you may want to consider the following apparel for your outing:

    • Wear a hat if it will be sunny out to shield your eyes and head from harmful UV rays
    • For cold conditions, opt for a beanie that will keep your ears and head warm.
    • Gloves are a great way to protect your hands and keep them warm in the winter. Besides shooting gloves, consider an extra pair of mittens for cold conditions. If you’ll be using a GPS or other devices, make sure to buy gloves that are touchscreen-compatible.
    • Neck gaiters are great for hunting since they provide protection from chilly winds in cold climates and UV rays in sunny conditions.

    Hangin’ It Up

    By now, you hopefully know how to shop for hunting clothes that best match your environment, conditions, and type of hunt. Dressing properly for a hunting trip is important, and ensures you stay safe, comfortable, and protected. 

    As a reminder, here’s a quick recap of what we covered:

    • Creating a three-layer hunting clothes system is the best way to control temperature, manage sweat, and stay protected from the elements.
    • NEVER wear cotton hunting clothes because they absorb water easily and take too long to dry.
    • The best deer hunting camouflage is breakup (digital) camo that blurs your outline.
    • The best duck and waterfowl hunting camouflage is mimicry camo that contains natural patterns resembling your surroundings.
    • Blaze orange is required in most states and should be worn by all hunters to improve everyone’s safety. 
    • Deer cannot distinguish blaze orange so it will not impact how they see you.
    • Good hunting pants are durable, comfortable, and have plenty of pockets. Great hunting pants are quiet and have built-in scent control.

    Looking for new hunting clothes? Make sure to check out OpticsPlanet’s massive collection of hunting apparel and gear to prepare for your next big outing. Now, let’s roll up our sleeves and have a safe and fruitful hunting season!

    No Comments on What to Wear on a Hunt: 4 Things to Know About Hunting Clothes

    Read More
  • Looking down a rifled barrel

    What Is the First Step in Cleaning a Firearm? How to Clean Your Gun

    May 24 • How-To, Firearm Maintenance • 4786

    Any and every gun owner needs to learn about gun cleaning as a key part of regular gun maintenance. It ensures the proper performance of your firearm and increases its longevity. Just a few gunsmithing tools and the right gun cleaning kit can make all the difference if you’re following the right steps. Read on to find out what is the first step in cleaning a firearm, why you should do it, how to clean your gun, and how often it needs to be done.

    Why Does Gun Cleaning Matter?

    If you think about a gun being like a car, it’s pretty obvious. If your vehicle isn’t well-maintained, it’s going to wear out faster, rust up, become dangerous to operate, and inevitably fail you when you need it most. Luckily, gun maintenance is a whole lot cheaper and easier than automobiles.

    The primary purpose of gun cleaning is to remove fouling and preserve the firearm. What’s fouling? Fouling* is the buildup of various debris and residue that firing a gun produces: carbon, copper, lead, and other debris. In short, it’s nasty gunky crud that degrades guns when left unchecked.

    (*Not to be confused with “fowling,” which is bird hunting. Fowling is fun, fouling is not fun.)

    Fouling affects every aspect of your gun:

    • Accuracy: As a gun’s used, the rifling inside the barrel that gives the bullet stability will build up debris, affecting how the bullet travels out of the gun.
    • Performance: Guns have moving parts. The more complicated the gun is, like a semi-automatic, the more moving parts and more chances for failure due to a lack of maintenance. This can result in jams, misfires, failure to feed, failure to eject/extract, stovepipes, and more.
    • Safety: Some of those performance issues can become quite dangerous if left unchecked. A neglected gun can deteriorate to the point of catastrophic failure (exactly as bad and scary as it sounds). It may even look all right from the outside but have some serious issues with the innards. Once a gun’s gotten that bad, it either needs to go to a gunsmith or be retired as a wall-hanger.
    • Longevity: A well-maintained firearm can easily outlive the original owner. This is how guns get handed down from generation to generation, still faithfully operating for decades and beyond.
    Two handguns on a cleaning mat with bore cleaning rods, brushes, and accessories.

    Gun cleaning starts with ensuring the firearm is unloaded.


    What is the First Step in Cleaning a Firearm?

    Safety First!

    Always make sure your firearm is unloaded before cleaning it. If it has a detachable magazine, take it out and remove any cartridges from the magazine. If it has a fixed or internal magazine, ensure that they’re entirely free of ammunition. Visually and manually inspect the chamber to be absolutely sure the weapon is unloaded.

    Once you’re 100% sure that your gun’s unloaded, follow all of the same steps to check it again. When it comes to safety, there’s no such thing as too many redundancies.

    One of the best practices I’ve heard about is to remove or lock up all ammunition from the area where you’re cleaning your gun. This removes even the most remote possibility of a live round being introduced to the firearm.

    What Do I Need?

    • A well-ventilated space: For starters, pick a well-ventilated area away from children and pets. Solvents and other chemicals can be very harmful, and fumes can quickly build up to a toxic level in a small and/or poorly-vented area.
    • A workstation: Pick an area like a table or workbench that is large enough to accommodate the firearm and all of its parts. I like a surface that’s roughly 4 feet wide by 6 feet long. You can do this on the floor if necessity dictates it, but your knees, ankles, and back will be a whole lot happier off the ground. A really handy item is a gun vise; it keeps the gun from moving around while you clean it, and is nearly essential if you’re mounting a scope. Using a cleaning mat is a good idea, as the solvents and oils will soak right through a towel and ruin the table surface underneath.
    • PPE: Many people prefer to use nitrile gloves for two reasons: it protects their hands from cleaning chemicals, and it prevents fingerprints from getting on the gun. The natural salts and oils on your hand may be invisible at the time, but you never forget the first time you take a gun out of storage and see a thumbprint-shaped bit of surface rust. Safety glasses are a good idea, too. Since you should already have some in your range kit, there’s no reason not to use them when your gun-cleaning to avoid getting any chemicals or flying parts into your eyes.
    • Gunsmithing tools: You shouldn’t need anything that will fill a toolbox, but simple gunsmithing tools appropriate to your gun are a good idea. It’s very rare to get any sort of tools with a gun or to have them included in cleaning kits. Wheeler has an affordable variety, and a torque wrench screwdriver ensures you don’t over-tighten screws or strip them.
    A basic gun cleaning kit.

    Most universal gun kits will include the accessories you need to get started.

    • Gun Cleaning Kit: You won’t need anything more than a universal gun cleaning kit to get started, and they’re inexpensive. They fit most calibers from .22 to 12ga shotguns and everything in between. There some components that you definitely want to have, and you can buy separately if they’re not included in your kit or need replacement:
    • Bore Light (optional): A bore light is really handy for inspecting the cleanliness of the barrel.

    Field Strip vs. Full Disassembly

    “Field stripping” is taking apart the basic components of a gun to clean them. You can find instructions on how to do this in the owner’s manual, manufacturer’s website, our YouTube channel, our How-To Guides, and here on our Gear Expert site. Just make sure you go slowly when you’re field stripping; there are a lot of little springs, screws, and various doodads that can get away from you pretty easily. It’s also a best practice to lay out the pieces in the order that you take them out, making reassembly much easier.

    Fully disassembling a gun beyond field stripping isn’t advised unless you really, really, really know what you’re doing. Otherwise, this usually results in bringing in what’s called “a bag of gun” to gun shops and gunsmiths because the owner has realized they don’t know how to put it back together and have likely lost or broken a few parts in the process. However, it’s not a bad idea to periodically take your gun in for professional deep cleaning; it’s actually recommended.

    Bolt-action rifle being cleaned from action toward muzzle.

    Whenever possible, clean from the action to the muzzle to avoid drawing debris back into the firearm.

    How to Clean Your Gun

    Cleaning the Barrel

    It’s always preferable to work from the action toward the muzzle unless for some reason that’s just not possible with the gun’s design. This avoids pushing the debris back into the receiver and chamber, which is counterproductive.

    1. Attach the appropriate caliber of a dry wire bore brush on the rod and slowly push it through, scrubbing up and down every few inches as you do.
      1. If you want or need to run it through again, remove the brush while it’s still sticking out of the muzzle, pull the rod out, and replace the brush before doing it again to avoid dragging the debris back in.
      2. This loosens up the fouling for the next step.
    2. Run a cleaning patch dipped in cleaning solvent through next. Go slow enough to ensure it’s really getting into that barrel. Let it sit for about 10 minutes to allow the solvent to really loosen stuff up.
    3. Run the wire bore brush dipped in solvent slowly through the barrel again.
    4. Run a dry patch through once or twice, swap the patch for a clean one, and repeat until the patch comes out as clean and white as it was going in.
    5. If you opted for a bore light, use it to check for any remnants in the barrel. If not, hold it up to a light to check. If you see anything left, repeat Steps 1-4 again.
    6. Note: although it’s not possible on every gun, look from action instead of down the barrel as a best practice.
    7. Once the barrel’s squeaky clean, run a lightly oiled patch through. Don’t overdo it, excess lubricant accumulates more debris and necessitates more frequent cleaning. If you’re not sure, run a single dry patch through after oiling, just to swab out any excess oil and ensure only a very fine coat.

    Cleaning the Action

    This varies somewhat from gun to gun depending on the make, model, and style, but the steps are essentially the same.

    1. Scrub with solvent using the gun brush that resembles a toothbrush. Again, let the solvent set in for about 10 minutes. Avoid the temptation to use that old used toothbrush from the medicine cabinet just to save a few bucks; it’s not worth getting toothpaste, food particles, and tartar in your gun.
    2. Wipe it down with clean, dry patches until they come away clean and white. If not, repeat Steps 1-2 again.
    3. Lightly oil the parts with patches. Make sure you get all of the moving parts and anywhere friction occurs. Just like the barrel, don’t overdo it on the oiling, a light coating is sufficient.

    Magazines Need Love, Too

    Don’t overlook your magazines, they’re a critical part of semiautomatics. The manufacturer’s instructions will show you how to take them apart, but may not stress how careful you need to be. Magazine followers have a strong spring behind them, so eye injury and broken and/or lost pieces are a distinct possibility. Once disassembled, give them a good scrubbing with solvent and wipe it off with dry patches until they come away clean. Don’t oil magazines, it will only attract debris and isn’t necessary.

    Inspect the Parts

    While you have your gun field stripped, it’s a great time to inspect the parts for any excess wear or breakage. There are a lot of gun parts available that you can replace by DIY, but if you’re unsure or it’s more than you can handle, take it to a gunsmith.

    Disassembled rifle being cleaned.

    Make sure you clean and oil all moving parts, taking care to remove debris and excess lubricant.

    Finish the Job

    • Once your gun’s completely cleaned, reassemble it.
    • Test all of the moving parts, making sure that everything is in working order:
      • Work the action several times.
      • Dry-fire a few times, preferably with a snap cap (always use a dummy round if you’re cleaning a rimfire to avoid damaging the firing pin).
      • Switch the safety off and on a few times.
      • Test the magazine release, etc.
    • Lastly, apply a light coat of oil to all of the external metal with a patch or other lint-free cloth.

    Keep It Lubricated

    Technically, both gun oil and gun grease are lubricants. There’s a very fine line between too much and not enough, but none at all is just not going to be good in the long run. A properly lubed gun will continue to operate properly even if it’s dirty.

    Gun grease is a bit different than oil, as it’s more like a cream than a liquid. Gun grease isn’t globbed on, it’s polished on very lightly with patches or other soft, lint-free cloth. Grease is great for parts that have a lot of high friction, like the slide, because they’re less likely to accumulate grit and debris and will last longer than gun oil. When applied, you still want to make sure you don’t have an excess layer left behind.

    It’s important to ensure that your gun’s moving parts all have enough lubrication to function, but not too much to gum up. Pay particular attention to parts that need to move the most for the firearm to function properly. Anywhere that metal meets metal is where friction can occur. Your aim is to minimize this friction. Slides, actions, trigger assemblies, sears, magazine releases, safety levers/buttons, slide locks/releases, and any other moving parts. Penetrating lubricants are preferred, as they can get into the little nooks and crannies that aren’t easily accessible when your gun is field-stripped.

    You’ll find a lot of different products on the market. Consider where and how you’ll be using your gun and pay attention to the specifications of the lubricant you’re purchasing. If you live or will be shooting in an area of high humidity, look for products with a high level of rust protection. There are also lubes that are specifically formulated to perform in subzero conditions, minimizing the risk of them gumming up when you’re out in harsh, freezing cold weather. Many can be used in combination with a layer of grease on parts that get a lot of wear and oil on parts that have less wear or are harder to access and couldn’t have a proper grease application as a result.

    How Often Should You Clean Your Gun?

    This depends entirely on how and how much you use your gun:

    Any time you’ve been out shooting, like trips to the range.

    If you’re doing really high-volume shooting or using inexpensive ammunition (often called “dirty ammo”), it’s nice to bring along a bore snake to run through every few hundred rounds. Bore snakes are also handy to take out in the field in case any foreign material gets into your barrel.

    A carry gun should be cleaned every 2-3 weeks.

    Especially the bore, hammer, and any other moving parts that will accumulate contaminants. We have salt-rich sweat and excrete natural oils that can and will be introduced to your everyday carry gun. Lint, dust, and various other exposures mean you should check it every 2-3 days for any buildup. The same goes for guns that are carried in vehicles (storing your gun around the clock in a vehicle is ill-advised in the event of a break-in or car theft). Don’t overlook this, a self-defense gun needs to work flawlessly at a moment’s notice and when you absolutely need to be able to depend on it.

    After any hunting or outdoor trip, even if you didn’t fire it or notice anything getting into it.

    Dust, pollen, brush, moisture, and more can all accumulate on a gun even on a short day trip.

    Before storing it for what could turn out to be a longer time than you anticipate (hope for the best, plan for the worst).

    Store guns barrel-down to avoid oil running down and accumulating in the gun or damaging a wood stock.

    During storage, check guns every 3-6 months to look for any accumulated dust, lack of oil, beginning signs of surface rust, etc.

    It’s a good practice to clean guns in long-term storage every 6 months to a year.

    It’s a lot to take in, but regular cleaning and maintenance of your firearm is key to the preservation and ensuring it functions perfectly. Now that you know the steps and frequency of gun cleaning, you can feel more confident that you’re doing it right. Tell us what you think in the comments below, and share if you liked it!

    No Comments on What Is the First Step in Cleaning a Firearm? How to Clean Your Gun

    Read More
  • lineup of tactical pants

    What Makes Tactical Pants Different from Regular Pants?

    May 9 • Apparel, Tactical Pants • 4425

    Tactical pants, or tac pants, may look and feel like your everyday casual pants. Some folks even refer to ordinary cargo pants as “tactical,” but there are several key differences between the two. In fact, tactical pants are purposefully designed to resemble ordinary pants but offer discreet features that are especially useful for covert operations or concealed carry. We wrote this guide to clear up any misconceptions about tactical pants and explain what makes tactical pants “tactical.”

    What Does “Tactical” Mean?

    The word “tactical” has a handful of different meanings. According to Collins Dictionary:

    • You use tactical to describe an action or plan intended to help someone achieve what they want in a particular situation.
    • Tactical weapons or forces are those which a military leader can decide for themselves to use in a battle, rather than waiting for a decision by a political leader. police officer wearing tac pants

    Both of these definitions somewhat apply to tactical pants. They are designed for a specific purpose and provide utility beyond covering your body. They are also used by military and law enforcement, providing extra utility in the field.

    In short, if pants are tactical, that means that they are made for and worn by those who serve and protect. However, civilians can still wear tactical pants if they want extra utility from their apparel, especially if they conceal carry.

    What Makes Tactical Pants “Tactical”

    So we know that tactical pants are designed for professional use and offer extra utility, but what exactly makes tac pants stand out from standard threads? Well, we can start by looking at the construction and features of tactical pants.

    Construction of Tactical Pants tactical pants side view

    While tactical pants can be made from a variety of materials, there are two common elements all tac pants share:

    • Extreme durability
    • Enhanced mobility


    Durability

    As we discussed earlier, tactical pants are crafted to serve the needs of law enforcement, the military, and others who have demanding jobs. That’s why tactical pants are undeniably tough and designed to withstand the most brutal conditions in the field.

    • Physical stress
    • Abrasion
    • Dirt
    • UV light

    These are only a handful of challenges servicemen and women face in the field. To outlast these factors, tactical pants may be designed with: reinforced seams

    • Rugged materials 
    • Fabric treatments
    • Reinforced seams (knees, seat, belt loop)
    • Double-stitching 

    Tough materials like ripstop and twill are commonly used to manufacture tactical pants, and they are often treated for resistance to water and stains. Reinforced seams feature bar tacks or other sewing methods that provide extra protection to essential areas. Reinforced belt loops are a must as standard belt loops aren’t designed to carry heavy gear during each use. These belt loops are also larger than standard ones to properly support a full duty belt.

    Mobility

    The next element of tactical pants to discuss is their mobility. Whether you’re pursuing suspects or rushing to the scene, you need tactical clothing that won’t restrict your movement. In most cases, these features actually provide extra mobility, making all the difference in an emergency. Tactical pants improve your mobility with:

    • Crotch gusset
    • Articulated knees
    • Elastic or expanding waistband
    • Stretch fabric

    A crotch gusset is a diamond-shaped piece of fabric implemented at the crotch area to avoid multiple seams converging. Think about standard jeans and how all the stitching bulks up in that area. A gusseted crotch eliminates that tension for extra comfort, improved movement, and durability.

    Articulated knees reduce the amount of fabric without impacting durability. Tactical pants with articulated knees allow you to bend, crouch, and move much easier than standard threads. Tac pants have stretchy waistbands that provide a great fit but offer that extra bit of comfort and mobility you need on duty. Stretchy fabrics like spandex are infused with rugged fabrics to create a perfect blend of durability and unrestricted movement.

    Common Features of Tactical Pants

    Nearly all types of pants offer various features to the wearer, but the features of tactical pants are designed with a particular purpose in mind. While everyday jeans have standard pockets for phone/keys/wallet and different cut lengths, those features are designed with the general public in mind. 

    Tactical pants, however, have features geared towards on-duty law enforcement, covert law enforcement, and EMTs. Essential features of tactical pants include:

    • Numerous pockets (and specialized pockets)
    • CCW-friendly construction

    Tactical pants usually have at least eight pockets throughout, each designed for a specific purpose. While ordinary pants may have plenty of pockets, they are made for general storage. On the other hand, tactical pants have pockets suited for items that most civilians wouldn’t carry:man putting magazine in pocket of tac pants

    • Knives
    • Handcuff keys
    • Magazines
    • Knee-pads
    • Flashlights
    • Pens
    • Multi-tools
    • Documents

    Tactical pants feature slash pockets, or slanted pockets, that are cut in a manner that provides quick access to their contents. This ensures the wearer can grab these vital items in a pinch. 

    Tactical pants are also optimized for concealed carry. Manufacturers pay very close attention to the materials they use in common carry areas to greatly reduce or eliminate the printing of your weapon through the pants. This is especially useful for covert officers who want to blend in with the crowd. Civilians who conceal carry a weapon may also appreciate the ability to carry protection without alarming the general public.

    The Last Leg

    Hopefully, you now understand what makes tactical pants “tactical” and how they differ from regular pants. As a reminder, here’s a recap of what we learned about tactical pants:

    • They are designed for a specific use, usually by law enforcement, military personnel, and EMTs.
      • But civilians can wear them too!
    • They are more durable and provide more mobility than regular pants.
    • They have numerous pockets designed to hold firearms, magazines, handcuff keys, and other items you need while on duty.

    Tactical pants are a must for certain professions, but you can also enjoy the extra comfort, durability, and utility they offer as a civilian. If you’re interested in learning more about tac pants, come check out our guide What Are Tactical Pants? for more information, or shop our collection of tactical pants today to find the style and color that suits you best!

    No Comments on What Makes Tactical Pants Different from Regular Pants?

    Read More
  • shooting a moving target

    How to Shoot a Moving Target: 2 Key Methods & Applications

    May 7 • How-To, Shooting Tips, Hunting • 3953

    Shooting a moving target is easier said than done. The concepts are simple. You either follow a target with your sights or you let the target walk into your sights. Where it gets difficult, though, is mastering the technique and timing to effectively hit your target. This article will give further insight into the concepts and challenges of shooting a moving target. 

    Ways to Shoot a Moving Target

    Across all shooting disciplines — rifle, shotgun, handgun, bow, crossbow, et cetera — there are two main methods for engaging a moving target. You can also apply them to any shooting application like hunting, defense, or target shooting. These include the tracking method and the ambush method. 

    To define these methods, I’ll refer to training materials published by the Marine Corps, a military organization that prides itself on its marksmanship training and capabilities. 

    • Tracking – The tracking method is when you follow your target with your sights. You do this one of two ways. You either aim directly at your target or just ahead of it. 
    • Ambush – The ambush method is when you keep your sights fixed on a spot and wait for your target to walk into your point-of-aim. 

    There’s a third method that’s often used in reference to competitive shotgun shooting like skeet or clays, or bird hunting. It’s called the swing-through method. It’s when you swing your shotgun along with the target until you’re ahead of it. 

    When to Apply the Methods

    shooting a moving target

    Tracking a coyote in the field.

    While these methods are easy to understand and relatively self-explanatory, which one you should use depends on your range and how your target moves. In turn, the Marines also identify two types of targets: a steady-moving target, and a stop-and-go target. Both of which are self-explanatory. 

    According to the training materials, the ambush method is better suited for a stop-and-go target because the target’s pattern of movement is less predictable. Inversely, you can track a steady-moving target because the target’s movement pattern is more predictable.

    But then there are still questions about when to track the target directly or just ahead it. The answer depends on the range and speed of your steady-moving target. 

    When to Track a Target Directly

    The Marines train their rifleman to track a target directly when the target is moving slowly at a relatively short range. These conditions include:

    • When a target walks slowly or quickly at about 50 yards
    • And, when a target walks slowly at about 100 yards 

    When to Track Ahead of the Target 

    Tracking ahead of the target is more complicated because you have to consider the time it takes for the bullet to travel down range and the speed in which your target is moving. 

    For instructional purposes, they use two hasty measurements to describe distance for lead time. The first is called leading edge, which means the edge of the target, or about half a body width, and the second is body width. 

    shooting a moving target

    Applying the tracking method to trotting game.

    In general, you should track your target with a leading edge if it’s moving slowly and then widen the gap the faster it moves. Another way to put it, if you’re tracking a slow-moving or trotting target, you should increase your lead by about half a body width every 50 yards. For example, you’ll need a: 

    • Leading edge at 50 yards
    • One body-width at 100 yards
    • Two body-widths at 200 yards

    Why Practice Shooting at Moving Targets

    Whether you’re shooting a stationary target or a moving target, the principles are the same, according to Jessie Harrison, a world champion professional shooter whose career accomplishments span two decades.

    “Shooting at moving targets, besides being fun and requiring a lot of practice, can vastly improve your skills at shooting stationary targets,” Harrison said, and explained that as a training exercise shooting a moving target will sharpen your skills as well as your reaction time.

    According to Harrison, it takes a quarter of a second for an average person to respond to a visual stimulus and about 0.17 seconds to respond to an audio stimulus. “Practicing any of these moving target methods will significantly improve your overall shooting proficiency,” she said.

    However, there’s no instruction or great piece of advice to give to teach you how to shoot a moving target. It’s really a matter of practice. 

    Should You Shoot at a Moving Target?

    Whenever you shoot at a living creature, you will face ethical questions about whether or not you made the right decision. Obviously, self-defense scenarios will merit more scrutiny than matters of hunting, but hunting is a much likelier scenario.  

    shooting a moving target

    Applying the ambush method to a stop-and-go target.

    When you’re on the hunt, you generally want to kill your target with as few shots as possible. There’s a righteous reason, a practical reason, and a combination of the two. 

    • First, you don’t want the animal to suffer unnecessarily. 
    • Second, you want to be an effective and efficient sportsman.
    • Lastly, you don’t want a dying animal to get away from you.

    Professional hunter and outdoor writer Craig Boddington said in an article about shooting running game that he doesn’t advocate it, but he’s also not against it. 

    “Taking a shot is always a judgment call based on your confidence — in that split-second when the trigger breaks — that you know what you must do and do it to the best of your ability,” he said. “This applies whether the animal is moving or standing still.”

    Even if you are comfortable and confident enough to shoot a moving or running animal, you should still familiarize yourself with your local and state hunting guidelines and rules. 

    Parting Shots

    There’s a lot about shooting at moving targets that’s self-explanatory, but the practice is far from simple. Despite that, shooting at moving targets in a training scenario will help improve your marksmanship skills on static ranges and in other practical scenarios. What other advice do you have for shooting at a moving target? Share in the comments below.

    No Comments on How to Shoot a Moving Target: 2 Key Methods & Applications

    Read More