

Any and every gun owner needs to learn about gun cleaning as a key part of regular gun maintenance. It ensures the proper performance of your firearm and increases its longevity. Just a few gunsmithing tools and the right gun cleaning kit can make all the difference if you’re following the right steps. Read on to find out what is the first step in cleaning a firearm, why you should do it, how to clean your gun, and how often it needs to be done.
Why Does Gun Cleaning Matter?
If you think about a gun being like a car, it’s pretty obvious. If your vehicle isn’t well-maintained, it’s going to wear out faster, rust up, become dangerous to operate, and inevitably fail you when you need it most. Luckily, gun maintenance is a whole lot cheaper and easier than automobiles.
The primary purpose of gun cleaning is to remove fouling and preserve the firearm. What’s fouling? Fouling* is the buildup of various debris and residue that firing a gun produces: carbon, copper, lead, and other debris. In short, it’s nasty gunky crud that degrades guns when left unchecked.
(*Not to be confused with “fowling,” which is bird hunting. Fowling is fun, fouling is not fun.)
Fouling affects every aspect of your gun:
- Accuracy: As a gun’s used, the rifling inside the barrel that gives the bullet stability will build up debris, affecting how the bullet travels out of the gun.
- Performance: Guns have moving parts. The more complicated the gun is, like a semi-automatic, the more moving parts and more chances for failure due to a lack of maintenance. This can result in jams, misfires, failure to feed, failure to eject/extract, stovepipes, and more.
- Safety: Some of those performance issues can become quite dangerous if left unchecked. A neglected gun can deteriorate to the point of catastrophic failure (exactly as bad and scary as it sounds). It may even look all right from the outside but have some serious issues with the innards. Once a gun’s gotten that bad, it either needs to go to a gunsmith or be retired as a wall-hanger.
- Longevity: A well-maintained firearm can easily outlive the original owner. This is how guns get handed down from generation to generation, still faithfully operating for decades and beyond.
Gun cleaning starts with ensuring the firearm is unloaded.
What is the First Step in Cleaning a Firearm?
Safety First!
Always make sure your firearm is unloaded before cleaning it. If it has a detachable magazine, take it out and remove any cartridges from the magazine. If it has a fixed or internal magazine, ensure that they’re entirely free of ammunition. Visually and manually inspect the chamber to be absolutely sure the weapon is unloaded.
Once you’re 100% sure that your gun’s unloaded, follow all of the same steps to check it again. When it comes to safety, there’s no such thing as too many redundancies.
One of the best practices I’ve heard about is to remove or lock up all ammunition from the area where you’re cleaning your gun. This removes even the most remote possibility of a live round being introduced to the firearm.
What Do I Need?
- A well-ventilated space: For starters, pick a well-ventilated area away from children and pets. Solvents and other chemicals can be very harmful, and fumes can quickly build up to a toxic level in a small and/or poorly-vented area.
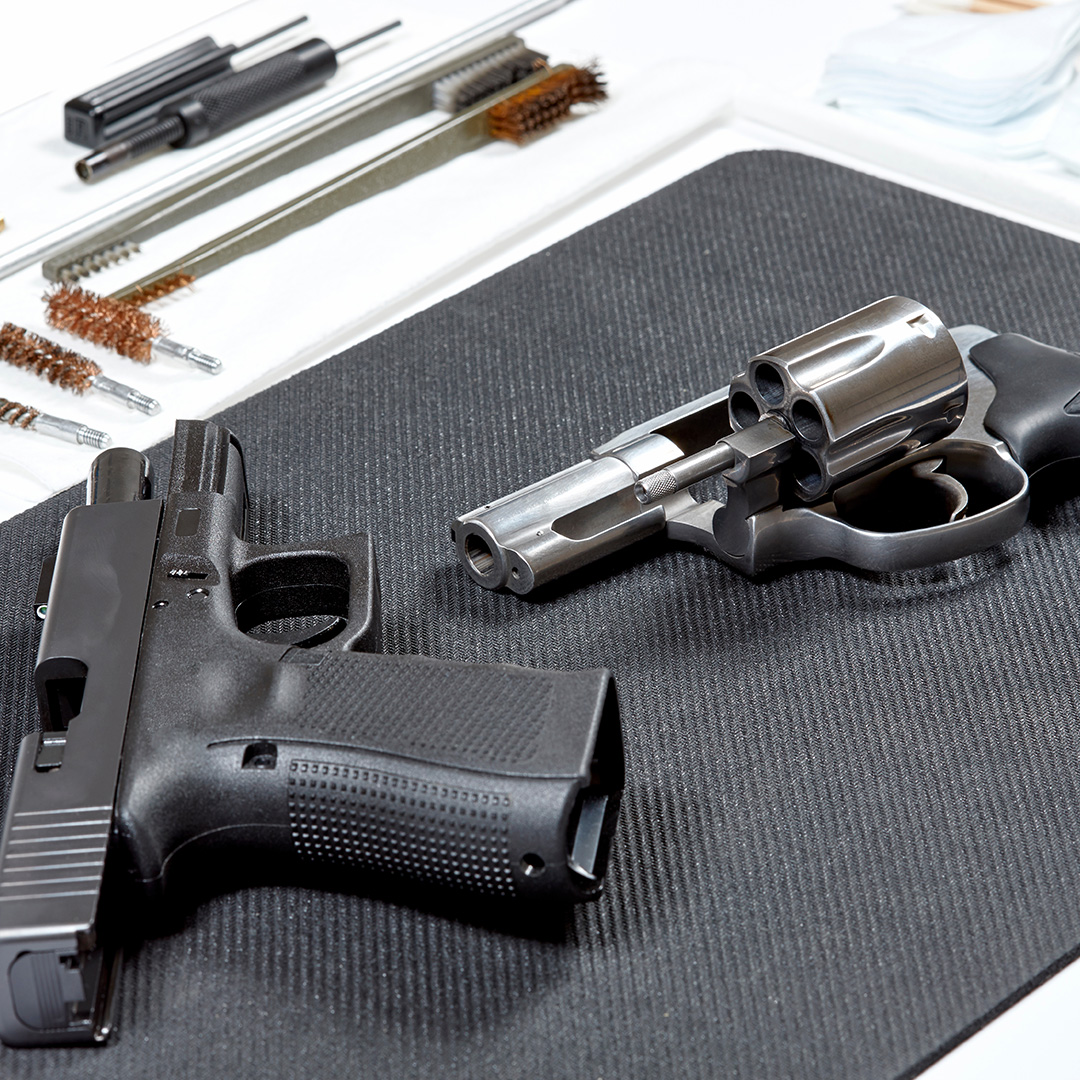
- A workstation: Pick an area like a table or workbench that is large enough to accommodate the firearm and all of its parts. I like a surface that’s roughly 4 feet wide by 6 feet long. You can do this on the floor if necessity dictates it, but your knees, ankles, and back will be a whole lot happier off the ground. A really handy item is a gun vise; it keeps the gun from moving around while you clean it, and is nearly essential if you’re mounting a scope. Using a cleaning mat is a good idea, as the solvents and oils will soak right through a towel and ruin the table surface underneath.
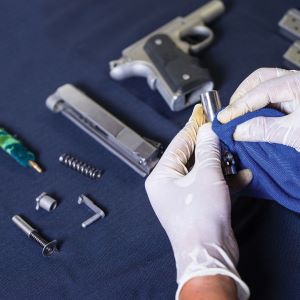
- PPE: Many people prefer to use nitrile gloves for two reasons: it protects their hands from cleaning chemicals, and it prevents fingerprints from getting on the gun. The natural salts and oils on your hand may be invisible at the time, but you never forget the first time you take a gun out of storage and see a thumbprint-shaped bit of surface rust. Safety glasses are a good idea, too. Since you should already have some in your range kit, there’s no reason not to use them when your gun-cleaning to avoid getting any chemicals or flying parts into your eyes.
- Gunsmithing tools: You shouldn’t need anything that will fill a toolbox, but simple gunsmithing tools appropriate to your gun are a good idea. It’s very rare to get any sort of tools with a gun or to have them included in cleaning kits. Wheeler has an affordable variety, and a torque wrench screwdriver ensures you don’t over-tighten screws or strip them.
Most universal gun kits will include the accessories you need to get started.
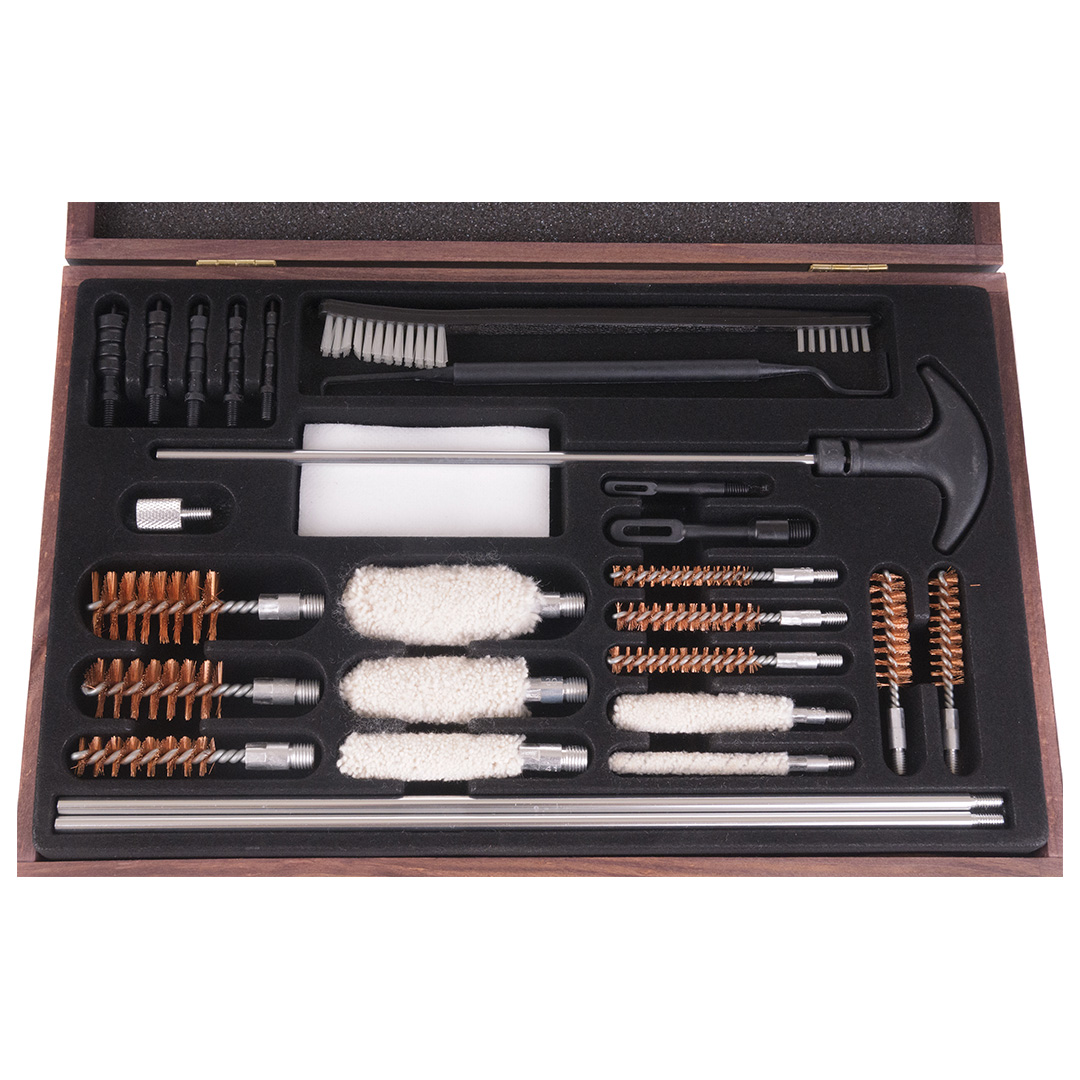
- Gun Cleaning Kit: You won’t need anything more than a universal gun cleaning kit to get started, and they’re inexpensive. They fit most calibers from .22 to 12ga shotguns and everything in between. There some components that you definitely want to have, and you can buy separately if they’re not included in your kit or need replacement:
-
-
- Cleaning Rod and Rod Ends
- Lubricants, Solvents, and Degreasers
- Gun Brush (both those that look like a toothbrush and bore brush rod-ends)
- Gun Cleaning Patches
-
- Bore Light (optional): A bore light is really handy for inspecting the cleanliness of the barrel.
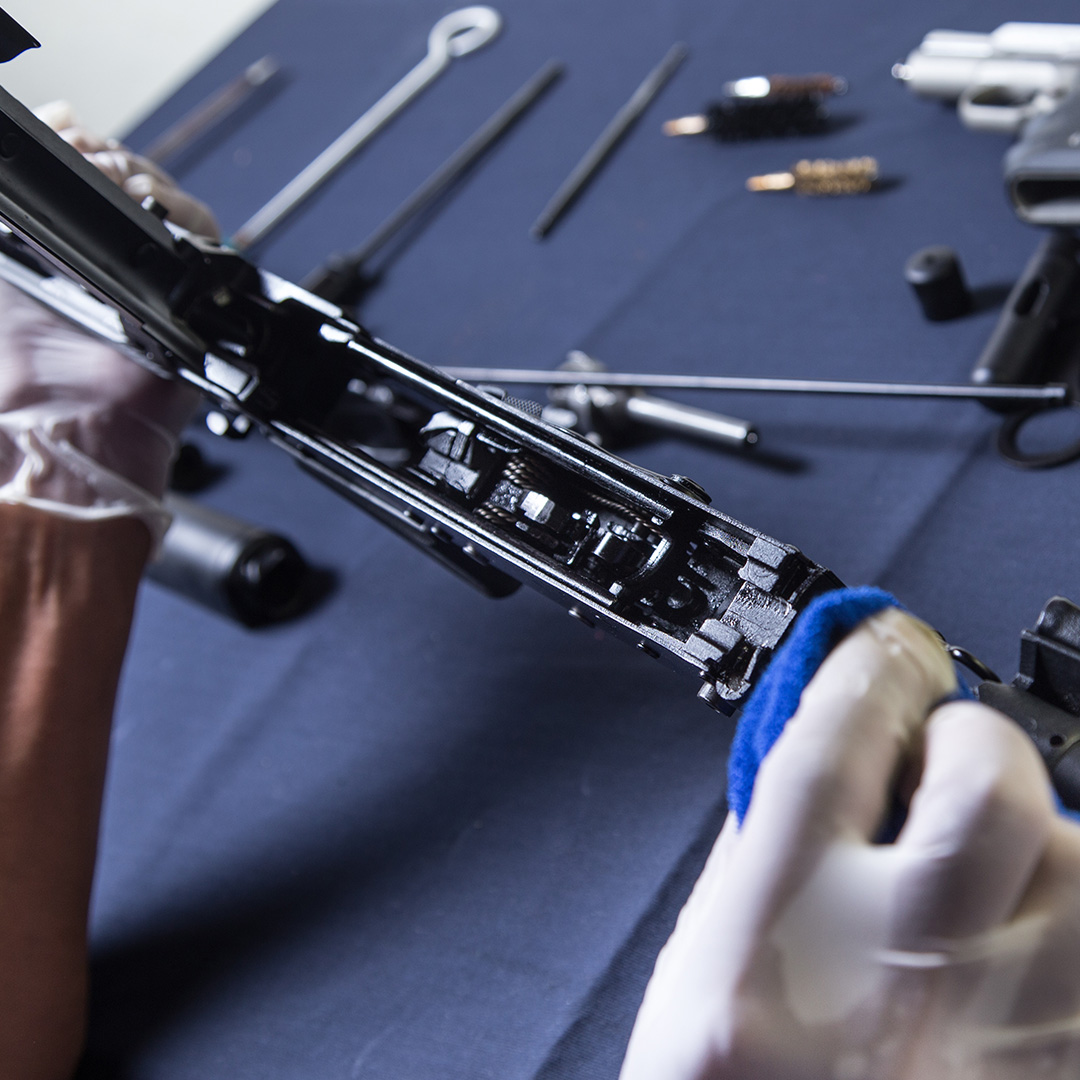
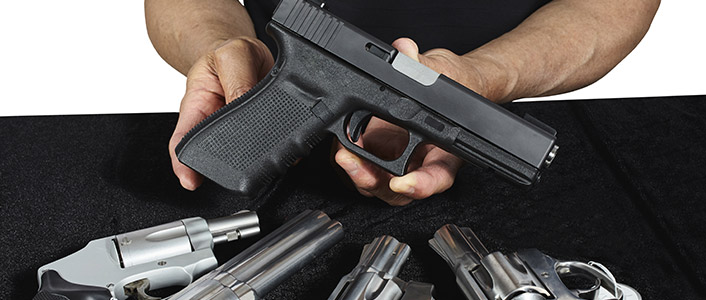
Field Strip vs. Full Disassembly
“Field stripping” is taking apart the basic components of a gun to clean them. You can find instructions on how to do this in the owner’s manual, manufacturer’s website, our YouTube channel, our How-To Guides, and here on our Gear Expert site. Just make sure you go slowly when you’re field stripping; there are a lot of little springs, screws, and various doodads that can get away from you pretty easily. It’s also a best practice to lay out the pieces in the order that you take them out, making reassembly much easier.
Fully disassembling a gun beyond field stripping isn’t advised unless you really, really, really know what you’re doing. Otherwise, this usually results in bringing in what’s called “a bag of gun” to gun shops and gunsmiths because the owner has realized they don’t know how to put it back together and have likely lost or broken a few parts in the process. However, it’s not a bad idea to periodically take your gun in for professional deep cleaning; it’s actually recommended.
Whenever possible, clean from the action to the muzzle to avoid drawing debris back into the firearm.
How to Clean Your Gun
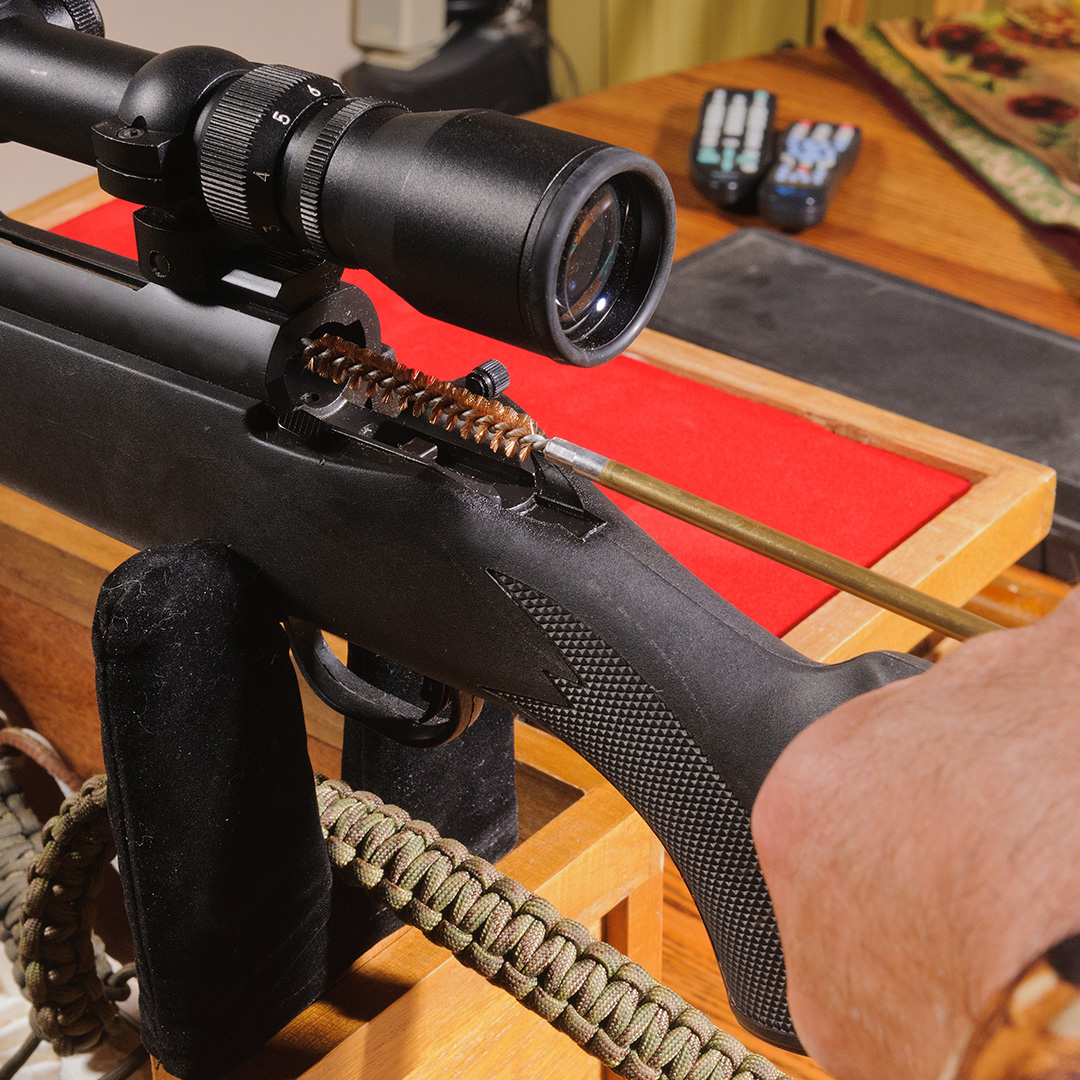
Cleaning the Barrel
It’s always preferable to work from the action toward the muzzle unless for some reason that’s just not possible with the gun’s design. This avoids pushing the debris back into the receiver and chamber, which is counterproductive.
- Attach the appropriate caliber of a dry wire bore brush on the rod and slowly push it through, scrubbing up and down every few inches as you do.
- If you want or need to run it through again, remove the brush while it’s still sticking out of the muzzle, pull the rod out, and replace the brush before doing it again to avoid dragging the debris back in.
- This loosens up the fouling for the next step.
- Run a cleaning patch dipped in cleaning solvent through next. Go slow enough to ensure it’s really getting into that barrel. Let it sit for about 10 minutes to allow the solvent to really loosen stuff up.
- Run the wire bore brush dipped in solvent slowly through the barrel again.
- Run a dry patch through once or twice, swap the patch for a clean one, and repeat until the patch comes out as clean and white as it was going in.
- If you opted for a bore light, use it to check for any remnants in the barrel. If not, hold it up to a light to check. If you see anything left, repeat Steps 1-4 again.
- Note: although it’s not possible on every gun, look from action instead of down the barrel as a best practice.
- Once the barrel’s squeaky clean, run a lightly oiled patch through. Don’t overdo it, excess lubricant accumulates more debris and necessitates more frequent cleaning. If you’re not sure, run a single dry patch through after oiling, just to swab out any excess oil and ensure only a very fine coat.
Cleaning the Action
This varies somewhat from gun to gun depending on the make, model, and style, but the steps are essentially the same.
- Scrub with solvent using the gun brush that resembles a toothbrush. Again, let the solvent set in for about 10 minutes. Avoid the temptation to use that old used toothbrush from the medicine cabinet just to save a few bucks; it’s not worth getting toothpaste, food particles, and tartar in your gun.
- Wipe it down with clean, dry patches until they come away clean and white. If not, repeat Steps 1-2 again.
- Lightly oil the parts with patches. Make sure you get all of the moving parts and anywhere friction occurs. Just like the barrel, don’t overdo it on the oiling, a light coating is sufficient.
Magazines Need Love, Too
Don’t overlook your magazines, they’re a critical part of semiautomatics. The manufacturer’s instructions will show you how to take them apart, but may not stress how careful you need to be. Magazine followers have a strong spring behind them, so eye injury and broken and/or lost pieces are a distinct possibility. Once disassembled, give them a good scrubbing with solvent and wipe it off with dry patches until they come away clean. Don’t oil magazines, it will only attract debris and isn’t necessary.
Inspect the Parts
While you have your gun field stripped, it’s a great time to inspect the parts for any excess wear or breakage. There are a lot of gun parts available that you can replace by DIY, but if you’re unsure or it’s more than you can handle, take it to a gunsmith.
Make sure you clean and oil all moving parts, taking care to remove debris and excess lubricant.
Finish the Job
- Once your gun’s completely cleaned, reassemble it.
- Test all of the moving parts, making sure that everything is in working order:
- Work the action several times.
- Dry-fire a few times, preferably with a snap cap (always use a dummy round if you’re cleaning a rimfire to avoid damaging the firing pin).
- Switch the safety off and on a few times.
- Test the magazine release, etc.
- Lastly, apply a light coat of oil to all of the external metal with a patch or other lint-free cloth.
Keep It Lubricated
Technically, both gun oil and gun grease are lubricants. There’s a very fine line between too much and not enough, but none at all is just not going to be good in the long run. A properly lubed gun will continue to operate properly even if it’s dirty.
Gun grease is a bit different than oil, as it’s more like a cream than a liquid. Gun grease isn’t globbed on, it’s polished on very lightly with patches or other soft, lint-free cloth. Grease is great for parts that have a lot of high friction, like the slide, because they’re less likely to accumulate grit and debris and will last longer than gun oil. When applied, you still want to make sure you don’t have an excess layer left behind.
It’s important to ensure that your gun’s moving parts all have enough lubrication to function, but not too much to gum up. Pay particular attention to parts that need to move the most for the firearm to function properly. Anywhere that metal meets metal is where friction can occur. Your aim is to minimize this friction. Slides, actions, trigger assemblies, sears, magazine releases, safety levers/buttons, slide locks/releases, and any other moving parts. Penetrating lubricants are preferred, as they can get into the little nooks and crannies that aren’t easily accessible when your gun is field-stripped.
You’ll find a lot of different products on the market. Consider where and how you’ll be using your gun and pay attention to the specifications of the lubricant you’re purchasing. If you live or will be shooting in an area of high humidity, look for products with a high level of rust protection. There are also lubes that are specifically formulated to perform in subzero conditions, minimizing the risk of them gumming up when you’re out in harsh, freezing cold weather. Many can be used in combination with a layer of grease on parts that get a lot of wear and oil on parts that have less wear or are harder to access and couldn’t have a proper grease application as a result.
How Often Should You Clean Your Gun?
This depends entirely on how and how much you use your gun:
Any time you’ve been out shooting, like trips to the range.
If you’re doing really high-volume shooting or using inexpensive ammunition (often called “dirty ammo”), it’s nice to bring along a bore snake to run through every few hundred rounds. Bore snakes are also handy to take out in the field in case any foreign material gets into your barrel.
A carry gun should be cleaned every 2-3 weeks.
Especially the bore, hammer, and any other moving parts that will accumulate contaminants. We have salt-rich sweat and excrete natural oils that can and will be introduced to your everyday carry gun. Lint, dust, and various other exposures mean you should check it every 2-3 days for any buildup. The same goes for guns that are carried in vehicles (storing your gun around the clock in a vehicle is ill-advised in the event of a break-in or car theft). Don’t overlook this, a self-defense gun needs to work flawlessly at a moment’s notice and when you absolutely need to be able to depend on it.
After any hunting or outdoor trip, even if you didn’t fire it or notice anything getting into it.
Dust, pollen, brush, moisture, and more can all accumulate on a gun even on a short day trip.
Before storing it for what could turn out to be a longer time than you anticipate (hope for the best, plan for the worst).
Store guns barrel-down to avoid oil running down and accumulating in the gun or damaging a wood stock.
During storage, check guns every 3-6 months to look for any accumulated dust, lack of oil, beginning signs of surface rust, etc.
It’s a good practice to clean guns in long-term storage every 6 months to a year.
It’s a lot to take in, but regular cleaning and maintenance of your firearm is key to the preservation and ensuring it functions perfectly. Now that you know the steps and frequency of gun cleaning, you can feel more confident that you’re doing it right. Tell us what you think in the comments below, and share if you liked it!
Dave grew up in the southeast highlands of Idaho on the western slope of the Rocky Mountains. He was strongly influenced by his dad, a lifelong outdoorsman who brought him along on hunting trips. He began shooting .22’s at age six under close supervision. At 13 he got his first deer rifle and first mule deer in the same month. The next year he got his first shotgun and first ruffed grouse. He’s often roaming the Portneuf Range and Caribou-Targhee National Forest camping and hunting game to fill the freezer. He has a Bachelor of Science degree in Outdoor Education & Writing from Idaho State University and has had many jobs in the outdoor industry.
Latest posts by David Parris (see all)
- Do all 9mm bullets fit 9mm guns? 3 Popular 9mm Calibers - August 13, 2021
- Hot Weather Tips: 5 Easy Hacks - July 19, 2021
- The Bugout Bag and The Family Bugout Bag 101 - June 18, 2021
Related Posts
« What Makes Tactical Pants Different from Regular Pants? What to Wear on a Hunt: 4 Things to Know About Hunting Clothes »