
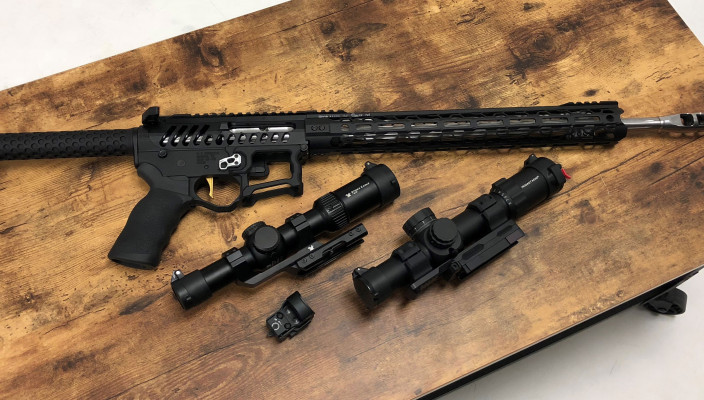
I’ve made a decision – my 2018 resolution is to improve my shooting skill set, and my method is going to be participating in local 3-Gun competitions. While practicing, drills, and techniques are an important step to achieving this goal, I also decided to build a brand new AR. While you can start shooting 3-Gun with basic gear, I’m still a competitor and wanted something that would offer an edge. Plus, building an AR is a lot of fun. After a lot of research and consulting a few of the top 3-Gunners out there, I have finally built my dream AR. It is purpose-built for competitions, with some aesthetic flair included. While there are tons of options I could have gone with, I think this build offers high value for both beginners and experienced competitors alike.
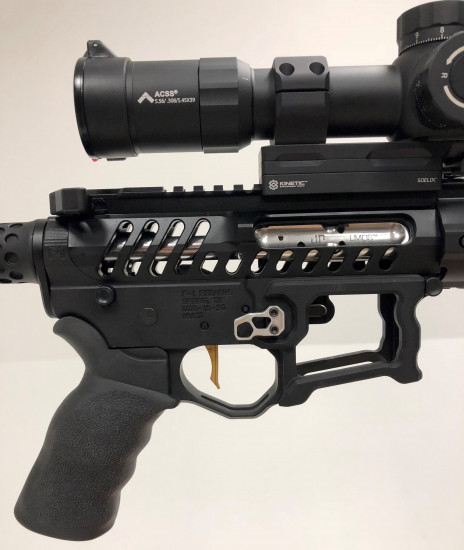
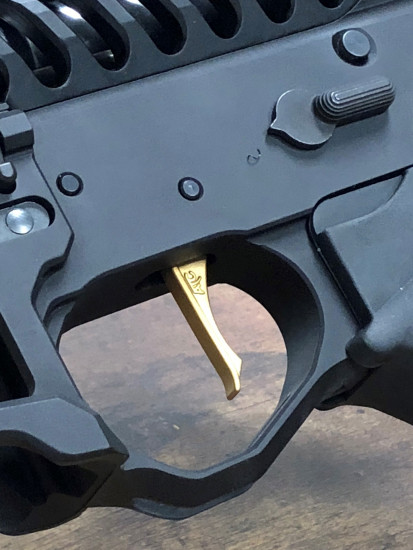
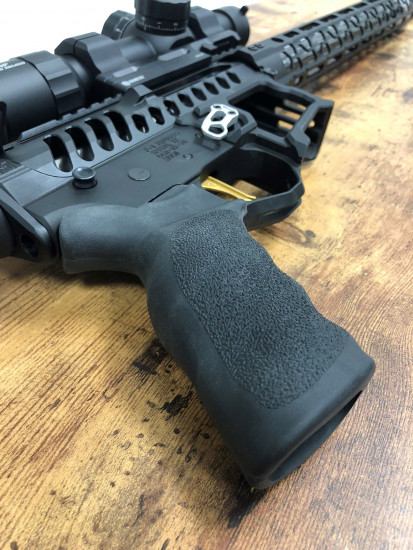
Receiver Set: I chose to go with the F-1 Firearms skeletonized lower and upper. Other than being ridiculously good looking, the weight reduction is noticeable. The set includes an oversized trigger guard, installed front and rear takedown pins, and uses screws for bolt catch, receiver tensioning, takedown pin detent and trigger adjustment. There is no ejection port cover or forward assist with this set, which I prefer for competition setups.
Lower Parts Kit: For my lower parts kit I used the CMMG kit, but noticed that I didn’t need many of the parts as they were included with the F-1 lower. I chose the ODIN Works gen 3 extended magazine release to add some color to my AR, and that also came with the mag catch attached. It is never a bad idea to have spare small parts, so I would still recommend getting a lower parts kit.
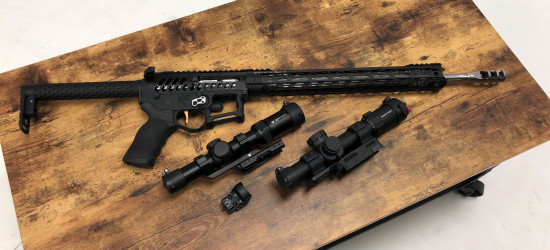
F-1 Firearms Upper / Lower and CMMG Lower Parts Kit
Trigger: The trigger is one of the first upgrades people make to factory ARs. A quality trigger can make all the difference in competitions, or even in the field. After much debate on which brand I should go with, I decided to use the American Trigger AR Gold Flat. This trigger is a drop-in assembly featuring a very crisp short reset and a 3.5lb pull. It is very reliable and is used by many top competitive shooters. Installation was very easy and it came with its own trigger pins.
American Trigger AR Gold Flat AR-15 Drop-In Trigger
Grip: After getting my hands on a few different models, my grip of choice is the Ergo Grip AR15/M15 Tactical Deluxe. I love how sticky it feels, just what I need when my palms get sweaty, and the design fits perfectly in my hands. Price-wise I think it’s a couple of bucks more expensive than the Magpul options I saw, but it felt so right that the extra cost was worth it.
Ergo Grip AR15/M16 Tactical Deluxe Rifle Grip
Buffer Tube: The buffer tube I decided to go with comes with its own buttstock. It is made by Battle Arms Development. It’s a fixed length of pull, very light and comes with a QD end plate. If you are looking for a low-weight setup with a minimalistic looks, but don’t want to compromise on style, the Battle Arms Development Rifle Length Lightweight Fixed ButtStock Combo is the setup for you. I just love the looks, and installation was both simple and quick. Because of the unique design, there is no need to use a Castle Nut when you assemble it, and the aircraft grade aluminum from which it is made makes it a very durable piece. Did I mention how lightweight it is? Only 7.5 oz., unheard of for an entire tube with a stock!
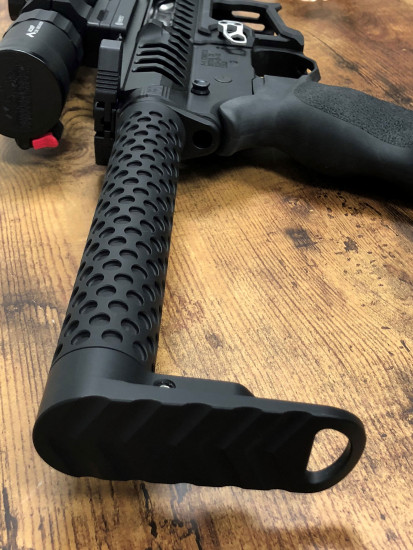
Battle Arms Development Lightweight Fixed ButtStock Combo / Qd End Plate
Barrel: For my barrel, recommendations were divided between using an 18” barrel and a 16” barrel. I ended up going with the 18” one because a couple of the pro shooters that were helping me out said they are using 18” mostly for recoil management. Liking that logic, I picked the 18” Criterion Barrels, Fluted barrel. The brand Criterion Barrels had a lot of good reviews from people who are into 3-Gun, good quality and affordable price, plus I loved the fluted silver look on my system.
Criterion Barrels AR-15 Fluted Rifle Gas System Barrel
Bolt Carrier Group: For my BCG I got the JP polished stainless LMOS carrier and the JP enhanced bolt assembly group. If you are into competitive shooting, I’m sure you are familiar with the JP Enterprises brand name. JP is a benchmark brand when it comes to competitive shooting, and their products are simply superb.
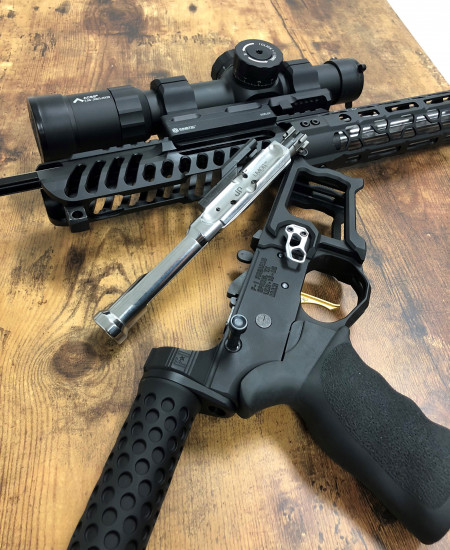
JP Enterprises Polished Stainless LMOS Carrier and Enhanced Bolt Assembly Group
Gas Block: Since I went with the LMOS BCG it was recommend I get an adjustable gas block, making the JP Enterprises .750 adjustable gas block an easy choice.
JP Enterprises .750 Adjustable Silver Gas Block
Muzzle Device: Keeping with the theme of quality, I chose the JP 3 Port Barrel Compensator for even better recoil management.
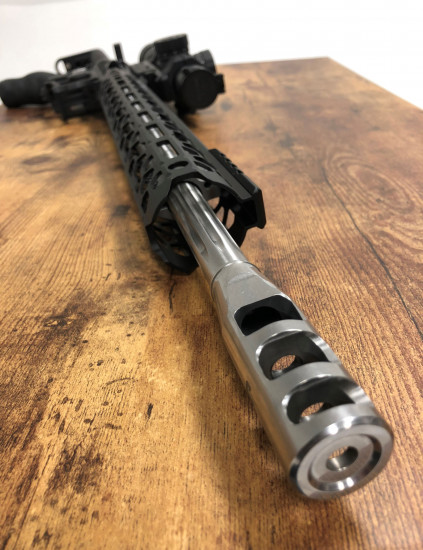
JP Enterprises 3 Port Silver Barrel Compensator .750
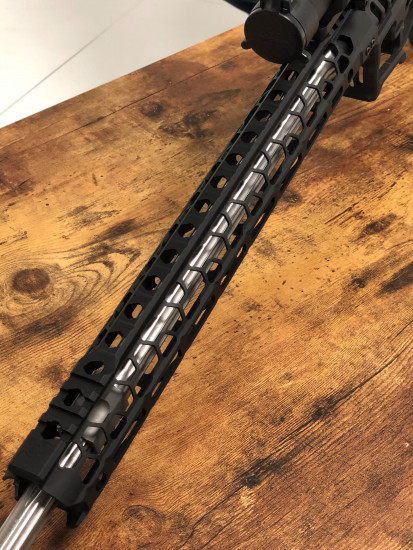
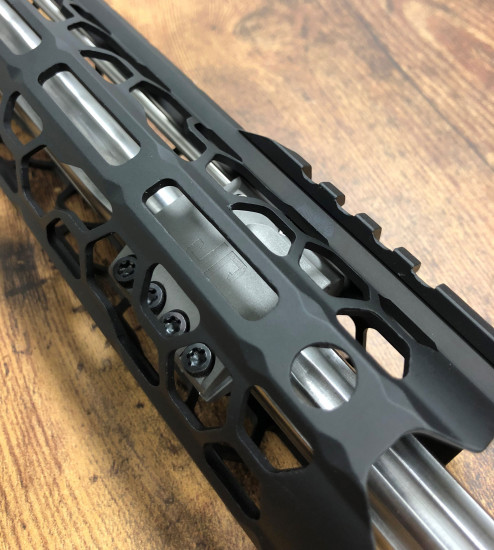
Handguard: Given that my AR was front heavy because of the barrel and muzzle, I wanted to get the lightest possible handguard. There were several options that use carbon fiber but my favorite choice ended up being the 15.5” ODIN Works O2 Lite free float forend. It is a low profile, super light (only 7oz) and durable handguard. It is very comfortable in my hand and I have to say that it looks phenomenal with my skeletonized receiver, making the BCG-Barrel-Muzzle look like the silver skeleton inside of my black AR.
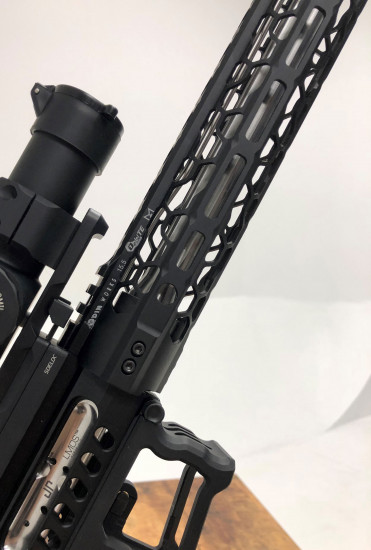
ODIN Works O2 Lite Free Float M-LOK Forend
Optic: No competition AR is going to be complete without a quality optic on top. For myself I actually picked 2 different combinations that I’m going to test out and see what works best for me. My first combination consists of a Primary Arms Platinum Series 1-8x24mm Riflescope with the unique ACSS reticle and a Kinetic Development Group SIDELOK mount. The glass on this scope is just phenomenal. The adjustable 1-8 magnification range seems to be the top choice amongst all the top 3-Gun competitors. The clarity and quality is just amazing. The 1x is a real 1x, which is not as common as one might think in the low powered variable optics world. The scope is rugged so it will be able to get some hard use and punishment from throwing the AR into the barrels as well as any other potential obstacles that might bang up the scope. Primary Arms really hit a home run with this high-end scope, as it can easily compete against scopes that cost 2-3 times more than it, giving the shooter a ton of value for its price. The scope has a 34mm tube diameter so I used the Kinetic Development Group SIDELOK Cantilever Modular Scope mount. The quick attach/detach without the use of any tools is awesome when you know that your next stage will not need or not allowed to have any optics on top of it.
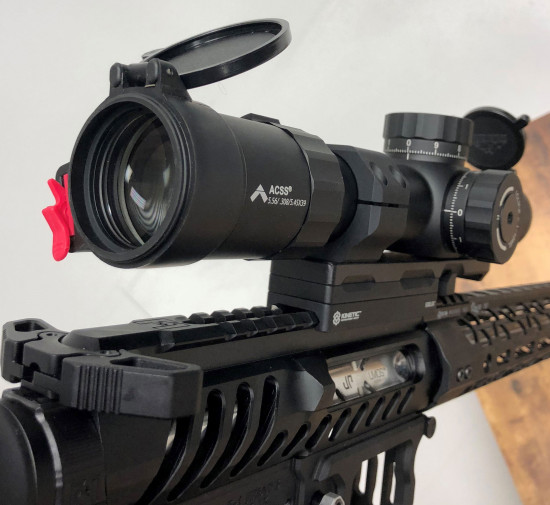
Primary Arms Platinum Series 1-8X24mm Riflescope with ACSS Reticle
My second optics combo is actually much more cost friendly, and yet offers great value, especially for beginners who don’t want to pay the high-end optics price. It is the Vortex Strike Eagle 1-8x24mm, mounted on the Vortex Cantilever ring mount for 30mm tubes. Because it has the smaller tube, I was actually able to pair it with a Vortex Razor Red Dot Reflex Sight, mounted at a 45 degree angle on the Vortex 45 degree mount. Since 3-Gun is all about speed (and accuracy) I found that by setting my strike eagle to 2-4X and using the small Red Dot Sight at 45 degree allows me to switch almost seamlessly (after lots of practice) between the various target distances while maintaining my form, flow and speed.
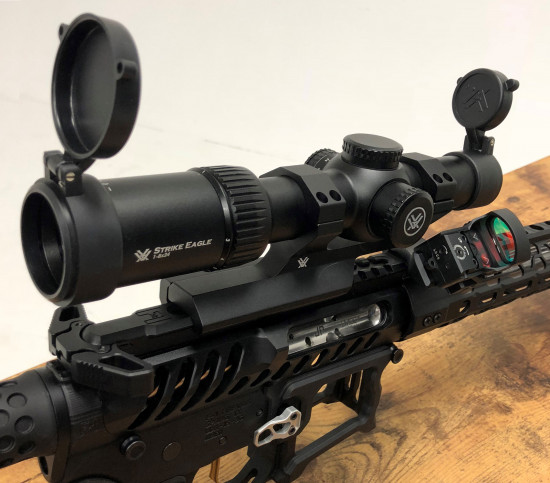
Vortex Strike Eagle 1-8x24mm Riflescope and Vortex Razor Red Dot Reflex Sight
There are benefits to using either combo 1 or 2. Price, quality, brand name, warranty, weight and so on. But like all good shooters will tell you, it’s all about practicing and pressure testing to find what works best for you.
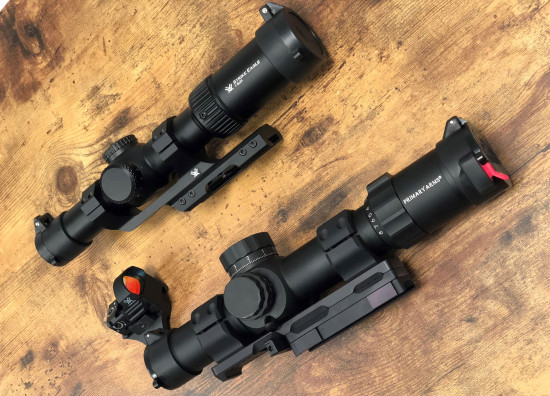
Primary Arms and Vortex Side by Side
I hope you find this article a useful in getting some ideas for your future build / upgrade. Not everyone will agree with the parts I chose but in skilled hands, I think my build can run with the best of them. Leave us a comment below to let us know what you think.
Hi, my name is Matt and I am a Gear Aficionado.I like trying out new gear whether it is a bag, a knife, an optic, or a firearm accessory. I want to know exactly what an item can and can't do or whether it's worth recommending or not. My friends may say I have a problem, but that doesn't stop them from asking for my feedback. Hopefully you do too.
Latest posts by Matt S. (see all)
- SOUSA Optics RAID Red Dot Sight - July 16, 2021
- Review: Fujinon Techno-Stabi TSX1440 Binoculars - June 21, 2021
- Review: Fujinon Hyper-Clarity Binoculars - June 21, 2021
Related Posts
« Leupold VX3i LRP 4.5-14×50 FFP Sig Bravo4 4×30 MegaView Battle Sight »